
Also known as: Mirror knitting
Context
This article is about creating new stitches with stitches moving from the right to the left needle. Undoing stitches is referred to as “tinking” (the word knit backwards) and is not covered here.
Most knitters pass stitches from the left needle to the right needle as they make new stitches. This means that when working in stockinette, the public side rows are knit as knit stitches and private side rows are knit as purl stitches.
Some patterns need only a small number of stitches to be made before the work has to be turned for the next row, such as working in short rows. Turning the knitting takes time, and it may be faster to continue with the same side of the knitting facing you. This means that you are transferring stitches from the right to the left needle, so that you need to form the stitches in a different way to “normal”. This is often called “backwards knitting” or “mirror knitting”.
How to do it
Styles of knitting
When knitting “normally”, holding the yarn in the right hand when knitting a stitch is often called “English style” and holding the yarn in the left hand is called “Continental style”. The way the yarn is passed round the needle differ in the two styles. In the English style, typically the yarn is wrapped around the receiving needle with a finger, whereas in the Continental style the typical method is swing the receiving needle to pull the yarn.
When knitting backwards, the role of the receiving needle passes to the left hand, so that the motions associated with the English style are used when the yarn is held in the left hand and those associated with the Continental style are used when the yarn is held in the right hand. In this article, I use the term “English” when the yarn is held in the same hand as the receiving needle and the term “Continental” when the yarn is held in the same hand as the receiving needle. This means that to avoid swapping the yarn from one hand to the other when you change direction, you would use one style working from right to left and the other working left to right.
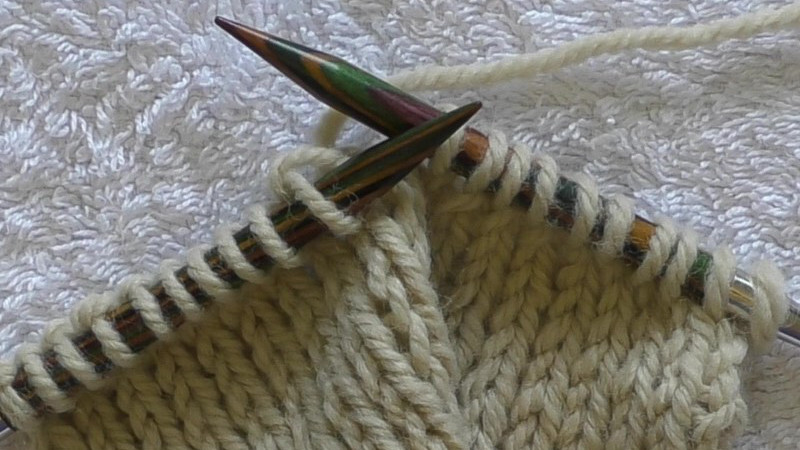
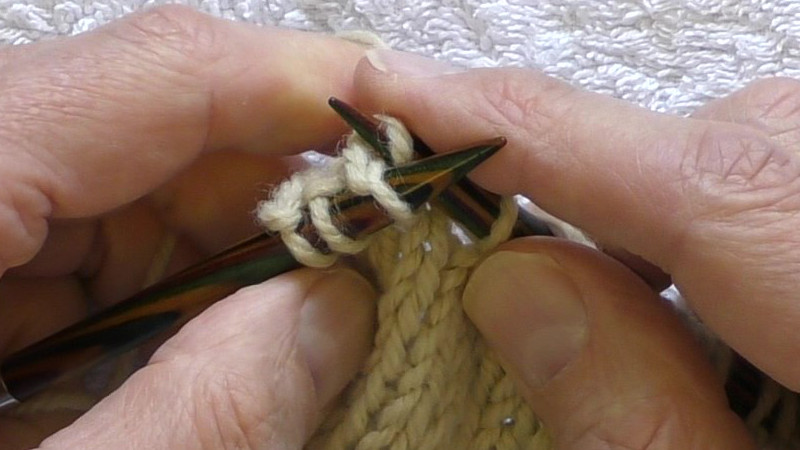
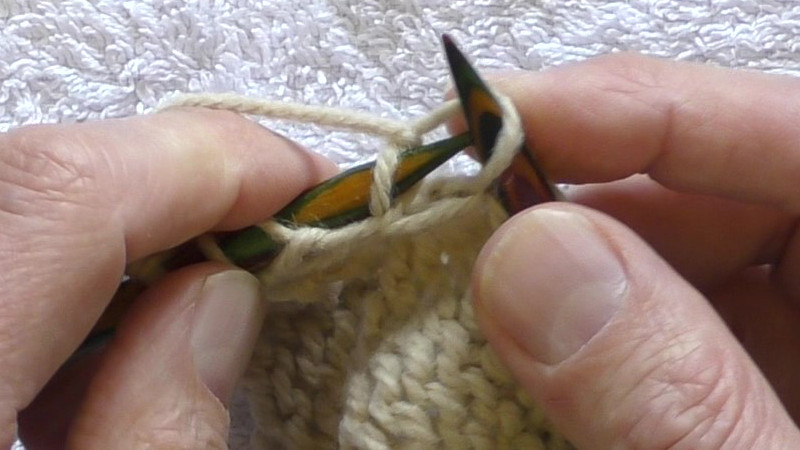
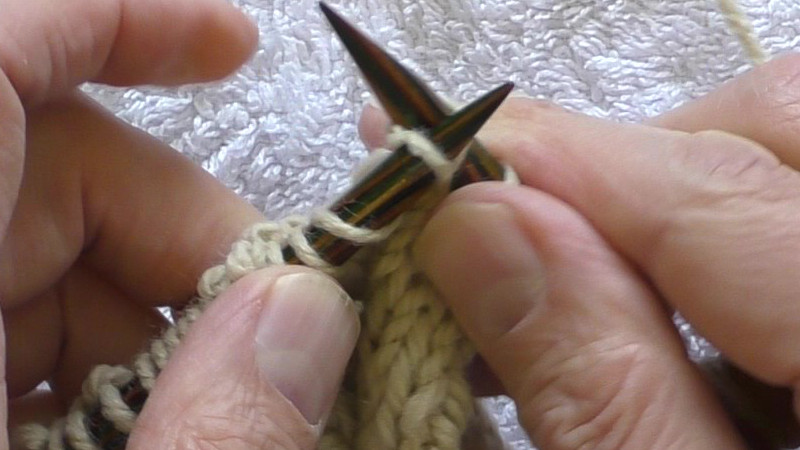
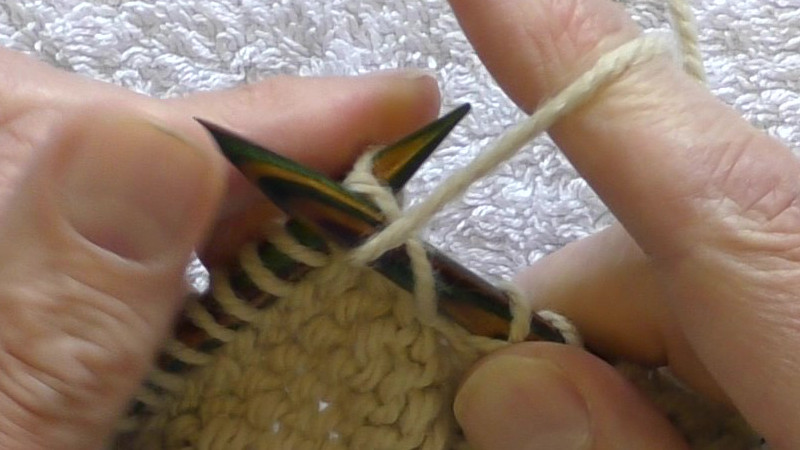
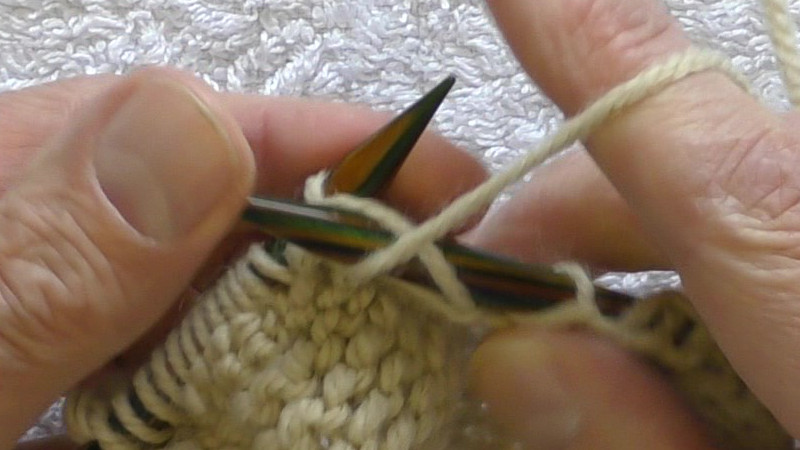
Knitting backwards – English style
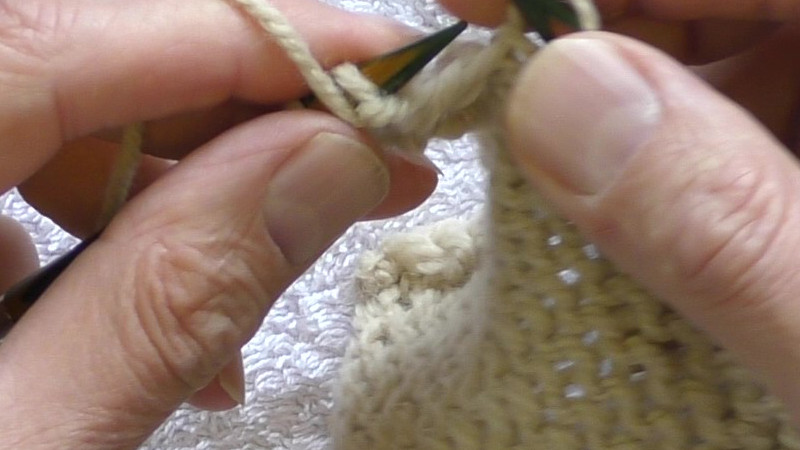
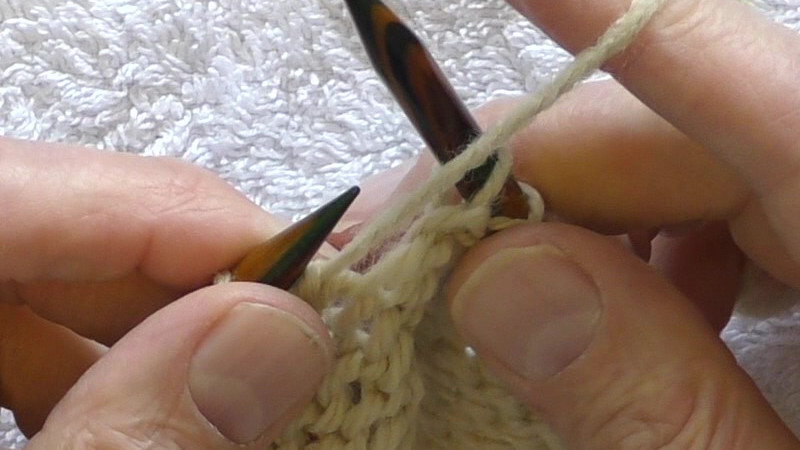
Making knit stitches
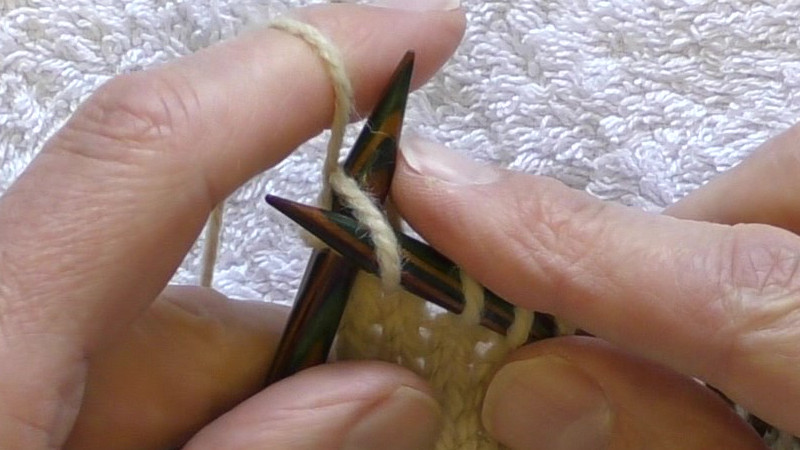
Hold the working yarn in your left hand behind the fabric.
Place the left needle through the first loop on the right needle, passing behind the right needle. The left leg of the loop should be behind the left needle.
Starting at the back. Pass the yarn to the left of the left needle, then around the front to return to the back on the right hand side of the needle.
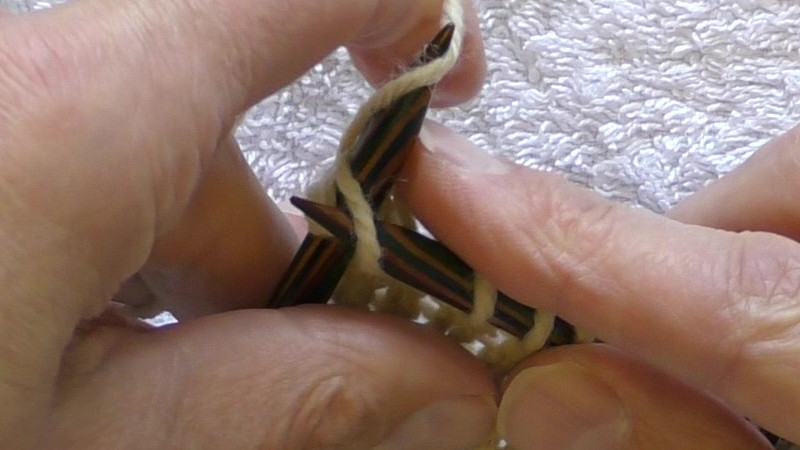
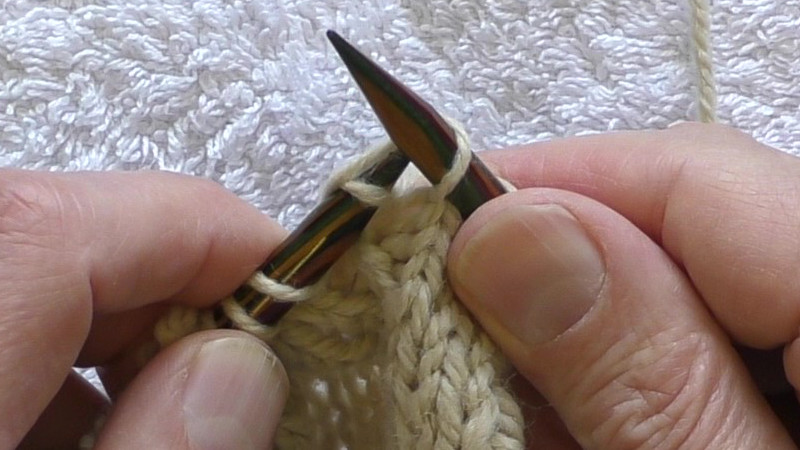
Using the left hand needle, pull the working yarn through the loop on the right hand needle.
Continue to move the new stitch down the body of the left hand needle past the tapered tip.
Remove the right hand needle from the old stitch.
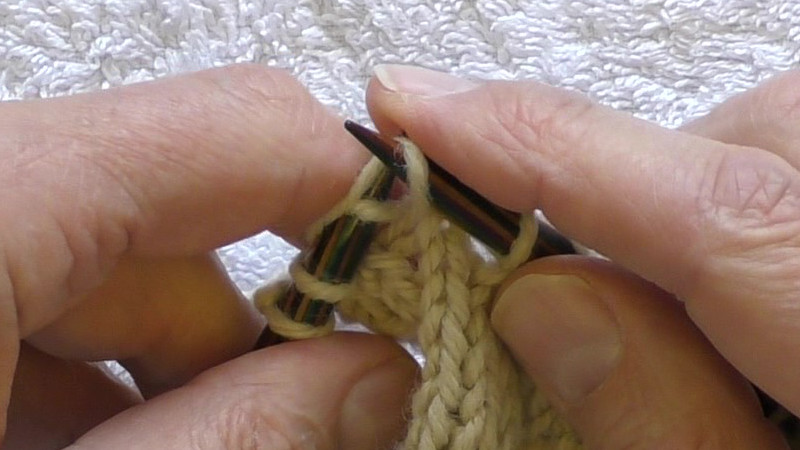
Continue to the next stitch.
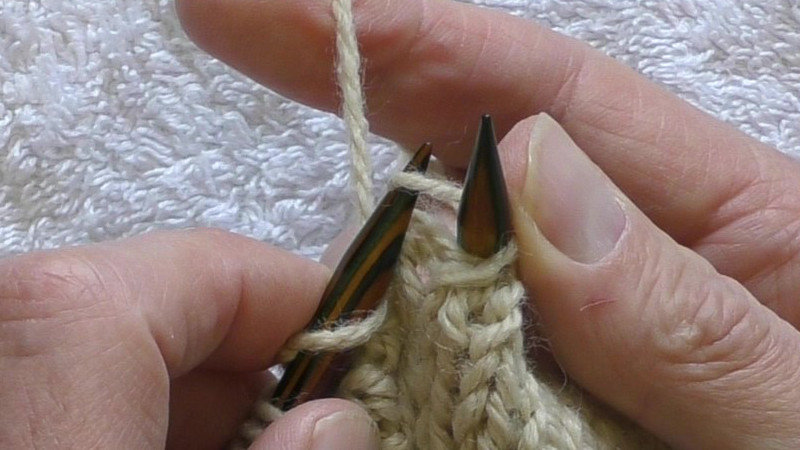
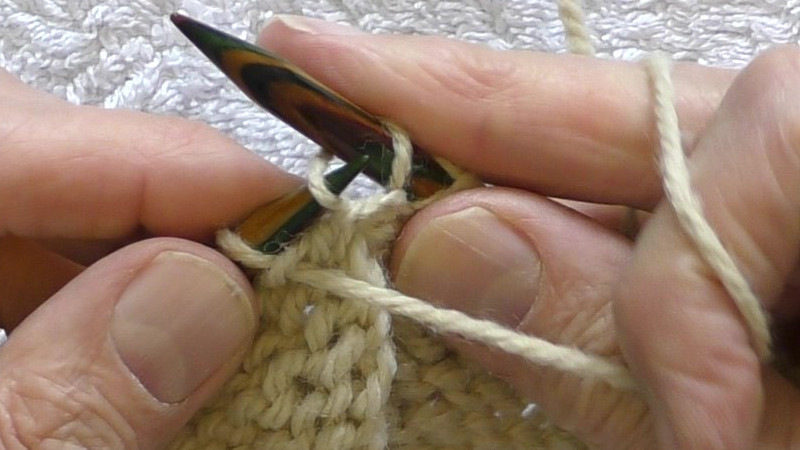
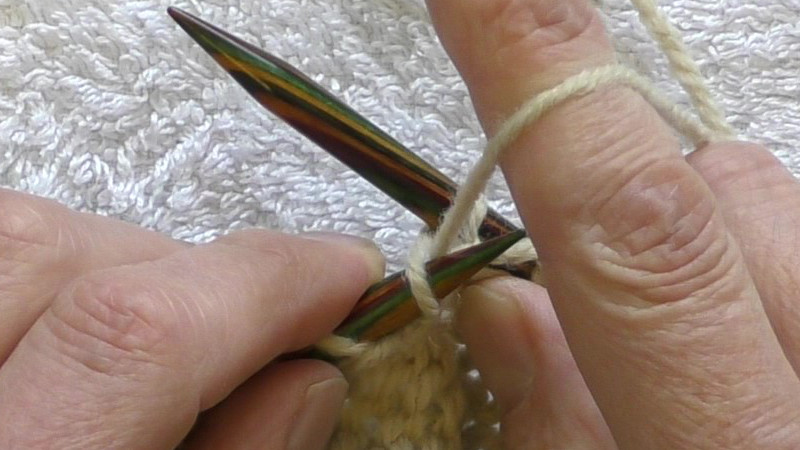
Making purl stitches
Hold the yarn in your left hand with the yarn in front of the fabric.
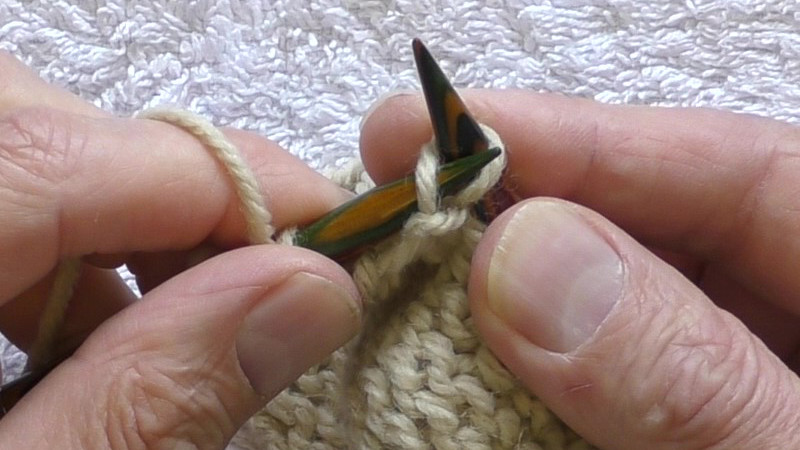
Insert the left needle into the first stitch on the right needle. The left needle goes from back right to front left. The left (back) leg of the stitch from the right needle is in front of the left hand needle, and the right (front) leg of the stitch is behind the left needle.
Turn the left needle so that it points towards your right.
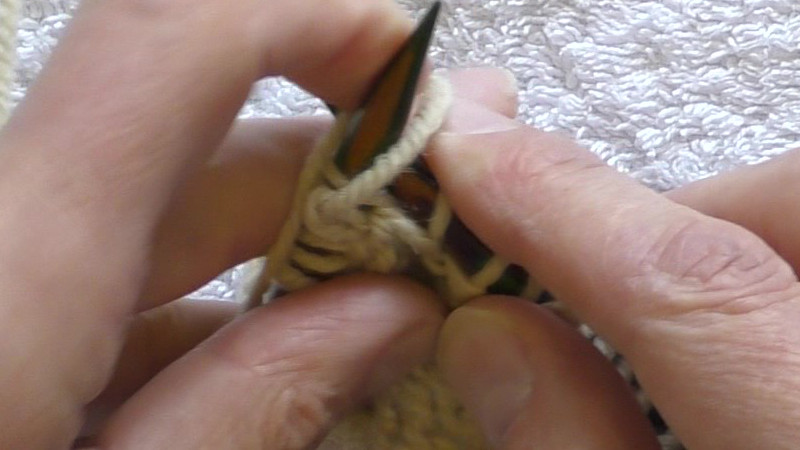
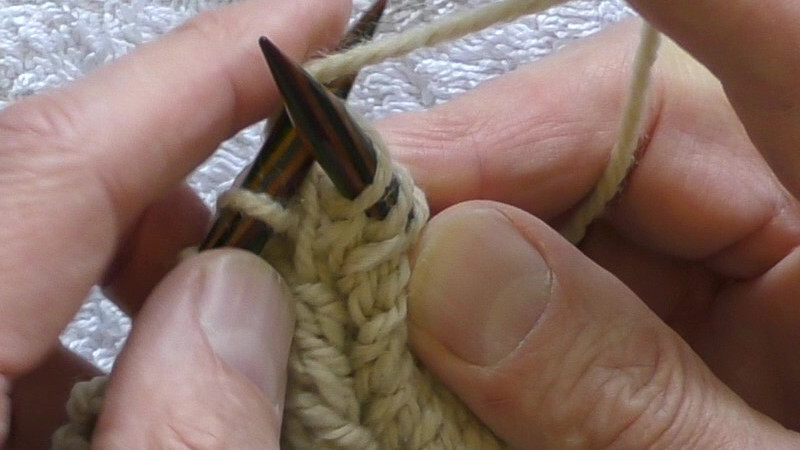
Wrap the working yarn around the left hand needle, passing the yarn from left to right under the needle and then taking it behind the needle.
Swing the left hand needle away from you so that it draws a loop of the working yarn through the stitch on the right hand needle.
Continue until the new stitch is on the left hand needle.
Remove the right hand needle from the old stitch.
Knitting backwards – Continental style
Making knit stitches
Hold the yarn in your right hand.
Push the left hand needle through the first stitch on the right hand needle. The tip should pass in front of the back leg and behind the right needle.
The yarn of the old stitch should pass behind and to the left of the left hand needle, cross the front and then cross the top of the right hand needle.
Hold the working yarn on the index finger of your right hand above and slightly to the right of the needle tips,
Swing the tip of the left hand needle backwards to pick up a loop of working yarn and then bring it up and then forwards and downwards with the yarn passing from behind the left hand needle, across its front, and then passing back to the finger on the right.
Continue the forward motion of the left hand needle to pull the loop of working yarn through the stitch on the right hand needle.
Continue to bring the left hand needle forward and then push the new stitch onto the body of the needle.
Remove the right hand needle from the old stitch.
Making purl stitches
Hold the yarn to the front of the fabric, passing across the front of the right hand index finger before being tensioned by the right hand.
Place the tip for the left hand needle through the centre of the stitch on the right hand needle, passing behind the back (left) leg of that stitch.
Continue to move the left hand needle so the tip lies in front of the right hand needle.
Swing the left hand needle forward, passing on top of the working yarn. Continue the swinging motion so that the tip moves back and up to catch a loop of the working yarn.
Pull the loop of yarn through the stitch on the right hand needle. Continue until the left hand needle with the loop lies behind the fabric.
Push the new stitch onto the shaft of the left hand needle.
Remove the right hand needle from the old stitch.
Increasing, decreasing and more complicated stitches
When knitting backwards you need to be aware that you are knitting in the opposite direction. This means that to achieve the same result you will need to make stitches in a different way. This article does not go into detail but as an illustration the standard left- and right- leading decreases are discussed here.
K2tog – knit two together – will be formed by placing the needle into the second stitch from the tip of the needle and passing it through both that and the stitch nearer the tip. This will result in a left leaning stitch (when knitting “normally” you would use a ssk to do this).
ssk (skpsso) – slip, slip, knit (slip, knit, pass slipped stitch over) – will be formed by slipping the first stitch on the right needle knitwise (with the right hand leg to the front of the receiving needle) and then doing the same with the second stitch and finally placing the right hand needle parallel to the left hand needle through both stitches and wrapping the yarn around the left hand needle. This makes a right leaning stitch.
Interpreting patterns when knitting backwards
Following a pattern when you are knitting backwards means that you have to make adjustments to instructions that use “left” or “right”.
In this article I use the terms:
- receiving needle: the needle onto which you transfer stitches when they have been made (in conventional knitting this is the needle on your right; when knitting backwards it is on your left).
- holding needle: the needle with unworked stitched (in conventional knitting this is the needle on our left; when knitting backwards it is on your right).
Key adjustments to your pattern for knitting backwards
When knitting backwards, you have a basic choice to make. Knit in the same direction as the pattern to create a mirror image of the finished object Or to knit in the opposite direction and create a finished object the same as in the pattern.
Adjustments independent of the order of knitting
Left-hand and right-hand sides
A further layer of complication arises when the pattern tells you how to make a stitch based on “left” or “right”.
Read references to “left needle” as “receiving needle”. Similarly, read those to “right needle” as “holding needle”.
Your pattern may refer to the individual legs of a stitch or to a running thread between stitches.
Stitches on the holding needle. The “right-hand” leg (or running thread), read the leg (or thread) is that nearest the tip of your holding needle. In the same way, the “left-hand” leg (or thread), is that furthest from the tip of the holding needle.
Stitches on the receiving needle. The “left-hand” leg (or running thread) is the leg (or thread) that is nearest the tip of the receiving needle. Similarly, the “right-hand” leg (or thread) is that furthest from the tip of the receiving needle.
Working in the same direction as the pattern
Some people who knit backwards read the pattern as written. For a text pattern, this means reading written instructions from left to right. When reading a chart, follow the order stated in the pattern (usually starting at the bottom right). The end result is the mirror image of that intended by the designer.
You are working in the opposite direction to the designer. This means that what the designer called “left” or “right” may be different for you . However, matters are complicated by “two wrongs make a right”.
Left- and right- leaning
If your pattern asks for a right-leaning decrease, following the instructions for the abbreviation will give you a stitch that actually leans to the left. For example, a k2tog is right-leaning for conventional knitting and left-leaning for knitting backwards. You are making a mirror image of the finished object, so this is exactly what you want. Similarly for left-leaning and increases.
Your pattern may leave it up to you to choose how to make the stitch. In that case, choose a knitting backwards stitch that leans in the opposite direction to the one stated. See the table below for the direction of lean for knitting backwards stitches.
Finally – remember that you are making the mirror image of the object the designer intended. What the pattern describes as the left-hand side of a cardigan will actually be on the right, and so forth.
Working in the opposite direction to the pattern
To create a finished object that is the same as in the pattern, when knitting backwards you need to “work the pattern backwards”. For a text pattern, this means reading written instructions from right to left. When reading a chart, work the rows in the opposite direction to that stated. Most often that means starting at the bottom left, working the first row to towards the right. If you are working flat (to-and-fro), start the next row from the right and work to the left. When working in the round, start the next round on the left and work to the right.
Left- and right- leaning
If your pattern asks for a right-leaning decrease (increase), work the instructions for the abbreviation corresponding to a right-leaning decrease (increase). For example, where the pattern calls for a k2tog work the instructions for a ssk. This is because the movements for a right-leaning stitch when knitting backwards are those for a left-leaning stitch in conventional knitting. Your pattern may leave it up to you to choose how to make the stitch. In that case, choose a knitting backwards stitch that leans in that direction.
| Leaning to | Conventional stitch | Knitting backwards stitch |
| Right | k2tog | ssk (skp) |
| Right | k3tog | sssk (s2kp) |
| Left | ssk (skp) | k2tog |
| Left | sssk (s2kp) | ktog |
| Right | m1r | m1r |
| Left | m1l | m1l |
Helpful links
You might like to view the video tutorial: Knitting Backwards (T202002).