
Also known as: Stretchy cast-on for 2×2 rib
Context
A tubular cast-on creates an edge across which a rib pattern appears from the public side to the private side. The original tubular cast on was designed for 1×1 rib. Later a 2×2 rib version was developed (see this Very Pink Knits tutorial for how this cast-one is made). Although this flows smoothly across the edge, it is not very stretchy because the stitches have already been stretched across each other in pairs.
“Being Knitterly” has a different technique that creates an edge that is slightly less “perfect” than the original version – see the tutorial on the Being Knitterly website.
Teabreakknitter “unvented” a different approach to making a 2×2 tubular cast-on, based on the observation that a 1×1 tubular cast-on is built from a stocking stitch set-up, and that using the same approach based on a 1×1 rib set-up would result in 2×2 rib. This method is described here. The result is stretchy, and has a similar appearance to the method described by “Being Knitterly”.
How to do it
These instructions are for creating a complete sequence of 2×2 rib (that is [k2,p2] repeated from the start to the end of the row (or round). The instructions are given for working flat, with an annotation at the end of each step for adjustments that need to be made when working in the round.
The illustrations below are for working flat to create a 20 stitch 2×2 rib. The instructions assume that you are working rib that starts with a knit stitch on the public side. If your first stitch is to be purl, purl where the instructions say knit and vice versa.
When you are working flat, the first and last stitches of a row are likely to be selvedge stitches, so the k2tog and p2tog will not be visible in the finished item.
Work a provisional cast-on

Use your favourite provisional cast-on.
If you are working flat, cast on one more than half the number of stitches you will need for the rib (for example if your rib needs 12 stitches, cast on 7).
If you are working in the round, cast on half the number of stitches you will need for your rib.
Set-up rows
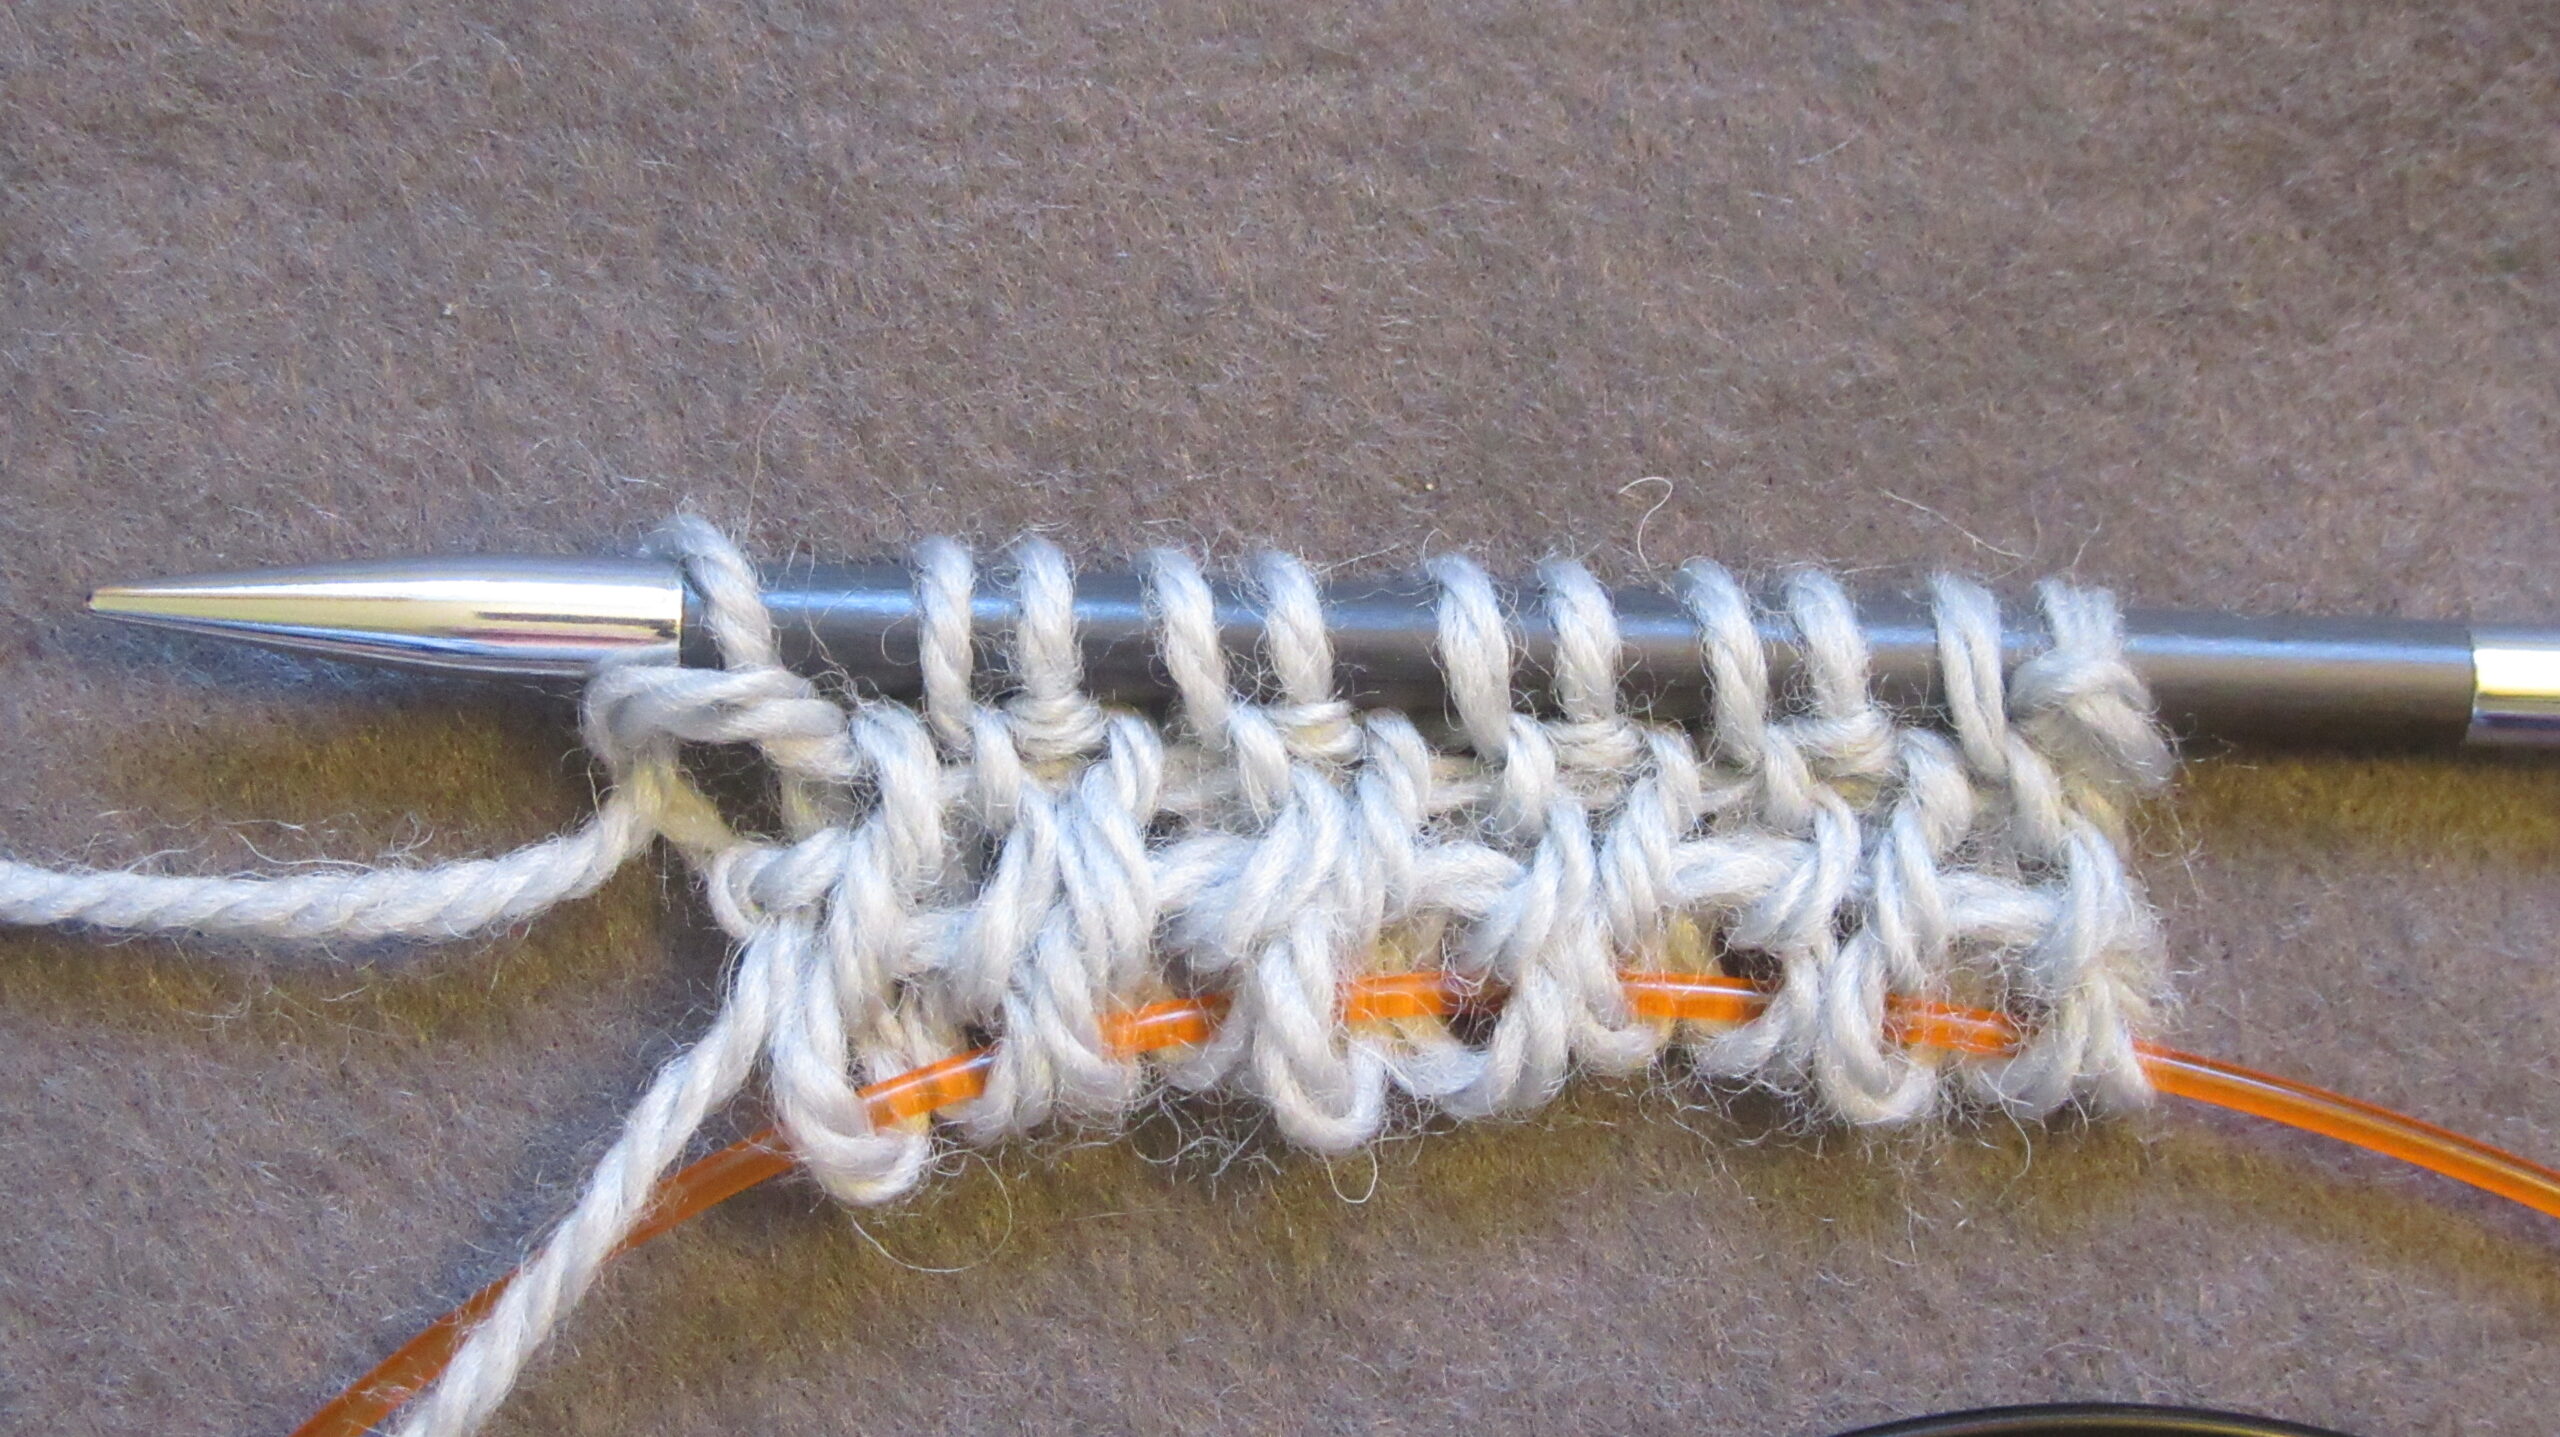
Working flat, work three rows in k1, p1 rib.
(This step is worked flat even if you will work your 2×2 rib in the round.)
Note: the cast-on used in the photograph is a Basic Stranded Cast-on
Convert to 2x rib
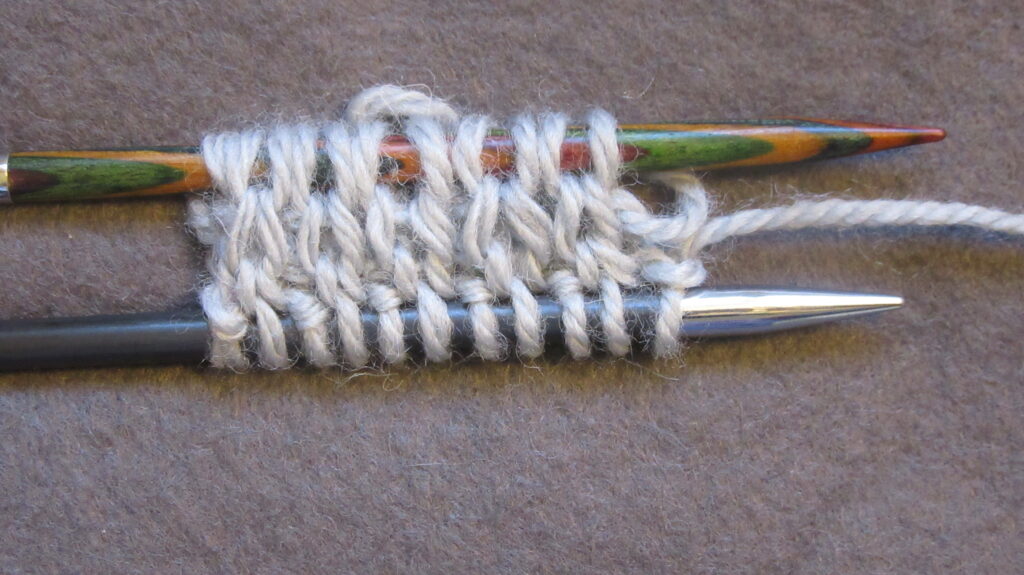
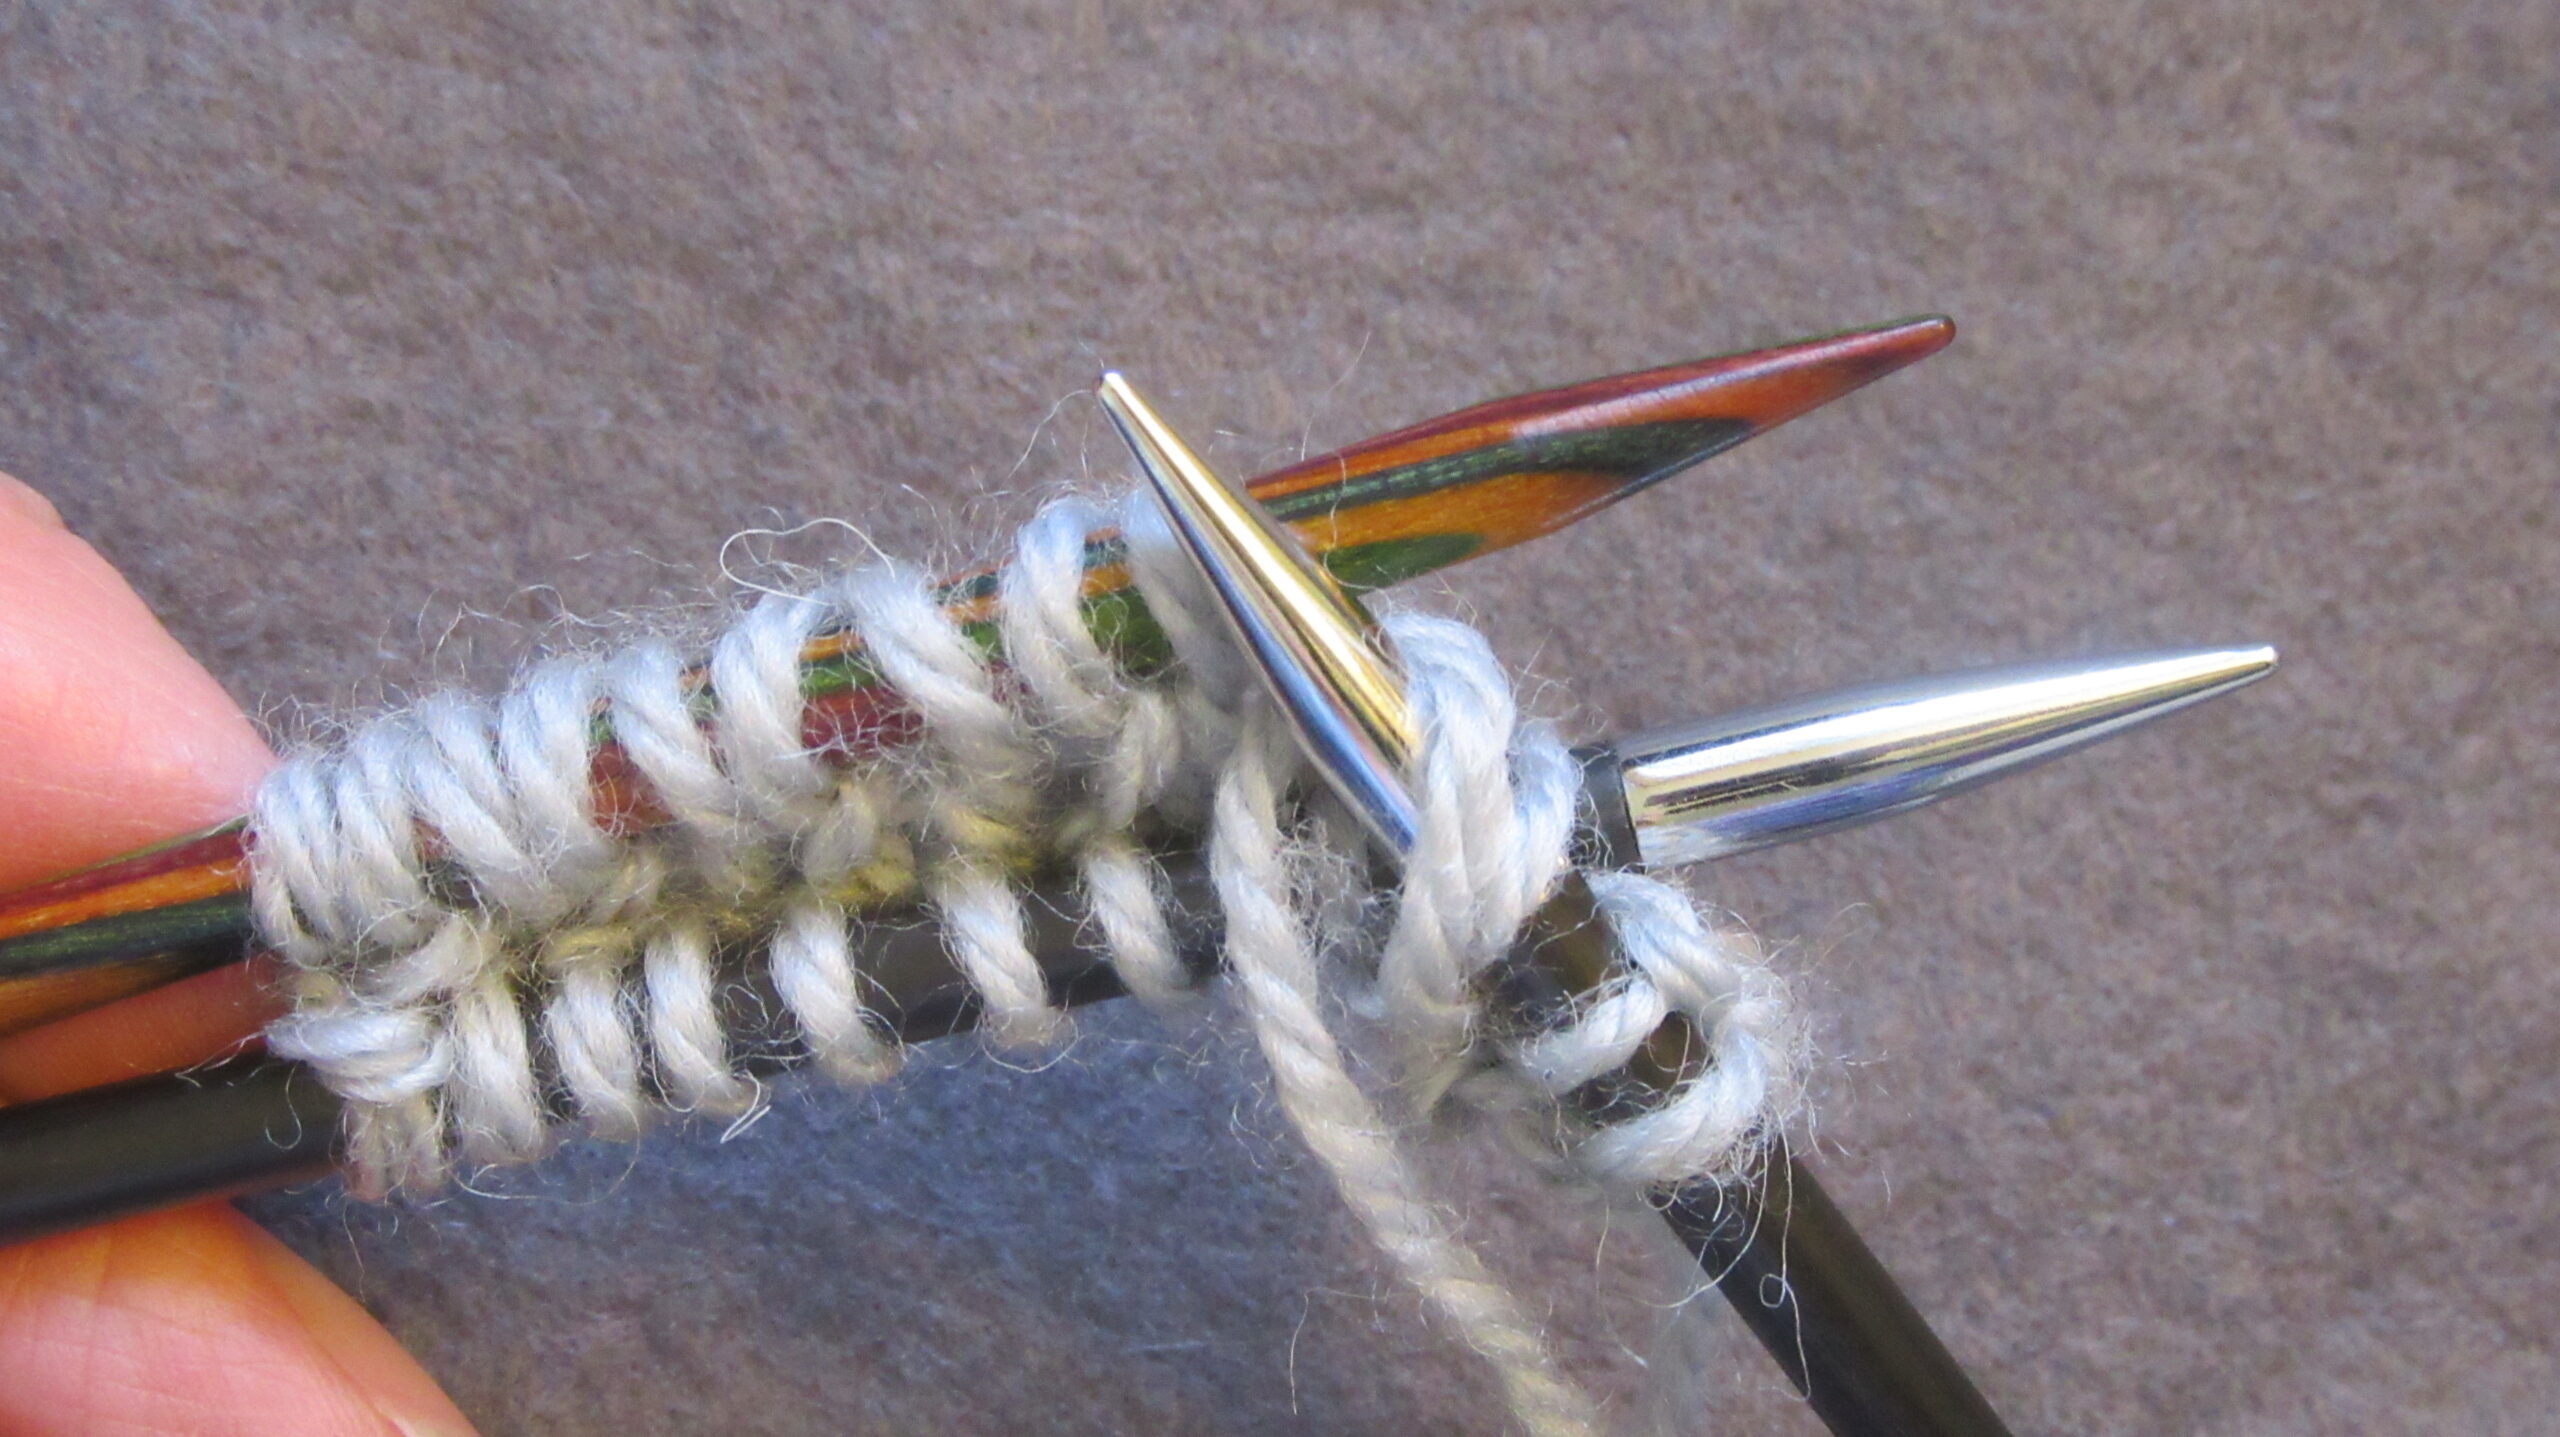
Transfer the provisional cast-on loops to a needle. Hold the working needle (black) to the front and the cast-on edge needle to the back (multi-coloured).
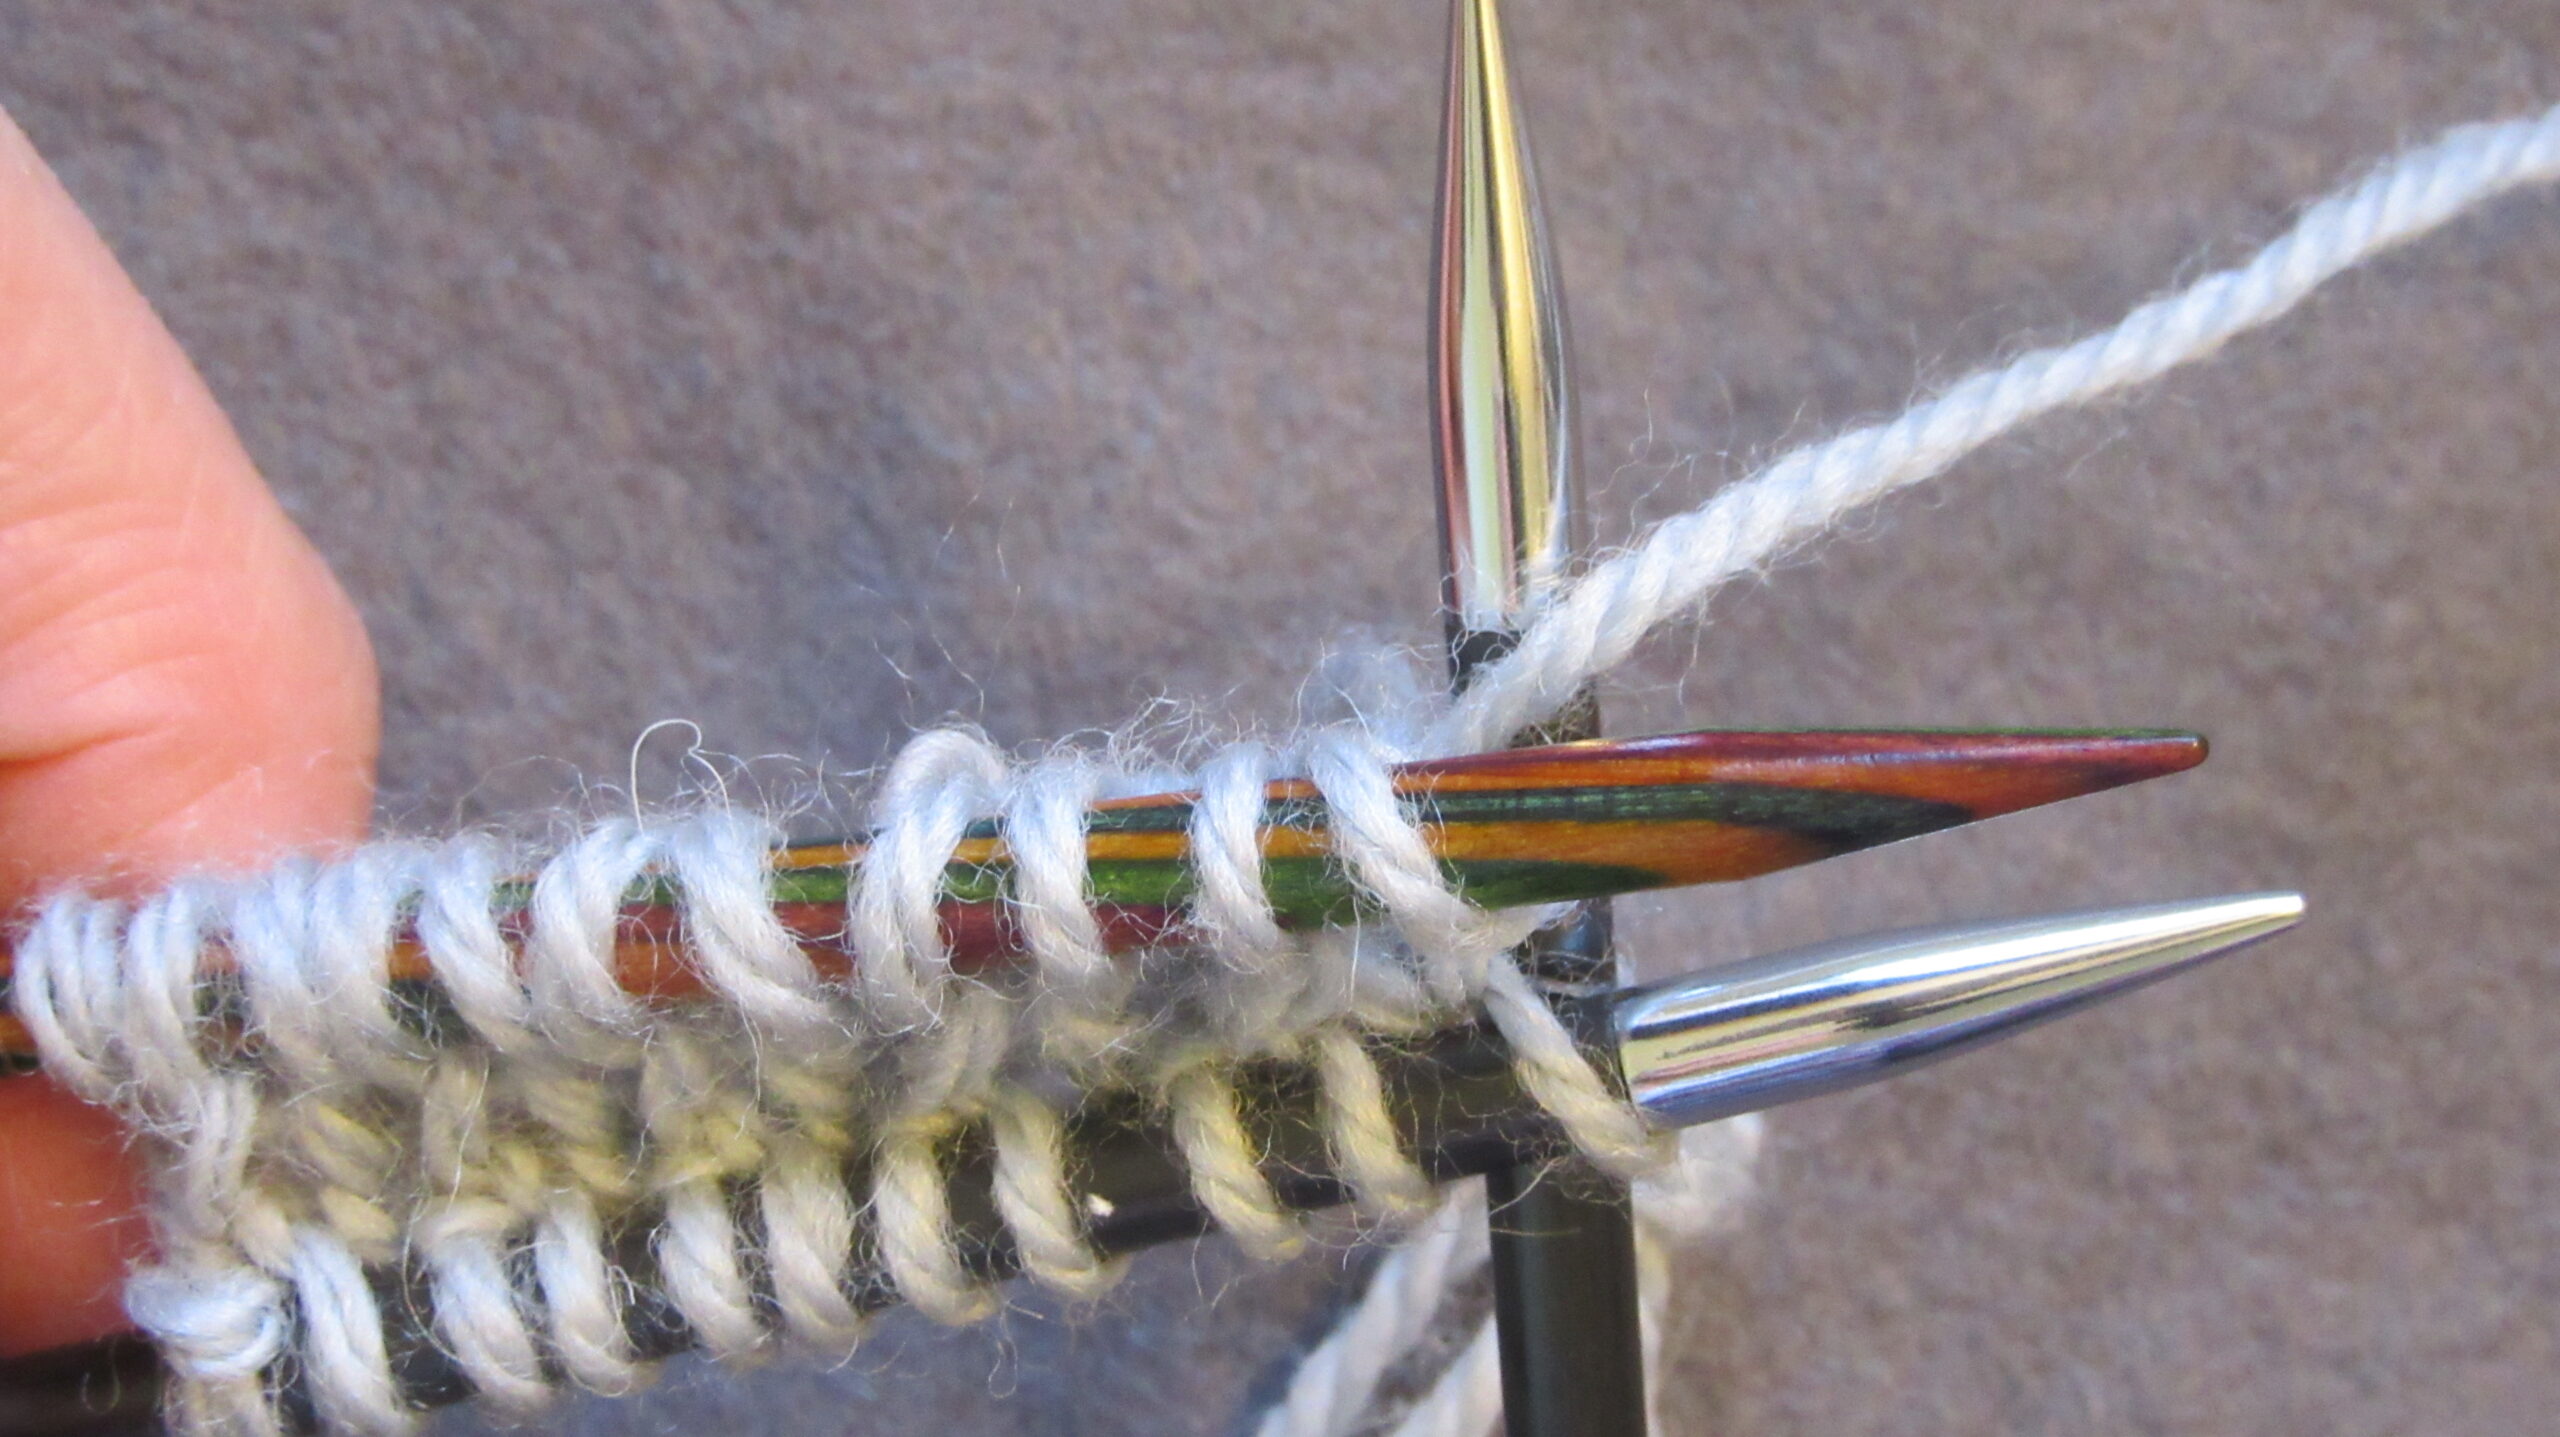
Knit the first stitch on the front needle and the first stitch on the back needle together (to form one stitch on the receiving needle).
If you are working in the round, slip the first stitch from the back needle onto the receiving needle and knit the first stitch on the front needle.
Knit the next stitch from the back needle.
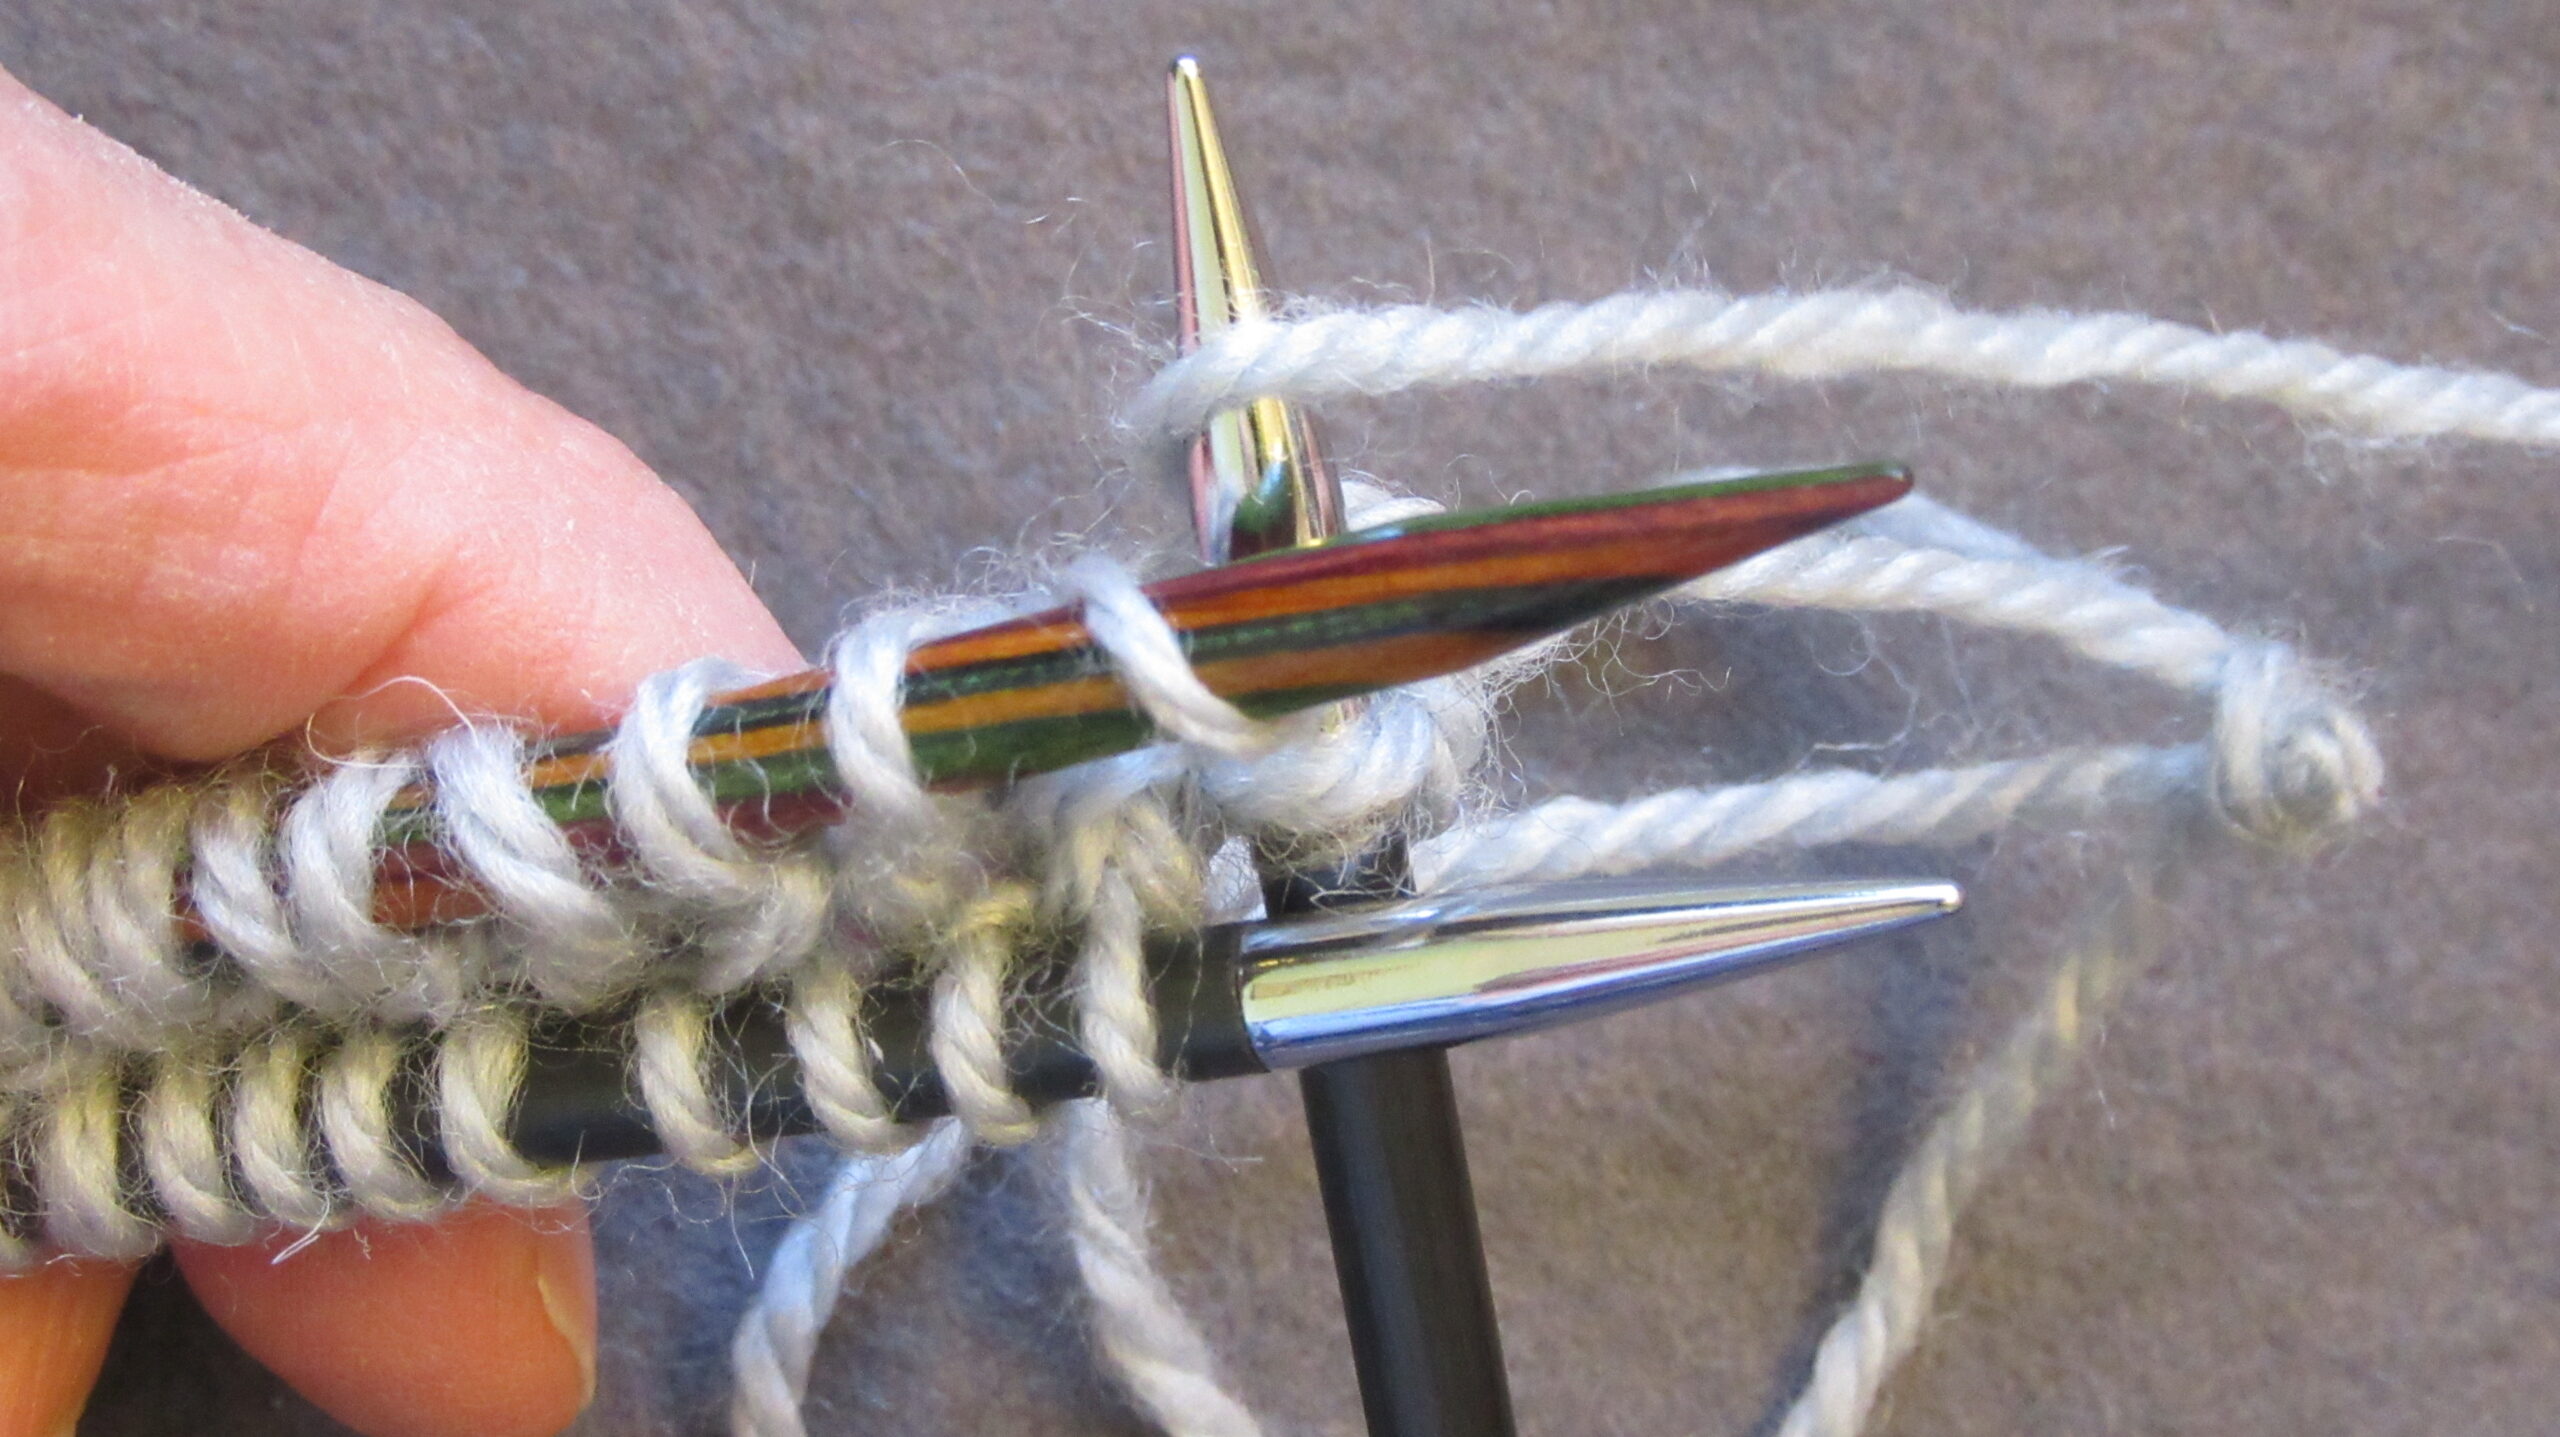
Purl the next stitch from the front needle.

Purl the next stitch from the front needle.

Continue:
- k1 from front
- k1 from back
- p1 from front
- p1 from back
until you have one stitch left on both needles.
When you will be working flat, purl these together.
If you are going to be knitting in the round, knit the stitch on the back needle. Purl the stitch on the front needle. Join in the round by purling the stitch you originally slipped.
Continue to work 2×2 rib as required.
What it looks like

From the public side, one column of knit and one column of purl appear to flow smoothly across the edge.
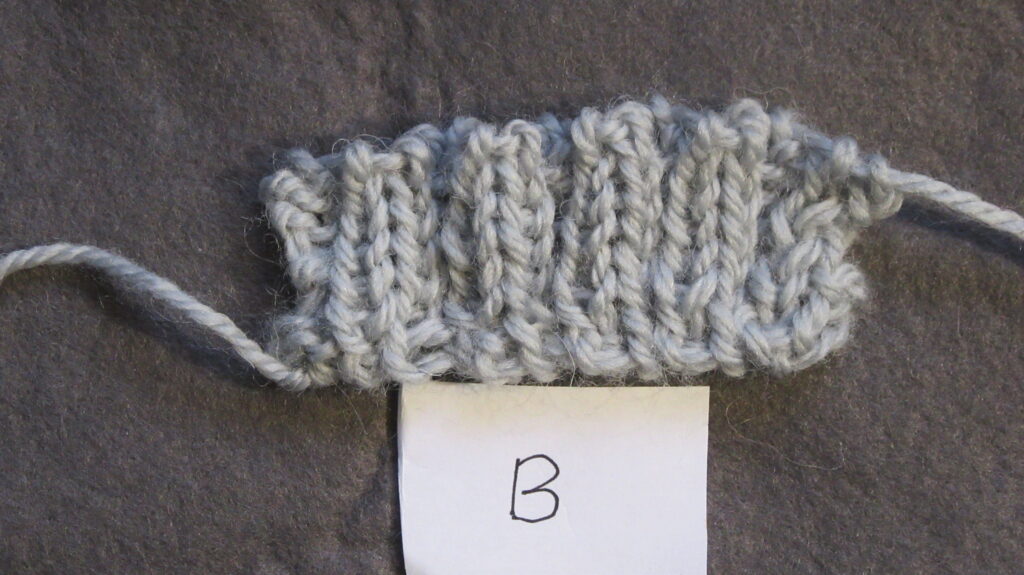
The private side looks like the public side.
How stretchy is it?
Piece when relaxed
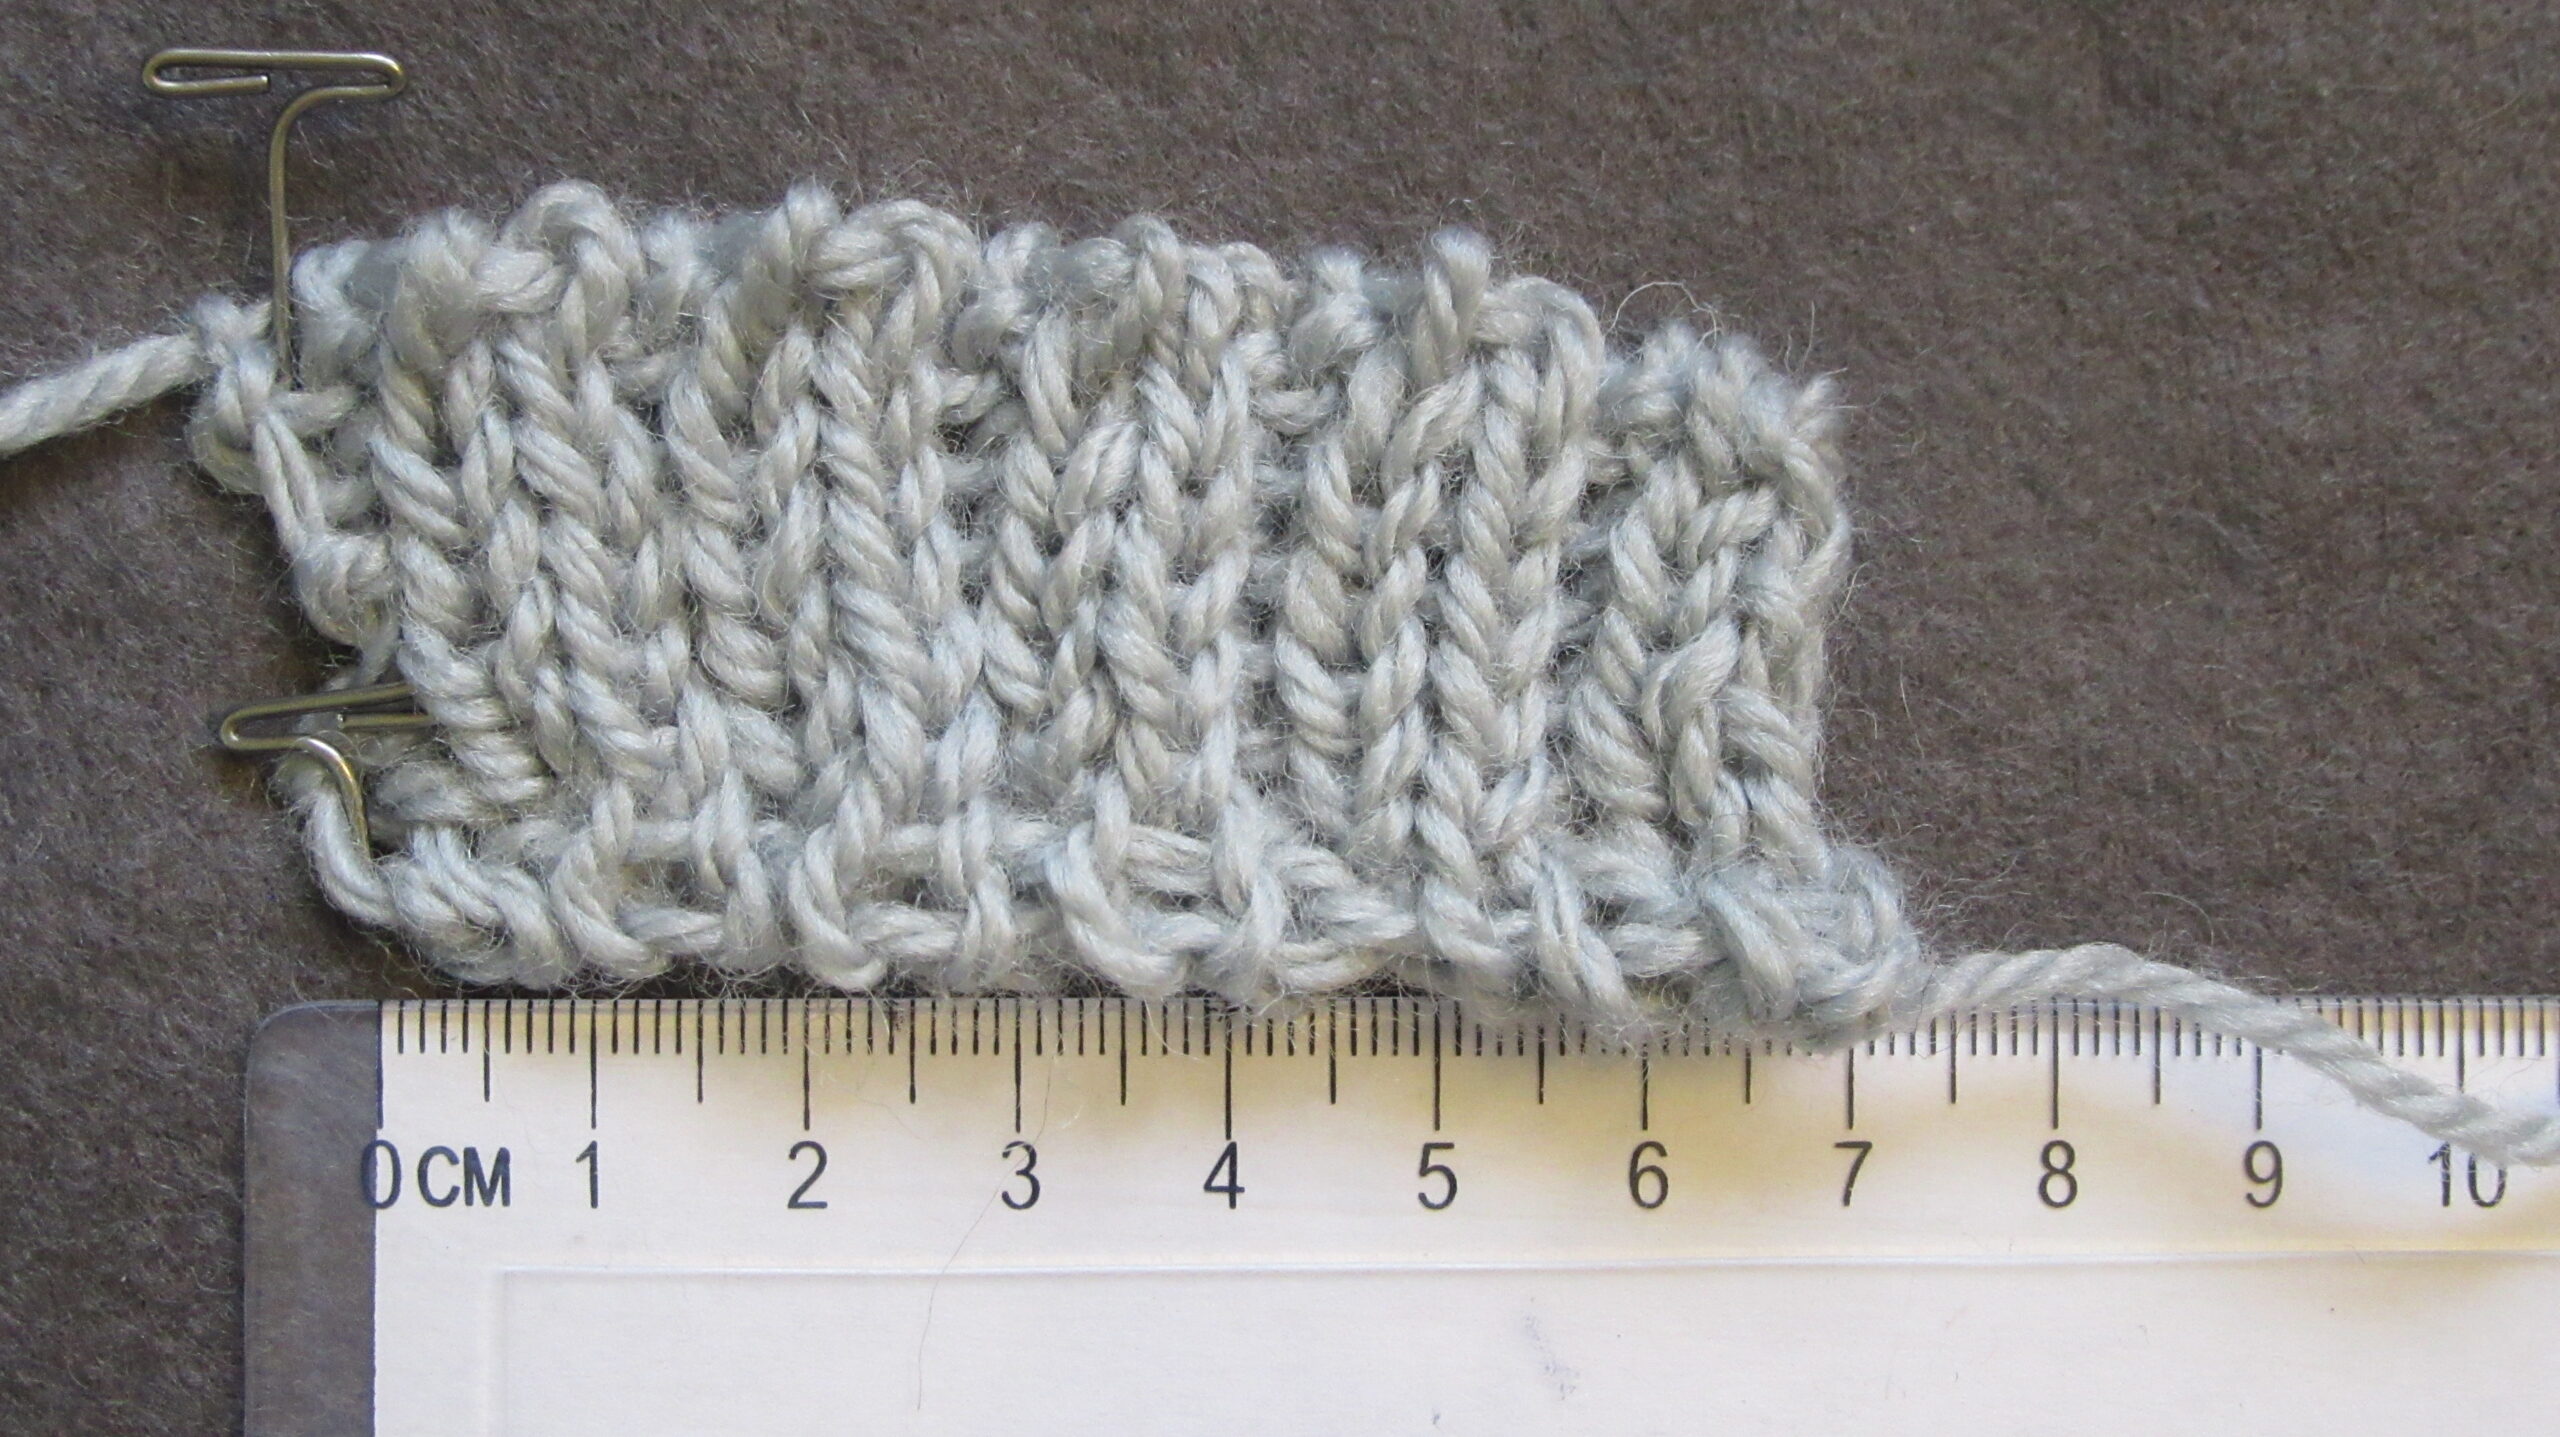
When relaxed, the swatch used in this tutorial measured 7 cm across.
Piece when stretched
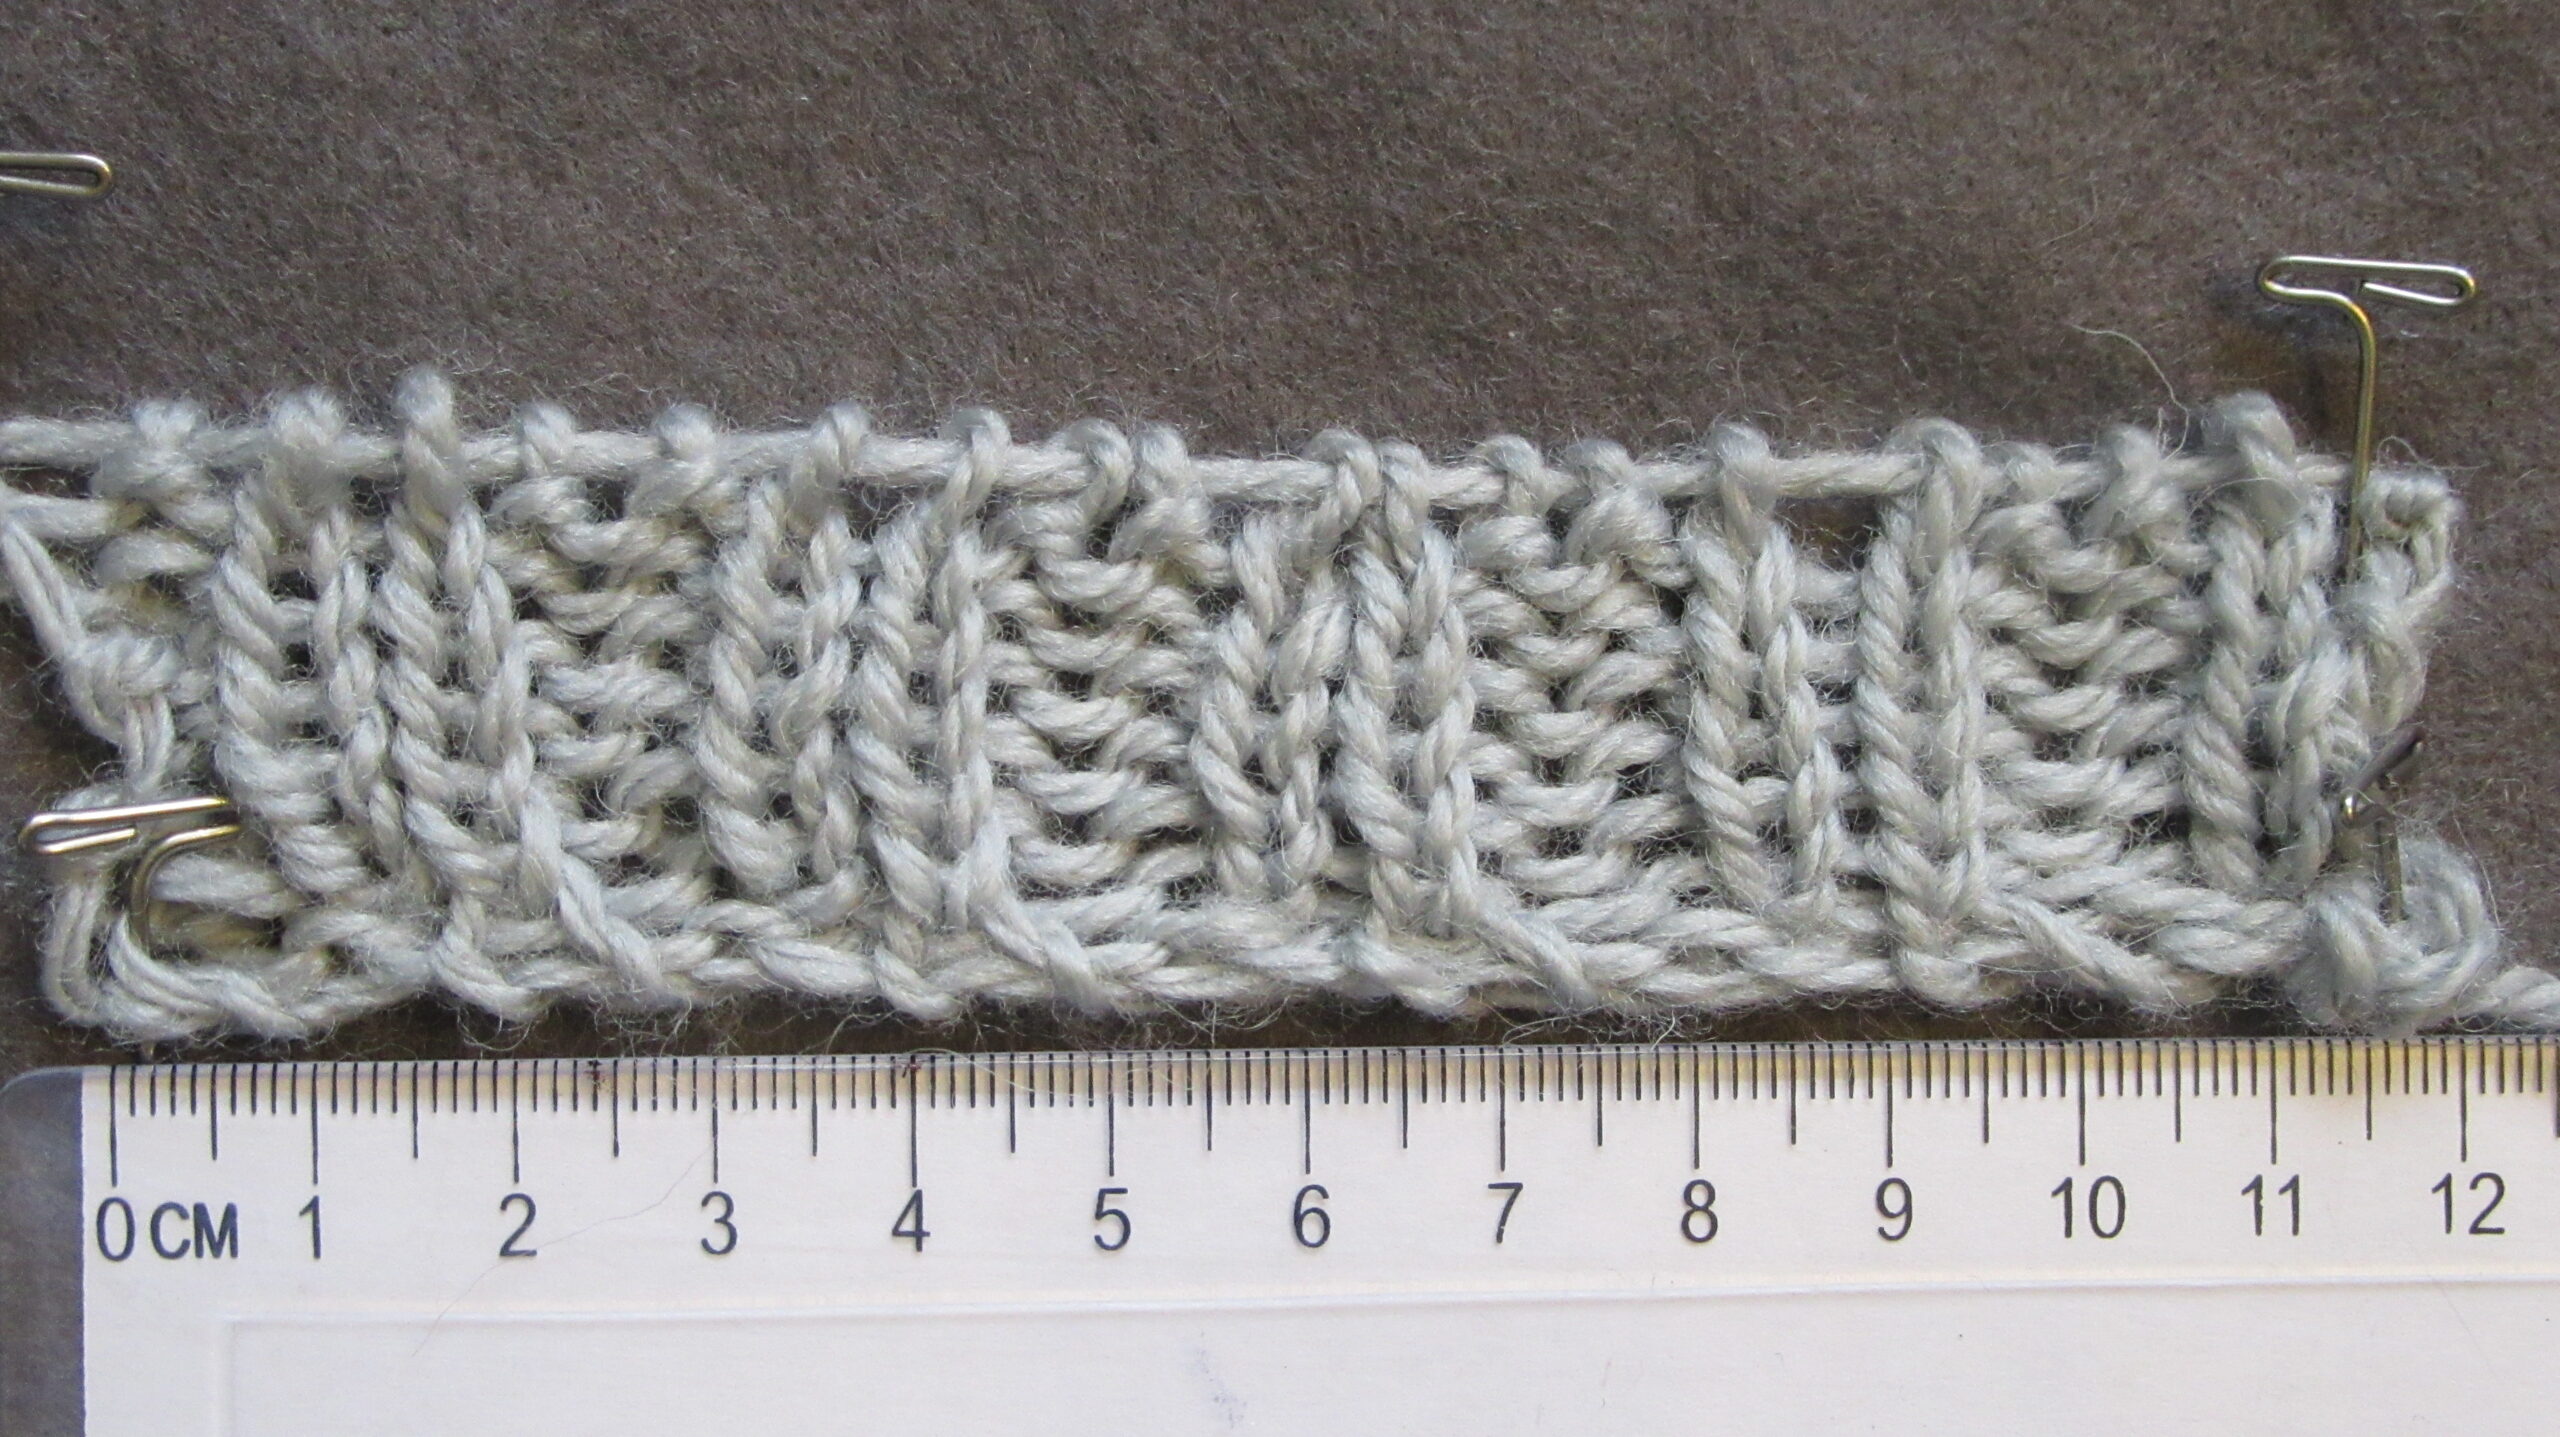
It was possible to stretch the swatch to 11.5 cm.