
Also known as: German twisted cast-on, Old Norwegian cast-on
Context
A member of the compound half-hitch (long-tail) cast-on family, this cast-on grips the cast-on stitches at their base, making an edge that is more interesting and slightly more stable than a plain half-hitch edge. I first came across it in a pattern that used vertical stripe ribbing, for which extra stability might help prevent the purls stitches of the first row (made with one colour yarn) separating from the knit stitches (made with a different colour yarn).
How to do it
The illustrations in this article show a dark colour yarn for the tail yarn, and a light colour yarn for the working yarn.
There are (at least) two methods for performing this cast-on. The two methods described here are identical until you reach the stage with the comment “This is the last step that is the same in both techniques.”
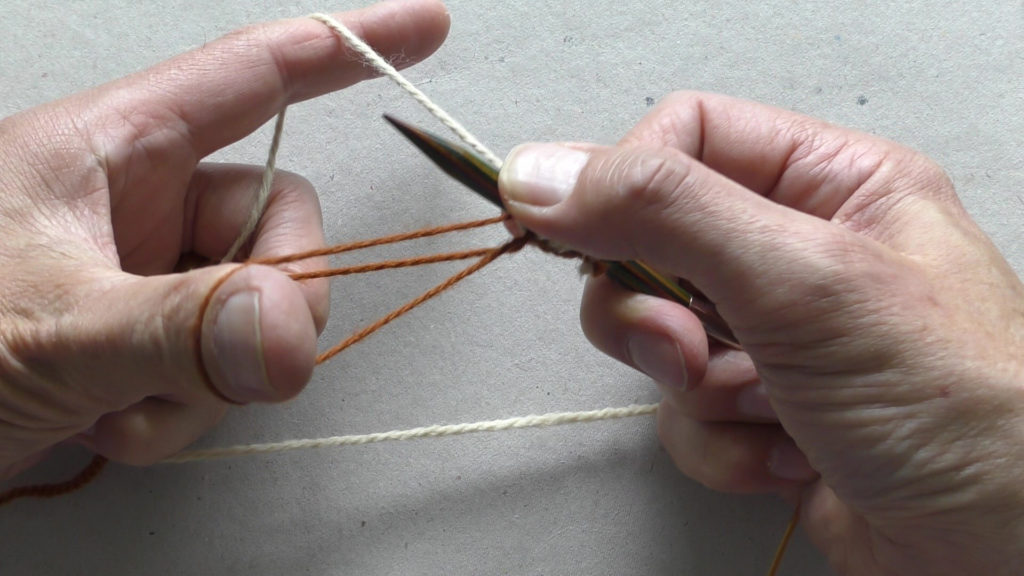
Holding the yarn
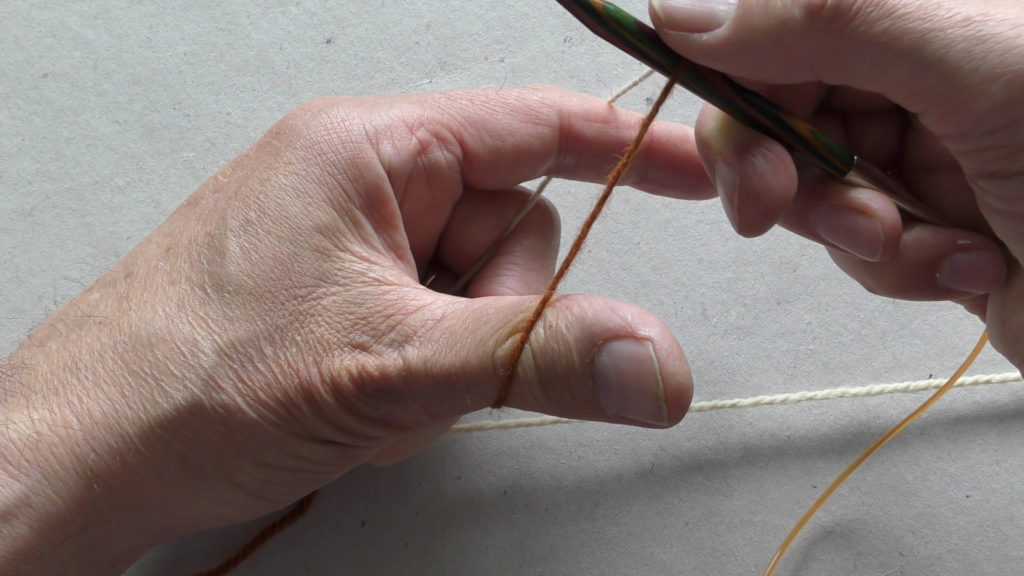
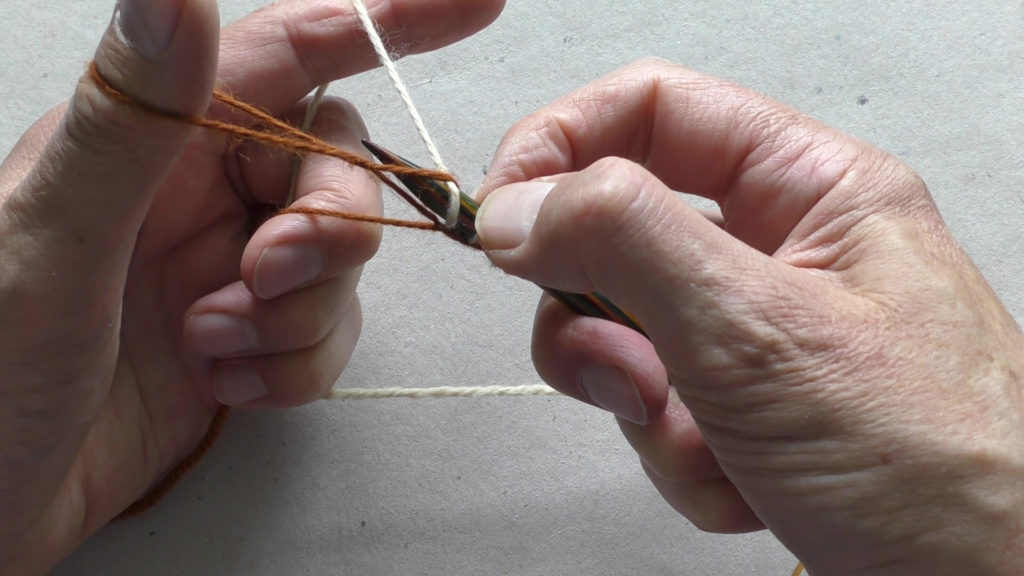
Place the tail end yarn over the thumb of your left hand, and the working yarn over your forefinger. Hold the needle in your right hand below the yarn, pointing to the left.
Standard method
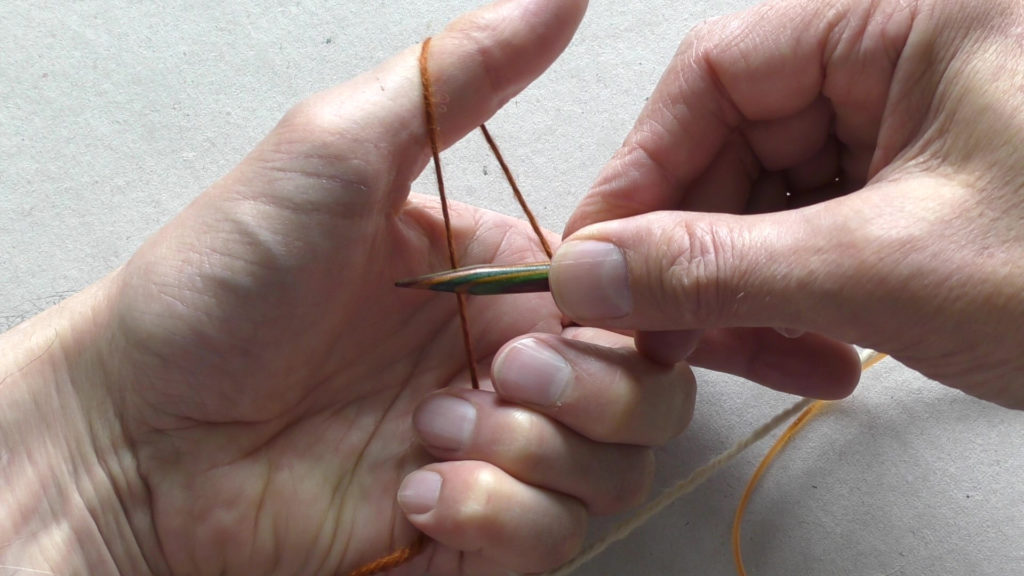
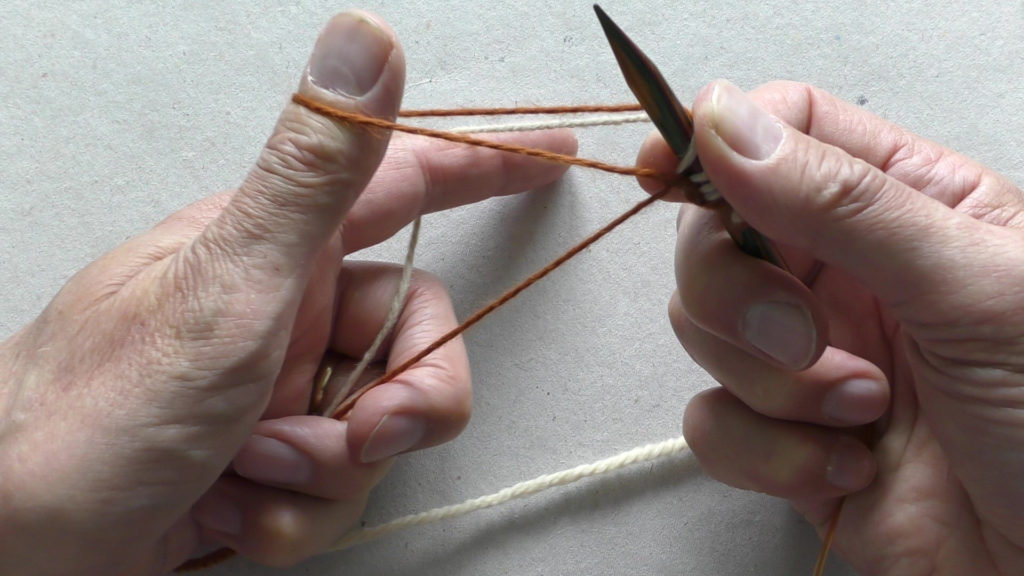
Move the needle towards you, in front of the tail end yarn. Then move it backwards, carrying both strands of the tail end with it.
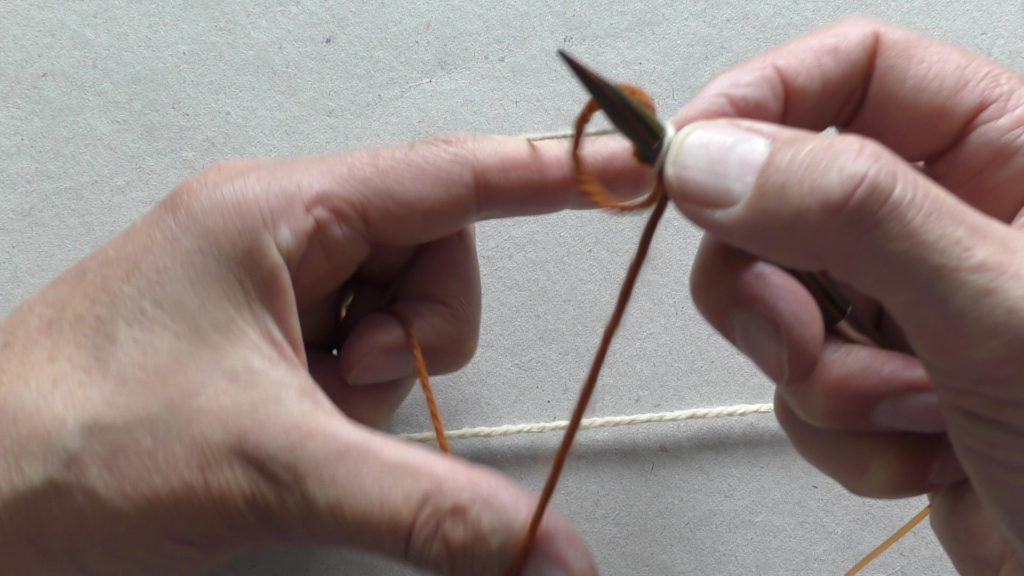
Continue to move the needle backwards and upwards to catch the strand of working yarn nearest to you.
Twist the needle so that the point passes behind the working yarn (forming what looks like a yarn over).
This is the last step that is the same in both techniques.
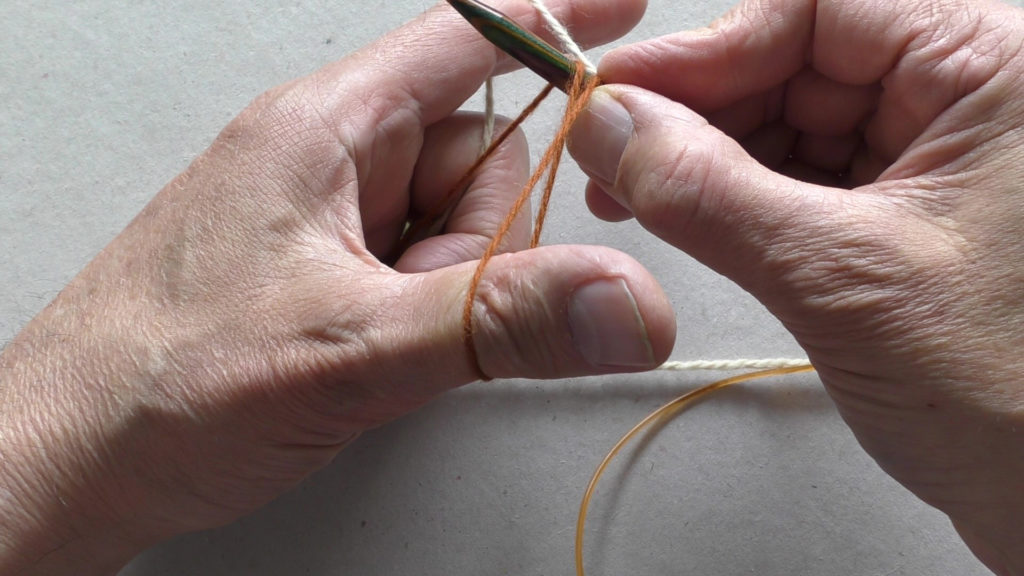
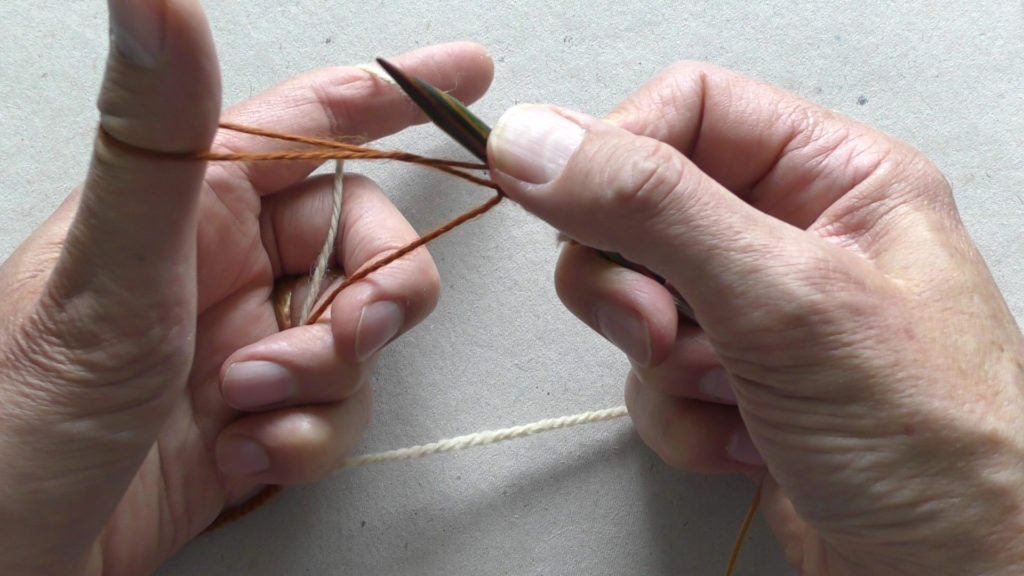
Now move the needle towards you and through the loop in the tail end yarn BELOW the point where the two strands of tail end yarn cross.
Pull the stitch tight
Continue until you have cast-on enough stitches.
Alternative method
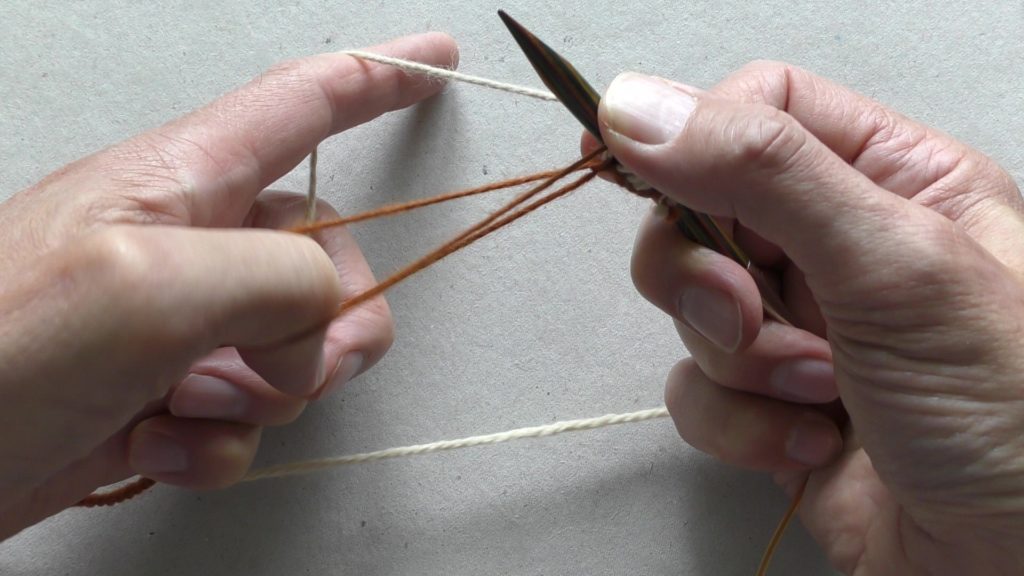
There is an alternative approach to the final two steps of the method described above. Some people (myself included) find it easier and faster to untwist the loop in the tail end than to pass the needle through the small loop below the cross.
Start the stitches as described above until the comment “This is the last step that is the same in both techniques.”
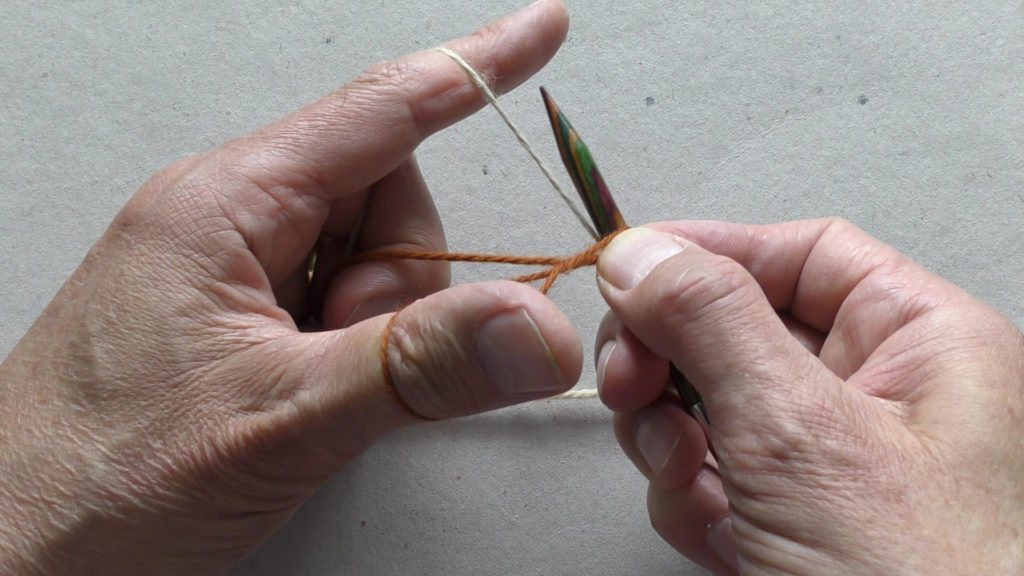
Start rotating your thumb towards your forefinger(clockwise when you are looking at your palm). This starts to untwist the loop in the tail end yarn.
Continue rotating your thumb (down and then to the front).
Keep rotating your thumb (upwards and then backwards) until the loop is untwisted.
When the loop has untwisted, drop it over the end of the needle and tighten your new stitch.
Helpful links
You can find alternative explanations in the links below.
- T-ref: Twisted-Knit-Half-Hitch-Cast-On
- Description of how to perform the twisted knit half-hitch cast-on.
- Description of how to do the twisted knit half-hitch cast-on (also known as the German twisted cast-on or the Old Norwegian cast-on).