
What are stitch markers?
Stitch markers are items that you place on your needles, or around stitches, to help you keep track of your knitting.
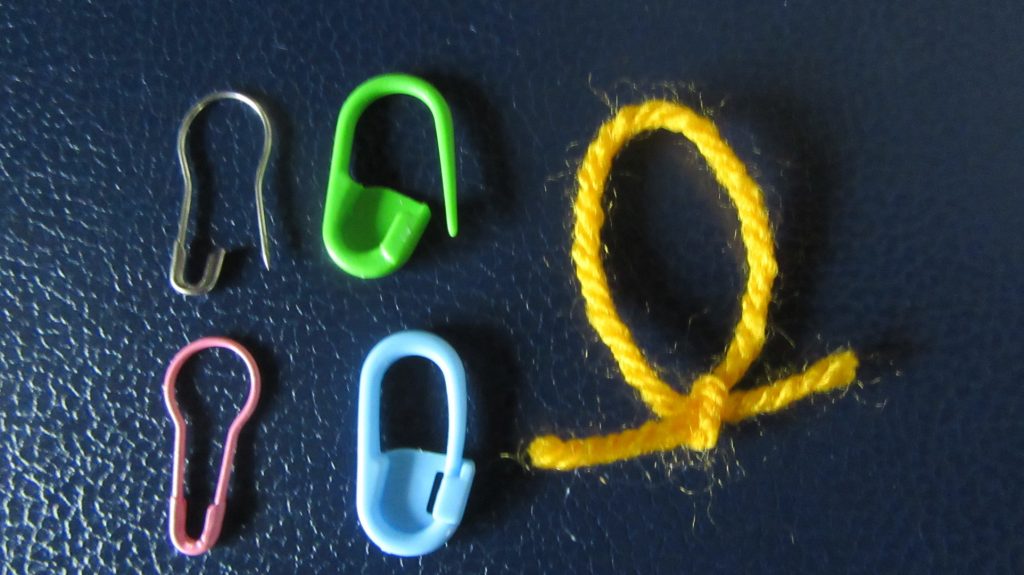
There are two basic types of stitch marker: fixed and removable.
Fixed stitch markers are closed loops. You normally only use this type of marker to keep track of your knitting while it is on the needles. If you were to put one around a stitch, you could only remove it by breaking the stitch marker or cutting your yarn,.
Removable stitch markers are more versatile. They can be opened up, so you can place them around a stitch (for example to mark which is the public side of your work). If you need to change the position of a removable stitch marker within a row, you open it, take it off the needle, and place it in its new position before closing it again.
Stitch markers can be simple, such as the ones in the photograph. A loop of spare yarn in a contrasting colour is an example that is always available. I call this a removable marker because you can always remove it without damaging your work. Others are truly works of art. The key requirements are for them to be thin (so they do not cause your work to ladder), and smooth (so they do not catch on your yarn). I prefer to use plastic “padlock” markers
Using a stitch marker
Each knitter uses stitch markers in different ways. The two basic uses are:
- To mark a position in a row. This could be the start of a pattern repeat, a place where special action is needed (such as a raglan decrease), a fixed position to help you count stitches (such as every 20 stitches), or any other use that helps you.
- To mark a position in your fabric. Many people leave a removable marker at intervals of a fixed number of rows. So counting rows simply becomes counting stitch markers. I place a stitch marker on the public side of a fabric such as garter stitch where it is not obvious from the fabric which is the public side.
To mark a position in a row, simply slip the stitch marker onto the receiving needle when you reach the appropriate position. Or, if the markers are removable, you can place them on the needle before you start working the row. When you reach a stitch marker while you are knitting, just slip it onto the receiving needle before you make the following stitch.
Tip. Make sure that the largest part of the stitch marker is on the opposite side of the needle to your working yarn. This will avoid trapping the stitch marker trapping and creating a long running thread.
To mark a position in your fabric, make sure that you use a removable stitch marker. Loop the marker around a stitch where you want to place it. Open the marker. Pass the open leg between two stitches to the far side of the fabric. Then return the leg on the other side of the stitch. Remember to fasten the marker shut so it does not fall out.
You can use stitch markers of different colours to remind you of the actions that you need to take when you reach the marker.
Many patterns tell you where to place stitch markers. You can add others if that helps you.
Pattern instructions for stitch markers
Designers often suggest positions for stitch markers. You may see these abbreviations.
- pm: place a marker onto the receiving needle before making the next stitch.
- sm: slip marker (move it from the holding needle to the receiving needle).
- rm: remove the marker from the needle (it is no longer needed in that position).
Alternatives to stitch markers for marking areas of your work
Counting rows
Instead of stitch markers to help you count rows, you could use a thin piece of contrasting yarn that is longer than the “height” of the finished item. You can mark groups of rows (perhaps 10, or another number that is a natural repeat for your pattern). You then only need to count the number of groups to find out how many rows you have knit.
On the first row, put one of the yarn on the far side of your work and drape the yarn forward between two stitches. Then work the second stitch. After you have worked the number of rows you want, flip the marker yarn to the other side of the fabric between the same two columns of stitches.
Counting stitches
Stitch markers are the most common aid to counting stitches within a row. If you are casting on for knitting in the round, you could use a contrasting yarn to mark groups of stitches. This not only helps with counting, but also makes it easier to avoid twisting your work when you join in the round. This is described in the article “Marker thread for casting-on in the round“.