

Activity 12: Finishing
You should have completed Activity 11: Pick up stitches for the armhole edging and button band.
Instructions for this activity are on page 22 (Finishing) of the handout.
Weave in the ends
Because each round started in the middle of a steek, you only need to weave in a small number of the ends. The ends from your changes in colour are safely between the reinforcement of the steeks.
So, weave in the four ends for each of the arm and button bands, and the four ends where you joined at the shoulders.
Look at the number of ends that you don’t need to weave in. It was worth starting in the middle of a steek, wasn’t it!
Cut the steeks
Remember Activity 5: Reinforce first steek? If you gave in to temptation you have already cut part of a steek. If you were self-controlled, here is how you do it.
The video shows you how to cut a steek.
You have an even number of stitches in your steeks, so you will cut the running threads between the two central stitches.
Block your project
A stranded knitting project always benefits from dressing (the Shetland term for blocking). It evens up the stitches and shows off the colours.
Soak you waistcoat in warm, slightly soapy water for at least 20 minutes. Rinse well in clean water. Then, taking care not to rub the wool, wrap the waistcoat in a towel and wring the towel to remove most of the water. Then, place the waistcoat on a flat surface and pat to shape (there is no need to stretch it as you would for that other Shetland staple, lace knitting). If you are using a blocking mat, you might want to pin down the cast-on edge and the edges of the button bands. With only three rounds/rows of rib, these still have a tendency to curl.
Cut the ends
When the waistcoat has dried, you can take your scissors to it again. Cut all the loose ends, leaving only a few millimetres of end. This includes all those ends up the centre of the steek.
Tack down the loose edges of the steek
The steeks are naturally lying flat. For a garment that is going to be worn, I would use a thin yarn to tack the cut edges of the steek loosely to the body of the fabric unless the steeks were much narrower than the bands (and so could not be seen even if they did go walkabout).
Sew on the buttons
Sew on the buttons over the button holes on one side of the button band. On the wearer’s right (for a boy) or the wearer’s left (for a girl).
Lightly press from the inside
If you want to show off your waistcoat, lightly press it from the private (inside) side using a cool iron.
You are ready for the next activity
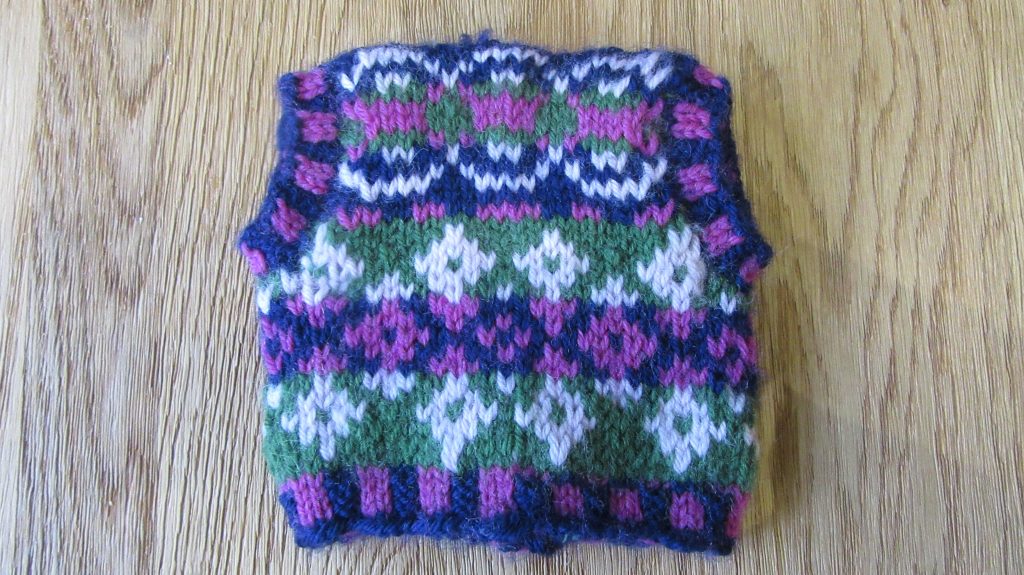
Your work should look something like the photograph.
You are ready to move to the next activity: admiring your work.
Thank you
Thank you for working through this tutorial. I hope that you enjoyed it, and perhaps learned something. I’d love to see your finished waistcoat on Instagram @TeabreakKnitter.
Additional links
- T-shop - Introduction to stranded colour work tutorial
- Excerpt from a seaming video by Roxanne Richardson.
- Playlist of the series on videos on how Teabreak Knitter made the Nahanni river vest.
- Very Pink Knits video "Knitting Help - 3 Ways to Join In-the-Round"
- How to bind-off when you have finished knitting. By Very Pink Knits.