
Also known as: Colour work – ssk or k2tog?
How you work your decreases makes a difference to the appearance of your colour work.
Choosing your decrease for colour work
When you do a decrease in your knitting, two or more stitches in one row are used to form a smaller number of stitches in the row being created. Most often, two stitches are used to create a single stitch in the new row (such as in a knit two together, k2tog). This causes the stitches in the row below the one being created to be pulled together and for one of those stitches to lie on top of the other(s). In the finished fabric, that stitch will appear to be larger (it may even cover all the other stitches), and the colour of that top most stitch will be the one that is most obvious. This effect might result in the motif appearing to be distorted in the row below the one being created.
The same applies to the stitch patterns in a fabric worked in a single colour with a stitch pattern (as opposed to stockinette or reverse stockinette).
Make decrease slope parallel to the edge
Using a k2tog on the left hand side of the fabric and an ssk on the right hand side will produce decrease stitches that are parallel to the slope of the edge being created.
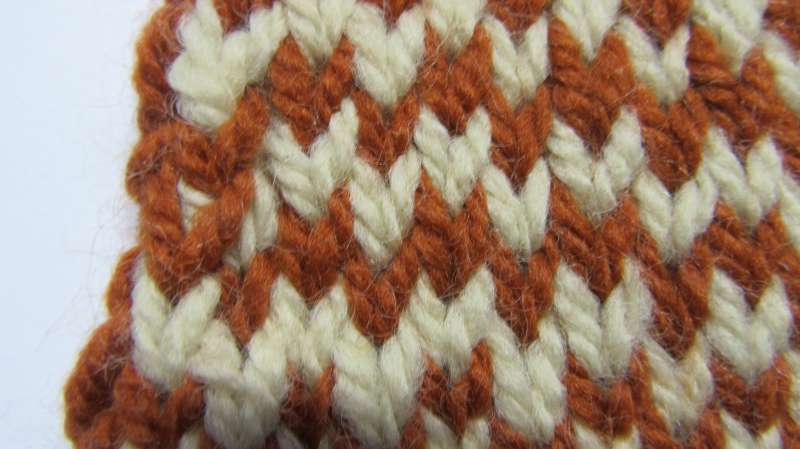
On the left
Using a k2tog on the left in colour work places the left most of the stitches being decreased from the row below on top of the right most. This leaves only a small part of the right most stitch showing, and visibly disrupts the colour sequence in the row below.
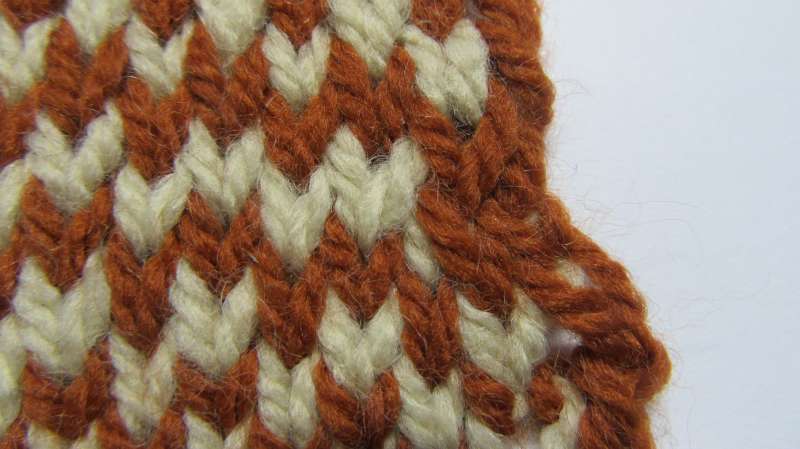
On the right
Using an ssk on the right in colour work places the right most of the stitches being decreased from the row below on top of the left most. This leaves only a small part of the left most stitch showing, and visibly disrupts the colour sequence in the row below.
Modify the colour sequence in the row below and make the decrease slope parallel to the edge
Having seen above that the colour pattern is disrupted if the decrease stitch is aligned to be parallel with the slope of the edge, a solution to this is to modify the colour pattern of the row below so that the stitch in the decrease that is closet to the edge is the same colour as the stitch next to it.
On the left
Modifying the colours of the row below so that the stitch closest to the edge is changed to be the same as that of the stitch next to it and using a k2tog to align the slope gives the right colour sequence in the row below. However, the stitch at the decrease appears to be larger because a part of the left most stitch is showing.
On the right
Modifying the colours of the row below so that the stitch closest to the edge is changed to be the same as that of the stitch next to it and using an ssk to align the slope gives the right colour sequence in the row below. However, the stitch at the decrease appears to be larger because a part of the right most stitch is showing.
Make decrease slope towards the edge of the fabric
Trying to align the slope of the decrease to be parallel to the edge of the fabric results in a distortion of the colour pattern in the row below because part of one stitch shows from behind the other. Sloping the decrease towards the edge solves this problem.
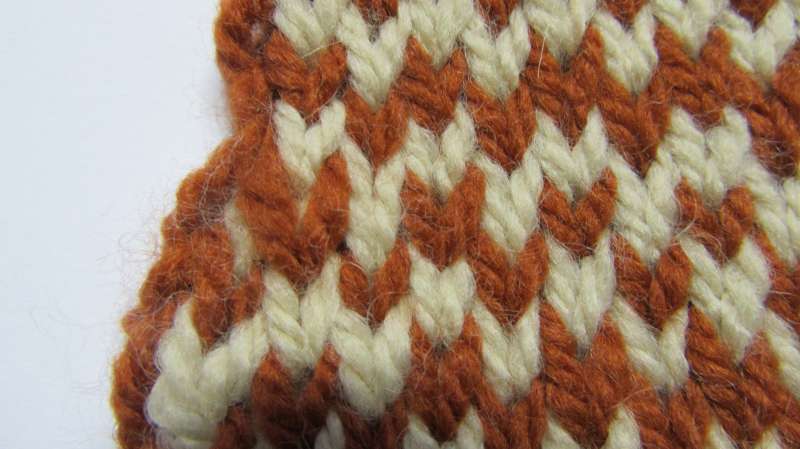
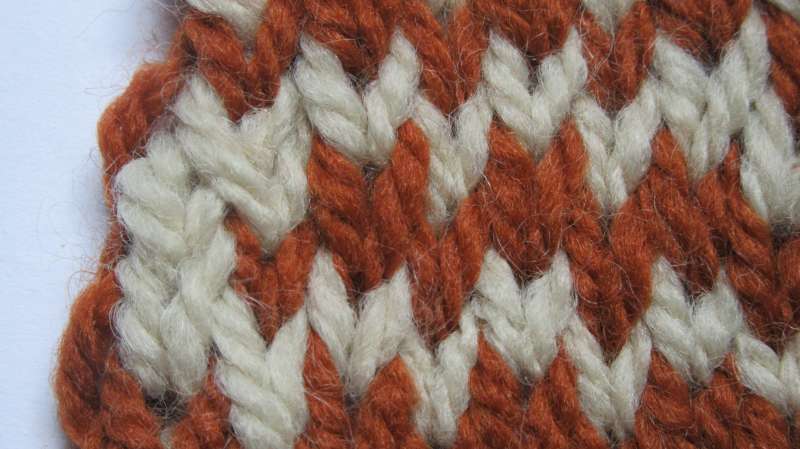
On the left
Using an ssk on the left of the fabric puts the right most of the decreased stitches from the row below on top of the left most stitch, leaving only part of the left most stitch showing. This results in the colour pattern of the row below being maintained. The small amount of the left most stitch that is showing appears natural, because that is what would happen if a woven fabric was cut on the diagonal.
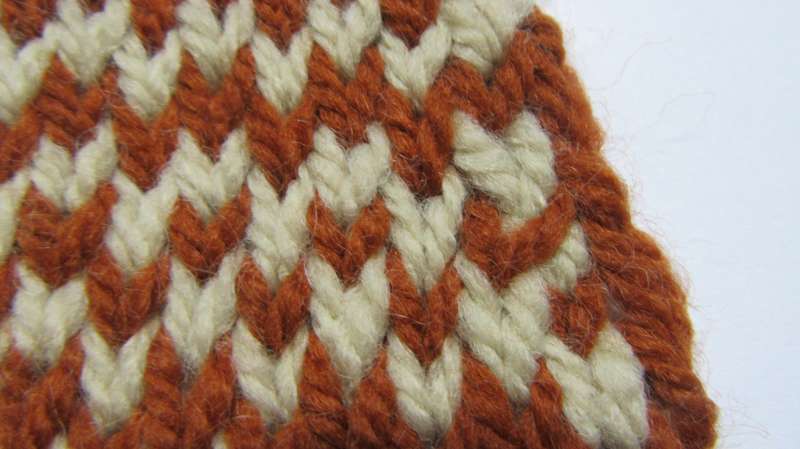
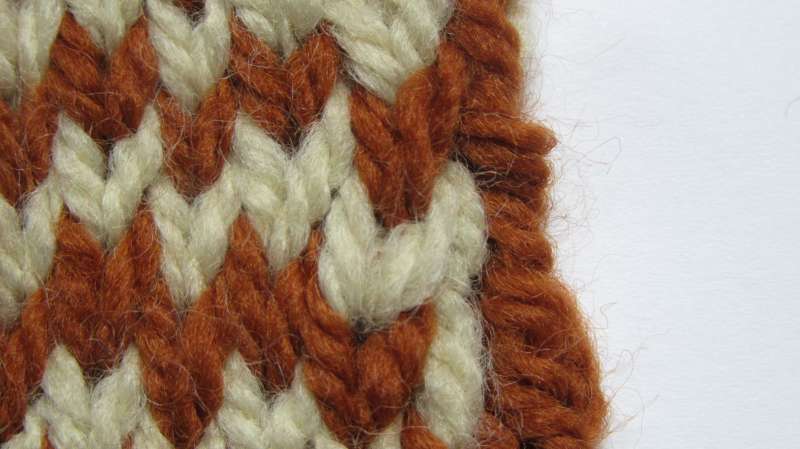
On the right
Using a k2tog on the left of the fabric puts the left most of the decreased stitches from the row below on top of the right most stitch, leaving only part of the right most stitch showing. This results in the colour pattern of the row below being maintained. The small amount of the right most stitch that is showing appears natural, because that is what would happen if a woven fabric was cut on the diagonal.
Recommendation
When working with colours, choose a decrease that leans towards the edge of the fabric so that it maintains the colour sequence in the row below.
This also applies when you are working with a textured stitch pattern.
Useful links
- T-ref: Decreases in colour work
- Roxanne Richardson Techniques Tuesday video providing an explanation of why you might want to lean a decrease towards (rather than parallel to) a sloping edge in order to maintain a pattern in the body of the fabric.
- Decreases in colour work to maintain continuity of the colour pattern in the row below that being worked.