
How you work your decreases makes a difference to the appearance of your colour work.
Show notes for the video t-torial
The underlined headings below are links that take you to that section in the YouTube video for this tutorial.
Introduction
Hello! I’m Steve, also known as TeabreakKnitter on social media.
In this t-torial I’m going to show you how I do decreases when I’m [knitting] stranded colorwork, and I’m going to show you how I decrease around this steek in the middle here.
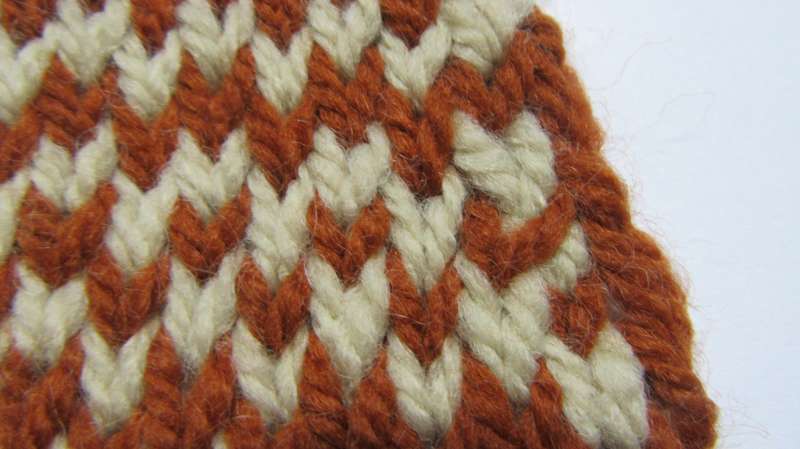
I’ve got an 8 stitch steek, with 2 edge stitches on it. I’m going to decrease here, in these two stitches, and in these two stitches in just the same way as I would for an armhole. I’m working in a chequerboard pattern that makes it very easy to see see how the stitches are lying.
I’ll just work up towards the decrease. One more stitch.
Decreasing with the edge of the fabric to your left
And we have a light and a dark stitch that we going to do the decrease on.
If I was working in a single plain colour, I would do a knit two together (k2tog) here, so that the [decrease] stitch was lying parallel to the seam.
I’ve got a right leaning stitch so that it will look neatly lined up against the seam, which will actually be made into the edge stitch. But look what happens now in the colour work if I do that. (I’ll just pull this back stitch tight a bit so that you can see what is happening here).
You can here that I’ve got my colour work. I’ve got white, brown, white, brown, white and when the next stitches tighten, those stitches lie over each other each other, so I get two white stitches next to each other – which is not what I want. If I undo that, and instead of doing a right-leaning knit two together, I do a left-leaning ssk [slip, slip, knit] (I’m succeeding in making the stitches quite loose by re-working them!) you can see what’s happened here now. I’ve got white, brown, white, brown, white, brown, white and the dominant stitch here is the brown.
Decreasing near the right hand edge of the fabric
I’ll work my way over to the other side [of the steek]. On the other side the seam will be leaning the other way, so it’s where I would normally do an ssk [slip, slip, knit]. I’ve got a left-leaning stitch so that it follows the line of the seam. Let’s see what happens if I do an ssk on the left-hand side of this. Slip, slip, and it’s going to end up with a dark stitch. And [now knit] the light stitch next to it. Once again, when things are tightened up, what do we find? I have two dark stitches next to each other. Let’s see what happens if I do knit 2 together [k2tog], a right leaning stitch. Knit 2 together brings that left hand light stitch on top. And again, I’ll knit through it so it is easier to see what’s happening here. Using the right-leaning knit two together [k2tog] we have kept the light, dark, light, dark, light pattern. And you can see that there’s a dark stitch tucked underneath. If you look on the other side, again the light stitch is tucked underneath the dark stitch, so I’ve kept the continuity of pattern going better.
Summary
In conclusion, when you are knitting colour work and come to an area of decrease at the edge of the fabric, you want to use a decrease that leans TOWARDS the edge.
So, if you’re cworking up the fabric and to your left there is an edge of the fabric at which you will be decreasing, you decrease using the ssk [slip, slip, knit] left-leaning stitch to do a decrease there.
On the other side, where you are at the edge of the fabric and moving in towards the centre of the fabric as you knit, you should use a right-leaning decrease, the [k2tog] knit 2 together.
That way you lay the correct colour on top on the public side of your work. This keeps [colour] continuity of the row before the one you are knitting at the moment.
So here’s the rule: to do a decrease in colour work lean the decrease towards the edge of the fabric.
Happy Knitting!
I hope you found this useful.
Until the next time, Happy Knitting!
Useful links
- t201910 - Decreases in colour work
- Roxanne Richardson Techniques Tuesday video providing an explanation of why you might want to lean a decrease towards (rather than parallel to) a sloping edge in order to maintain a pattern in the body of the fabric.
- Considerations when decreasing in colour work.