
Context
Rotational, reflectional, translational – the types of symmetry we were taught about at school. Spotting these symmetries in our knitting can help us spot mistakes early, when it is still possible to do something about them without a lot of work.
Although this article is written using colour work as the example, the technique can also be used when the fabric has stitch patterns, cables or open work (lace).
How to do it
Spotting the symmetries
Repeated motifs
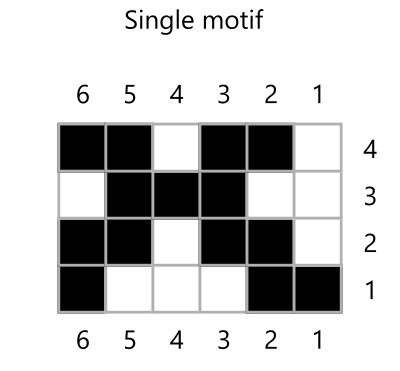
A typical colour work pattern will show you only one or two repeats of the motif. This is likely to be repeated several times across your work, and will often appear several times as you work up the fabric.
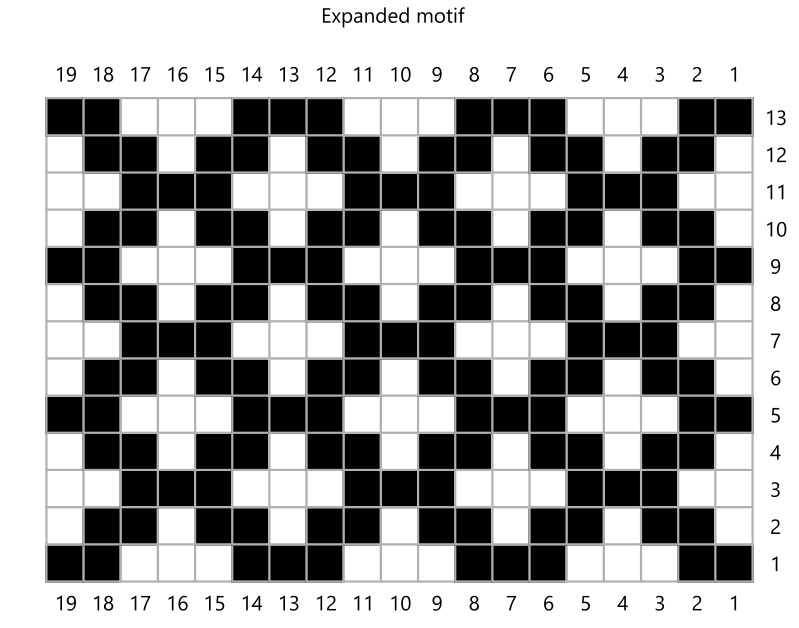
Here is the same motif repeated both horizontally and vertically. You can check your current work by looking back at earlier repeats to make sure they look the same.
Shaping

Shaping of garments is usually symmetrical. The left hand side is normally a mirror image of the right hand side, and the shaping of the armholes at the front matches that at the back. Add on the colour work, and it is normal for the sequence of colours on the front to be the same as on the back – so the colours at the edges of the front right and back left armholes match (the ones that start on the left of the fabric as you look it and curve in towards the centre).
You may have spotted that the sides of the openings between columns 17-22 and 36-3 are not symmetrical. This is deliberate.
Using the symmetries
Having spotted the symmetries, you can use them to check for mistakes. If the stitch patterns do not match, try looking for stitches knit in the wrong colour, missing or extra decreases, decreases of the wrong type (such as ssk instead of k2tog), and checking whether you picked up the motif at the right point after shaping.
- Do the stitches you have just knit match the ones in the previous repeat of the motif?
- Are the stitches to the left of a Vee neck a mirror image of the ones to its right in the same row?
- Do the stitches next to the armhole on the back match those next to the armhole on the right?
Examples
Here are some examples of mistakes and their cause. The chart shown above under “shaping” was used to create the fabric.
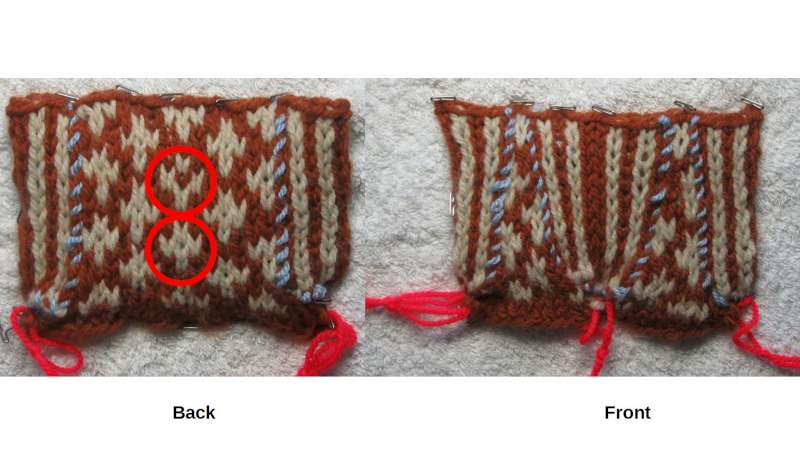
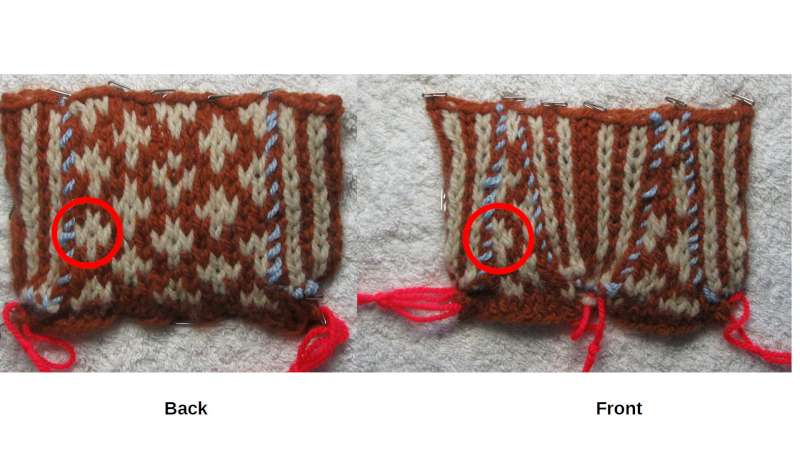
Comparing the cross in the upper circle with the one on the lower circle shows that the centre stitch is in the work colour.
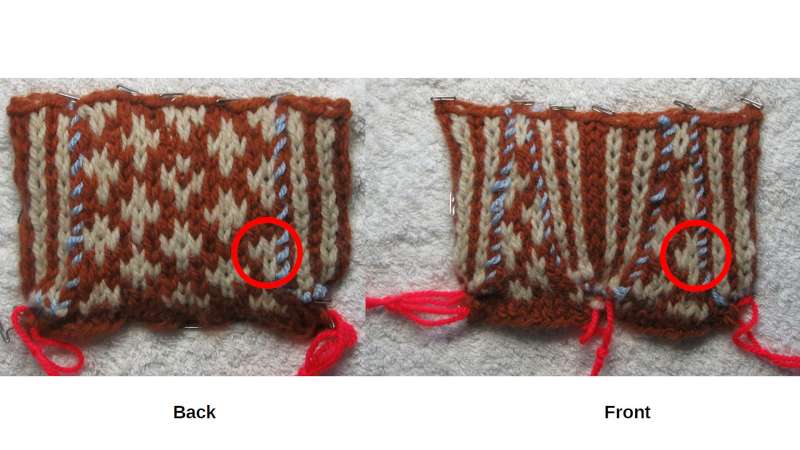
This is another example of the wrong colour being used, but this time it is on the edge of the shaping. Compare the circle next to the shaping on the back with that on the front. The top stitch in the “cross” on the back has been knit in the dark colour instead of the light.
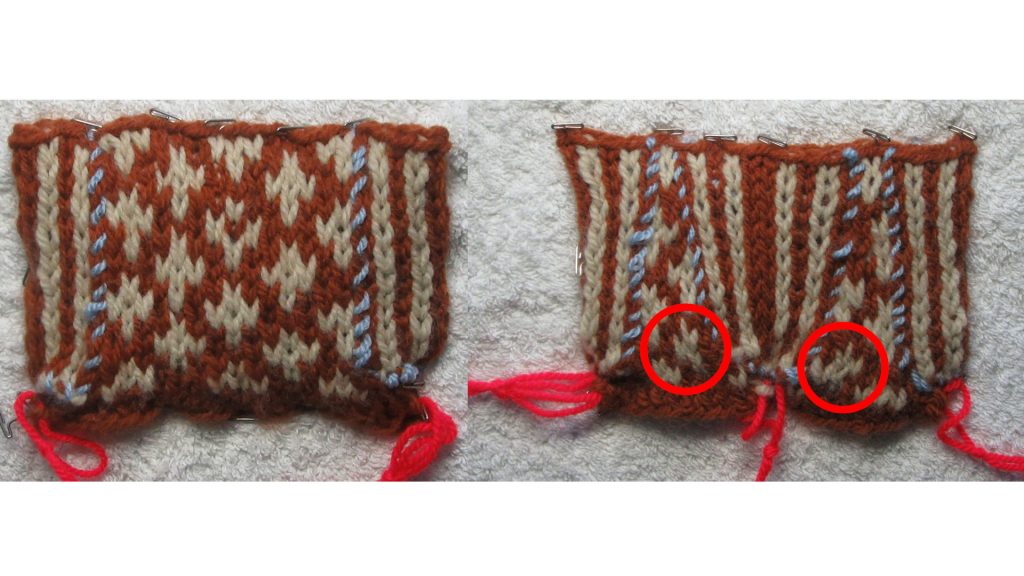
Comparing the colour patterns in the shaping of the area on the front corresponding to that on the back shows where a decrease was missed on the back – which shows up as a complete rather than partial cross.
Comparing the stitches each side of this symmetrical area of decreases shows a difference that was caused by using an ssk instead of k2tog on the left – resulting in the wrong colour stitch from the round below being drawn to the front.
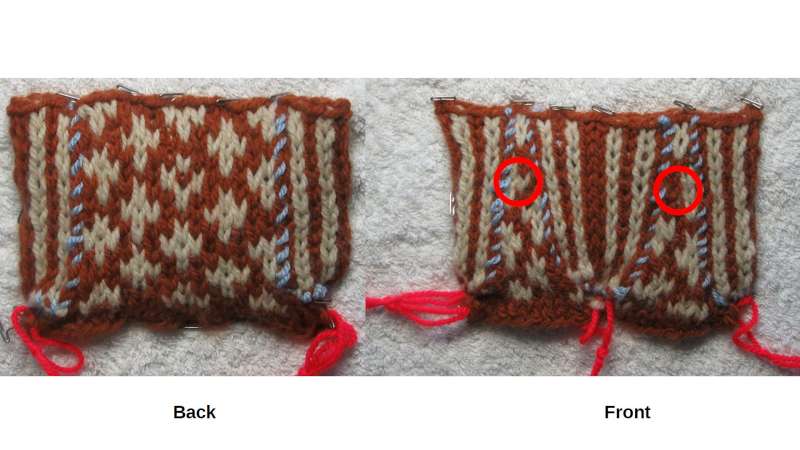
The light coloured stitch needed by the motif is missing on the right – because it is hidden by the dark yarn pulled to the front by the use of k2tog instead of ssk.
Useful links
- T-Ref - using symmetry to spot mistakes
- T-torial on using translation and reflection symmetry to spot mistake while knitting