
Show notes for the Basic Stranded Cast-on Tutorial
The underlined headings below are links that take you to that section in the YouTube video for this tutorial.
Introduction
In this video I will show you how to cast on using the basic stranded cast-on.
It is unattractive and is seldom used for anything other than gauge swatches.
Holding the yarn
The basic stranded cast-on uses two strands of yarn – the tail end and the working yarn.
Usually these are the two legs of a loop.
I have tied a dark coloured yarn for the tail end to a light coloured yarn for the working yarn.
This should make it easier to see what is happening.
Hold the yarn in your left hand.
The tail end should be over your thumb, and the working yarn over your forefinger.
Run both yarns across your palm and hold them in place with your other fingers.
Make the first loop
Now you need to make the first loop on the needle.
Hold the needle in your right hand pointing to your right.
Place it under the yarn between your left thumb and forefinger. Lift and turn the point over the working yarn.
Now you have a loop with the working yarn closest to the tip and holding the tail end in place.
Casting on two stitches
Keep the yarn between your forefinger and thumb tight.
Move the tip of the needle toward you,
over, downwards between you and the tail end that is held by your thumb,
under the tail end, up between your thumb and finger,
over and behind the working yarn,
then move it forward and under the tail end before bringing it up and back between your thumb and forefinger.
You now have a second loop of the working yarn over the needle that is held in place by the tail end.
Move the needle under the working yarn on your forefinger, lift it and move it back to the centre.
This makes a yarn-over.
Cast on more stitches
You make extra stitches by repeating these two movements.
Sweep up the tail end:
move the needle towards you, over then under the tail end, behind the working yarn, under the tail end.
And make a yarn-over:
under the working yarn and back to the centre.
- Sweep up the tail end;
- And make a yarn-over;
- Sweep up the tail end;
- And make a yarn-over;
- Sweep up the tail end;
- And make a yarn-over.
Each of these pairs of movements makes two stitches.
You will have an odd number of stitches on your needle – the original loop plus pairs of cast-on stitches.
Stop when you have enough stitches – with one extra if you need an even number.
Turn the needle round and hold it in your left hand.
You are now ready to start the first row.
Using an odd number of stitches
If you need an odd number of stitches you need to trap the working yarn on the needle with the tail end.
Move the tail end under the tip of the needle
and in front of the working yarn.
Hold it in place against the needle with the fingers of your left hand.
This will give you a firm loop to knit.
Using an even number of stitches
If you need an even number of stitches, you have an extra stitch on your needle.
Carefully take the last yarn-over off the needle.
The tail end is lying loosely around the working yarn.
Hold it against the needle with the fingers of your left hand.
This will give you a firm loop to knit.
Now you can start to knit.
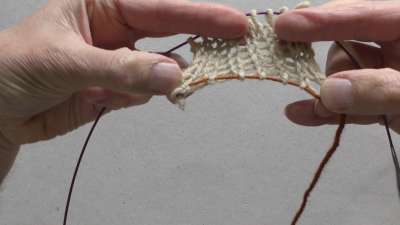
What the cast on looks like
Here is the cast-on edge
You can see the tail end running through the loops of the stitches
so that the stitches can move freely along it.
This means that the cast-on edge does not pull on the body of the knitting.
Conclusion
In this video I have shown you the basic stranded cast-on.
I hope you have found this video useful, and that you will be able to use this cast-on for your gauge swatches.
Happy knitting!
T-Reference
You can see a pictorial tutorial for the basic stranded cast-on in the T-Reference section of this website.