
Context
A steek is an area of knitted fabric that is designed to be cut. This allows, for example, a sweater to continue to be knit in the round (circular knitting) after the start of the armholes. The steps involved are:
- Cast on and knit your steek stitches;
- Reinforce your steek;
- Pick up stitches at the steek, such as for sleeves, button bands;
- Cut the steek (this article).
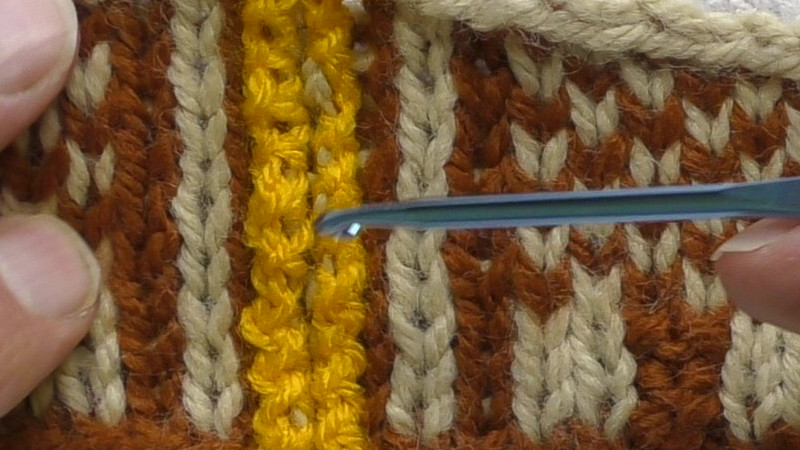
The last step in making fabric with a steek is to cut the central stitches of the steek. The cut is made half way between the two columns of reinforcement, so if is an even number of stitches in the steek the cut is between the central pair, and if there is an odd number the central stitch is cut along its mid-line.
You will need a sharp pair of scissors that you can control easily.
How to do it
Steek with even number of stitches
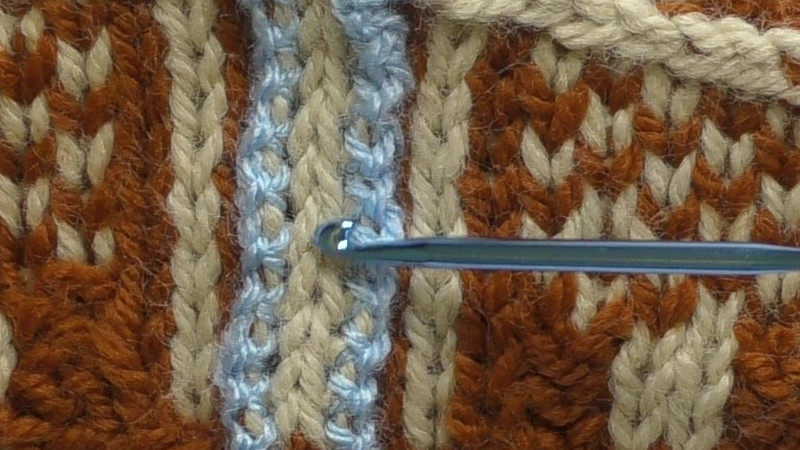
Cut the steek at its centre, between the two central stitches.
If you have reinforced the steek with crochet, this looks like the centre of a stitch that is aligned the “wrong way up”.
Slightly stretch the fabric to make it easier to see where you are cutting.
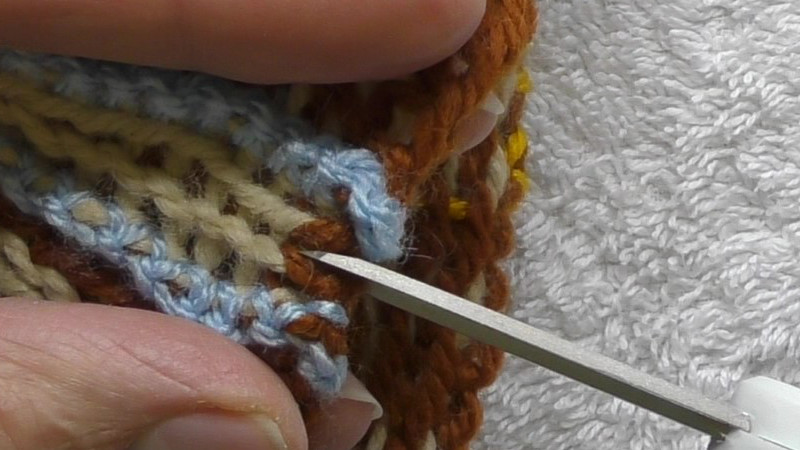
Put the tip of the scissors between the stitches and carefully cut the running thread and the float behind the stitch.
You may find it useful to put the fingers of the hand not holding the scissors behind the scissor blade under the steek – so that you do not cut the rest of your knitting by accident.
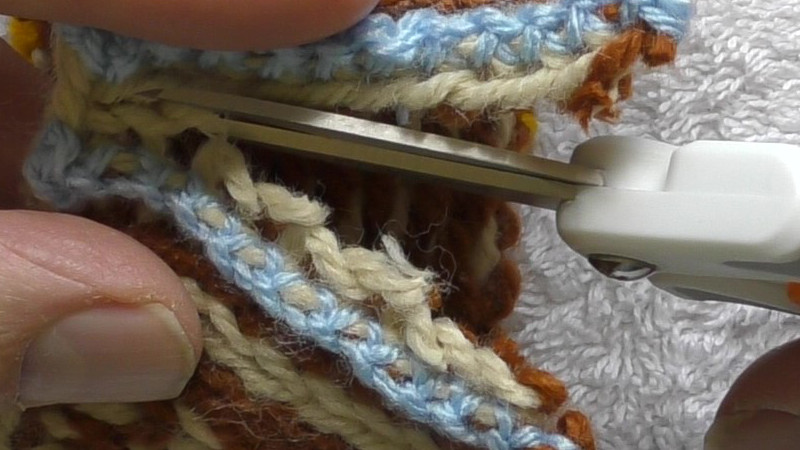
Continue to cut until you have cut all the stitches in the column, including the bind-off (or cast-on, depending on the direction you are cutting).
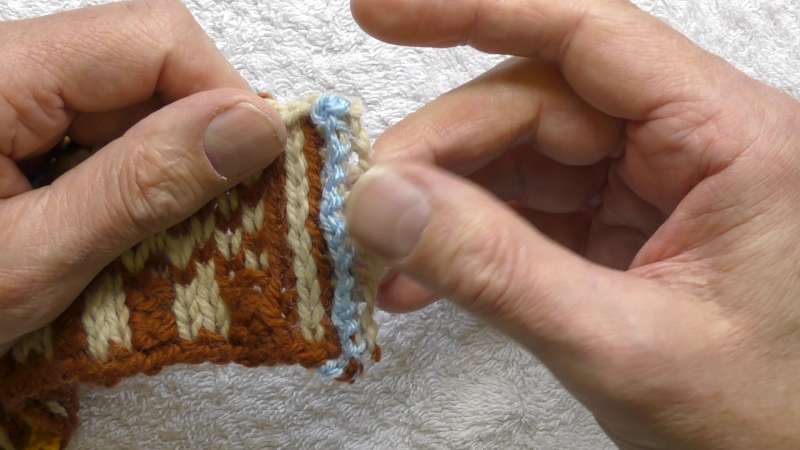
Do not trim the cut ends until after you have washed and blocked the item.
Steek with odd number of stitches
You will cut through the middle of the central stitch. This is between the two columns of reinforcement.
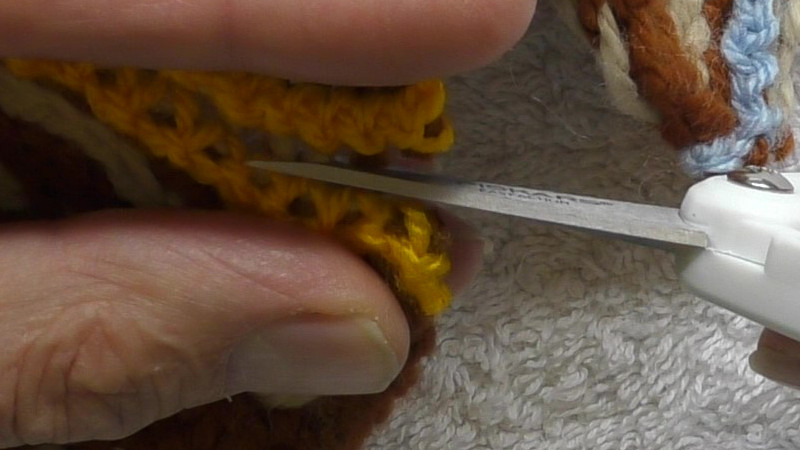
Gently stretch the centre of the steek to separate the columns of reinforcement. Carefully cut the central stitch and the floats behind it.
You may find it useful to put the fingers of the hand not holding the scissors behind the scissor blade under the steek – so that you do not cut the rest of your knitting by accident.
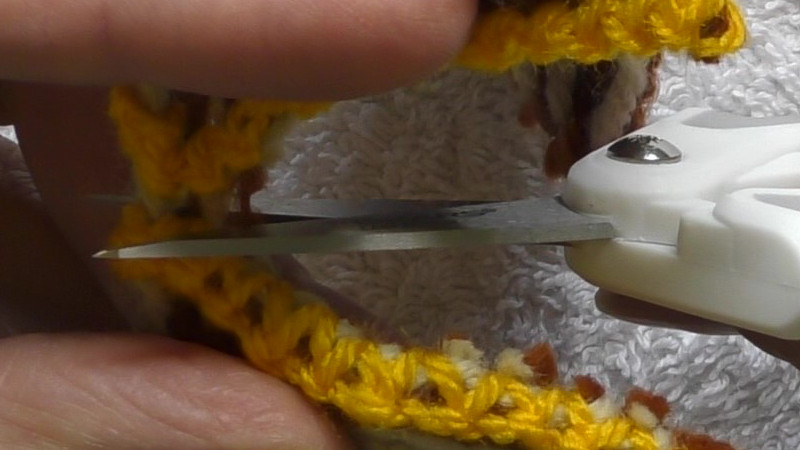
Continue cutting until you have cut through the bind-off (or cast-on, depending on which direction you are cutting).
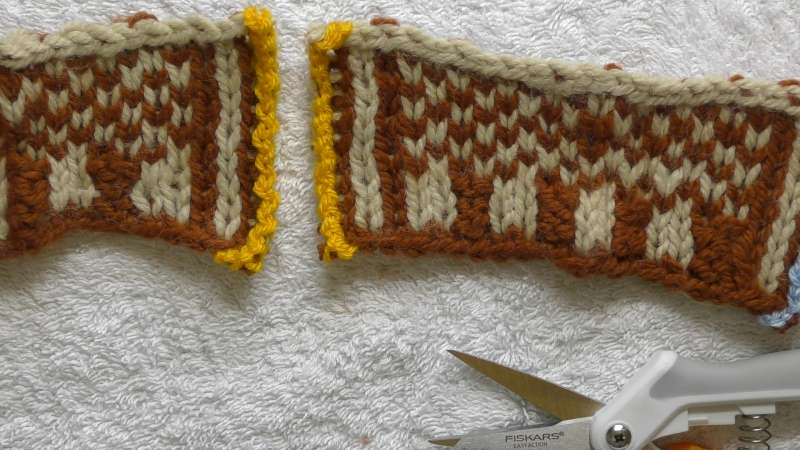
The edges of the steek appear neater than for a steek with an odd number of stitches, but may still need to be trimmed after blocking.
Helpful links
- T-ref: Cutting a steek
- Video tutorial by Very Pink Knits on steeking.
- T-reference article on reinforcing a steek.
- T-reference article on steeks
- Tin Can Knits tutorial on steeking for their Strange Brew range.