
Context
A steek is an area of knitted fabric that is designed to be cut. This allows, for example, a sweater to continue to be knit in the round (circular knitting) after the start of the armholes. The steps involved are:
- Cast on and knit your steek stitches;
- Reinforce your steek (this article)
- Pick up stitches at the steek, such as for sleeves, button bands;
- Cut the steek .
Reinforcing a steek before you cut the stitches helps stop the cut ends of yarn being pulled through the remaining stitches. Although it may not be necessary to reinforce steeks made using a yarn that felts easily, it becomes essential if a slippery yarn is being used.
The main ways of reinforcing a steek are: hand sewing, machine sewing and crochet reinforcement.
This article describes how to use crochet reinforcement. Crochet chains are formed down the pairs of columns that lie either side of the steek, tying the neighbouring legs in the column pairs together.
Sewn reinforcement ties the same legs together as crochet reinforcement – using hand-sewn stitches or machine-made zig-zag stitches. The Helpful Links section includes links to information from other web sites on how to do this.
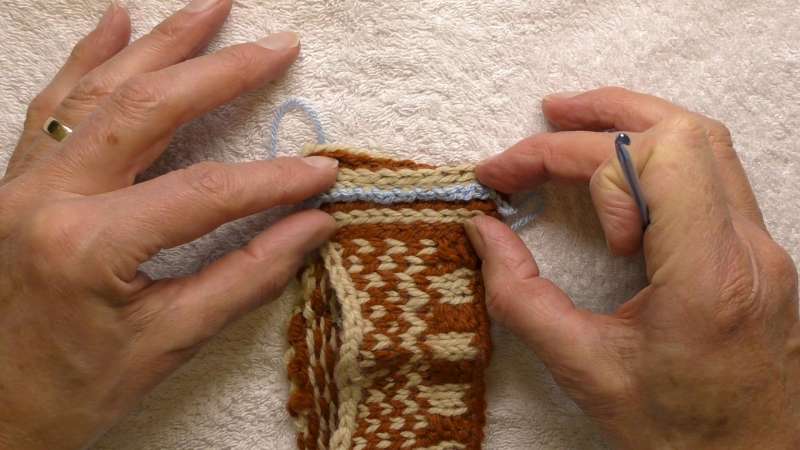
How to do it (Crochet reinforcement)
Use a smooth yarn that is smaller than the yarn used for the fabric. The reinforcement will not be visible from the public side of the garment, so you may find it easier to use a contrasting colour so that you can see your work more easily.
The crochet hook should ideally be a size or two smaller than the knitting needle you used to knit the steek – just don’t use one that is bigger than the knitting needle or you may have problems getting it through the knitted stitches.
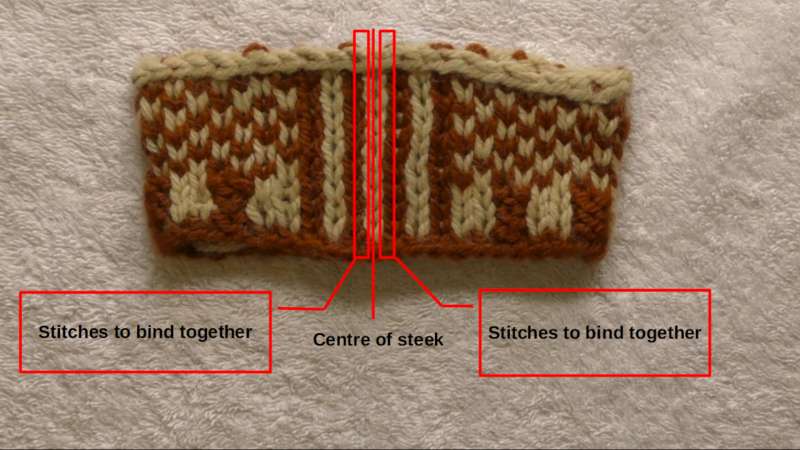
Crochet reinforcing a steek with an even number of stitches
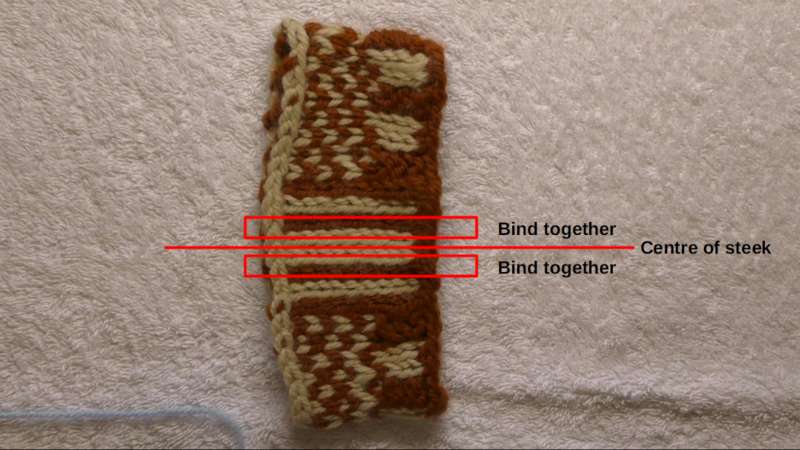
Columns to use
The cut will be made between the two columns of stitches at the centre of the steek (the two pale columns that run horizontally in the photograph).
The upper leg of the pale column above the centre line will be bound to the lower leg of the dark column above it.
Similarly, the lower leg of the pale column below the centre line will be bound to the upper leg of the dark column below it.

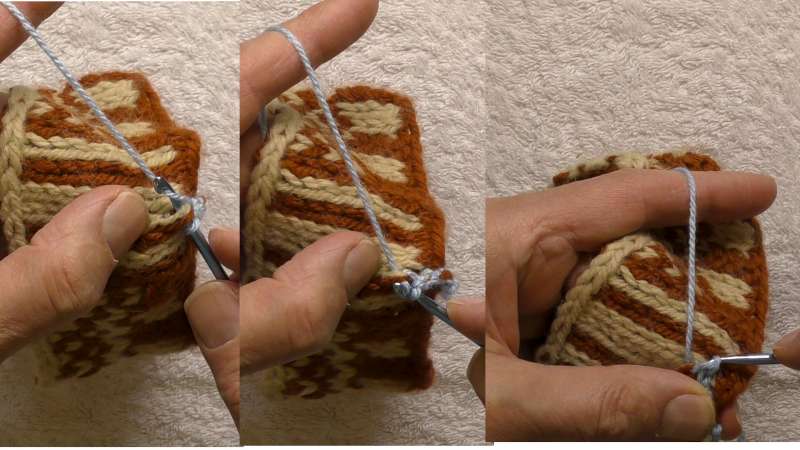
Bind the end loops
Start by binding together the loops on the right-hand ends of the columns. Depending on the direction you are working, these will be either the cast-on or cast-off edge.
Place a slip-stitch on the crochet hook as the first loop.
Put the crochet hook through the centre of the two loops at the right-hand edge that are at the end of the two columns to be bound together.
Loop the working end of the yarn over the hook, and draw the loop back through the two cast-on loops. This gives you two loops on the crochet hook.
Draw the loop nearest the hook end through the other loop.
Bind the columns of stitches
Pass the crochet hook through the middle of the second stitch away from the centre, passing behind the upper leg. Continue under the lower leg of the stitch next to the centre-line, and bring the hook up through the middle of that stitch.
Loop the working yarn around the hook, and pull it back through, so that it comes out through the middle of the lower stitch.
Pull that loop through the other loop on the hook.
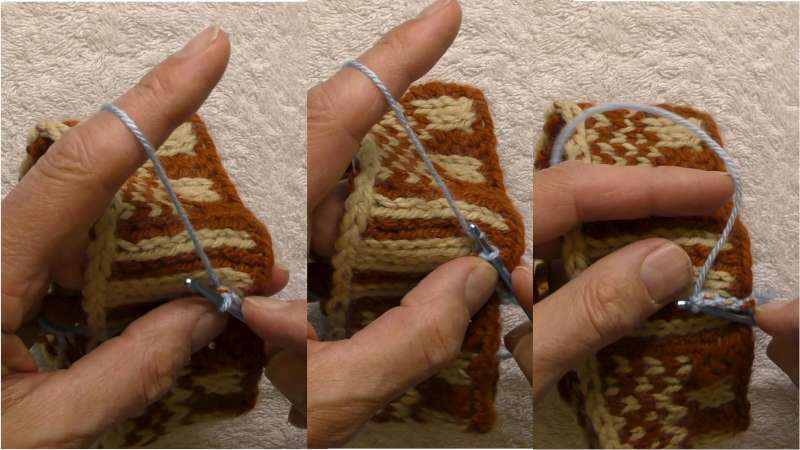
Bind the two stitches together
Make a chain stitch (loop the yarn around the needle, and pull it back through the loop already on the needle).
This results in the working yarn surrounding the two legs being bound together.
Continue along the column of stitches until all the stitches have been bound together.
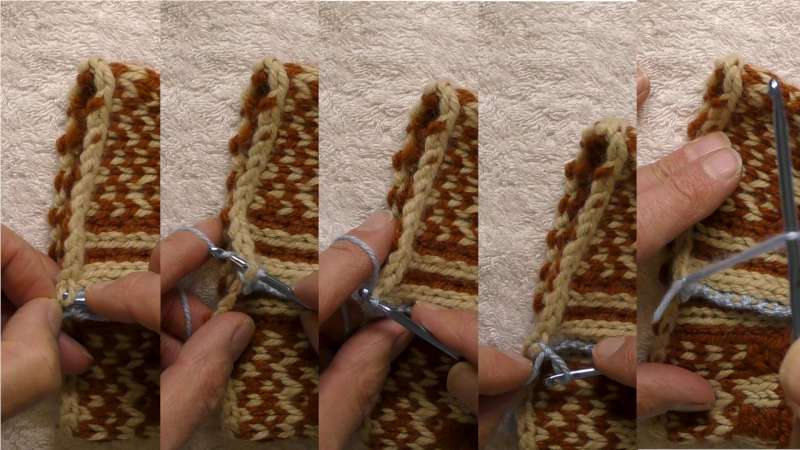
Bind the edge stitches
When you have finished binding together all the stitches in the column of the steek, you finish by binding the edge stitches (bind-off or cast-on depending on the direction you have been working).
Put the hook under the first side and then through the middle of the loop at the end of the column next to the centre of the steek, and then do the same for the loop next away from the centre of the steek. This places two strands of steek yarn over the hook.
Wrap the working yarn around the hook, and pull the loop back through the edge stitches, so that you have two loops of the working yarn on the hook.
Pull the loop nearest the end of the hook through the other loop (so you one have one loop on the hook).
Cut the working yarn to give a tail long enough to sew in, and continue pulling the yarn with the hook to draw it through the loop around the edge stitches. This will prevent the chain unravelling
Reinforced column
You have finished reinforcing one side of the steek. You should see a chain of linked stitches like the one shown in the photograph.
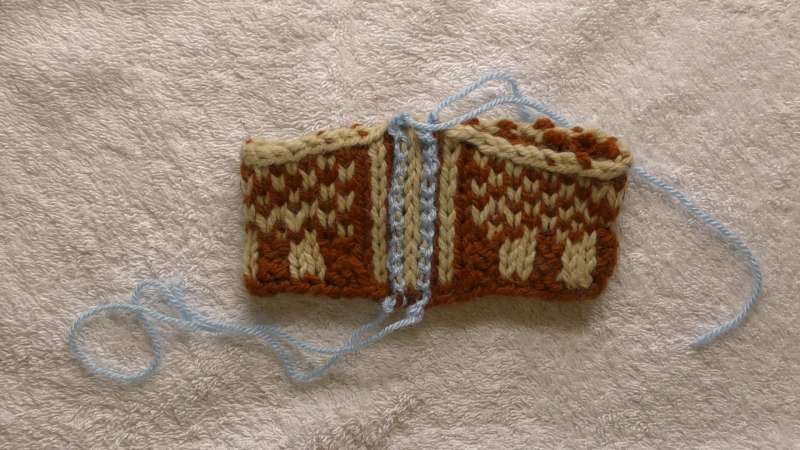
Reinforced steek
Turn your work by 180° and reinforce the other side of the steek.
The reinforced steek has two columns of crochet chain separated by the inner legs of the columns of stitches either side of the centre of the steek. The steek will be cut between those legs.
Crochet reinforcing a steek with an odd number of stitches
A steek with an odd number of stitches will be cut along the middle of the centre stitch, leaving half of the stitch on one side of the cut and the other half on the other side.
Reinforce the centre stitch
The centre stitch plays a major role in a steek with an odd number of stitches. Not only is the stitch cut along its middle, but its right leg is bound to the stitch to its right, and its left leg is bound to the stitch to its left.
The pairs of stitches are reinforced using the same method as those in a steek with an even number of stitches.

Reinforced steek
After reinforcement, a steek with an odd number of stitches has two crochet chains next to each other. The steek will be cut along the gap between them.
Helpful links
- T-ref: Reinforce a steek
- Show notes for the T-torial on "Reinforcing a steek with crochet" (T202001).
- Video tutorial by Very Pink Knits on steeking.
- T-reference article on steeks
- Tin Can Knits tutorial on steeking for their Strange Brew range.