
Context
Steeks allow you to knit in the round even when the finished item may not be continuous (for example a cardigan, or any garment with armholes). This t-reference article suggests one way of casting-on the extra stitches for a steek that takes account of how the steek will be reinforced.
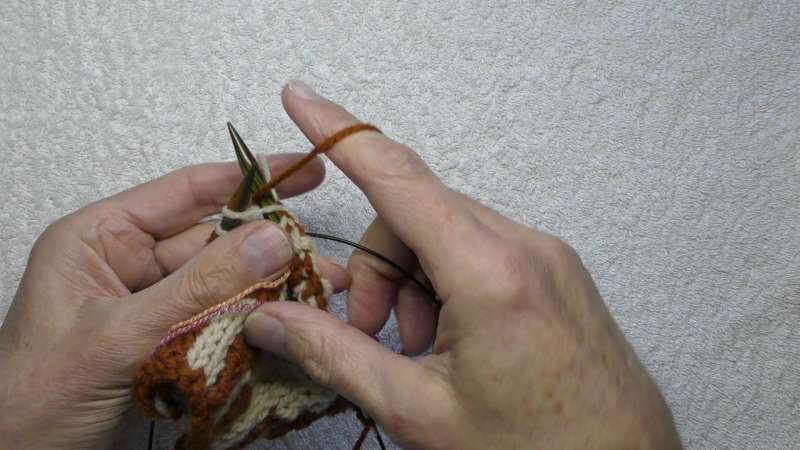
Adding the first edge stitch
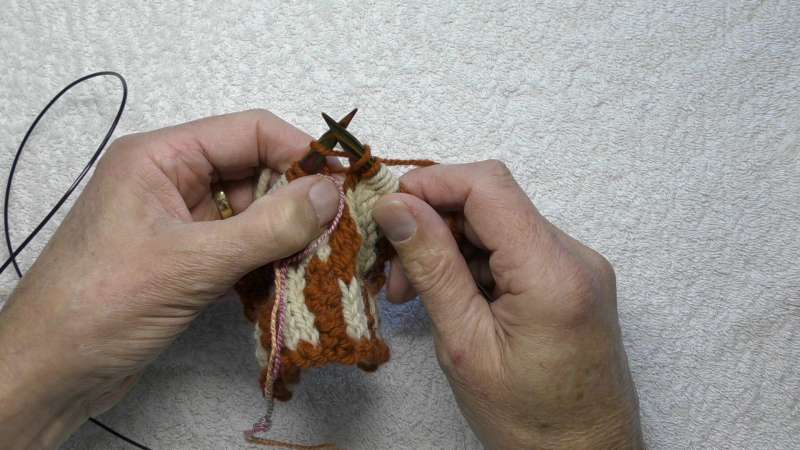
The first stitch in the steek area is normally an edge stitch that will be used when picking up stitches to form a border band.
Knit the stitch before the steek as normal, but do not remove the original stitch from the needle.
Then knit into the back of the stitch that was kept on the left needle using the background colour yarn. Place a marker between the two new stitches on the right needle to mark the start of the steek area.
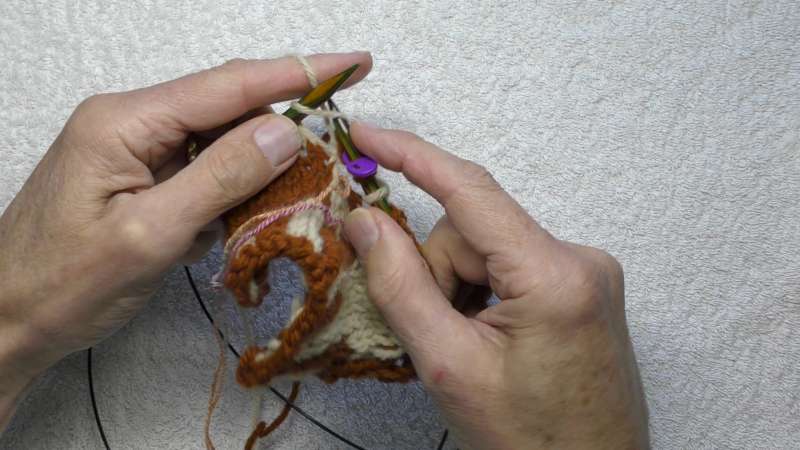
Adding the steek stitches
Each half of the steek is knit in alternating colours, starting with the contrasting colour for the stitch next to the edge stitch.
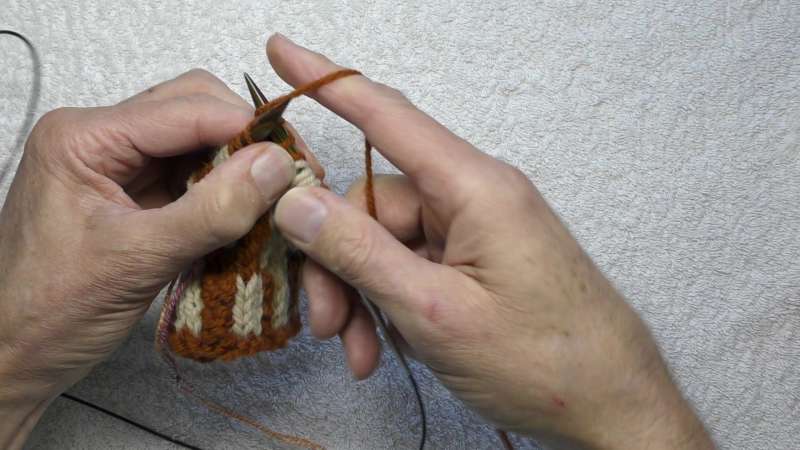
Form a backward loop on the left needle or your thumb with the yarn of the colour used to form the previous stitch.
Knit into this with the other yarn.
If you are using an odd number of steek stitches, keep going until you have cast-on all the steek stitches.
If you are using an even number of steek stitches, stop when you have cast on half the steek stitches. Instead of swapping colours for the next cast-on stitch, repeat what you have just done. Then continue alternating colours until you have cast on all the steek stitches.
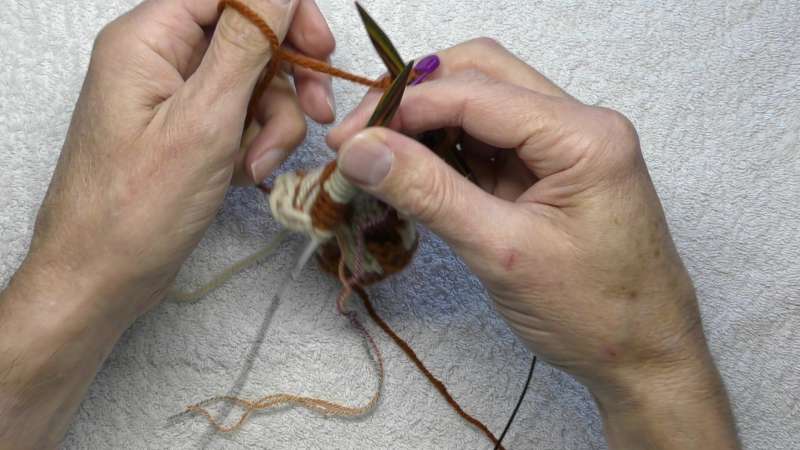
Adding the final edge stitch
The final stitch of the steek area is the edge stitch in background colour. This is formed by knitting into the first stitch after the steek.
Knit a stitch into the first stitch following the steek using the background colour yarn, but leave the original stitch on the left needle.
Place a marker that then use the yarn called for by the pattern.
Knit into the first stitch after the steek:
background yarn – knit into the back of the stitch;
contrast yarn – knit into the front of the stitch.
You have now cast-on the stitches for the steek, and have linked the two edge stitches firmly to the stitches around them.
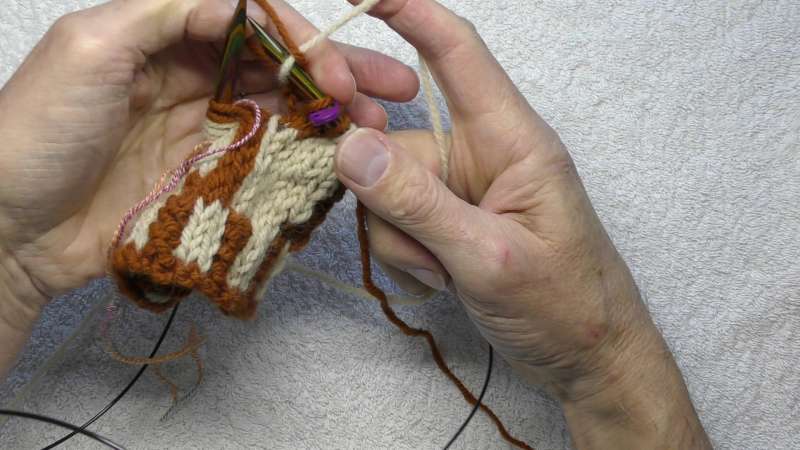
Knitting the steek stitches
Knit the steek stitches on each round, keeping to the same colour pattern as the cast-on. This will create stripes of contrast and background colour.
On a round that only contains one colour, then use that colour for all the steek stitches (unless you are carrying the other colour and trapping the very long float – in that case, continue the colour stripes of the steek).
When you reach the top end of the area of the steek, bind it off. If you are on a round that only uses one colour, use that colour. If you are on a round that uses two colours, bind off alternating the background and contrast yarns. If the fabric continues above the area of the steek, your pattern will tell you how to continue.
Even or odd number of stitches in the steek?
The world is divided into those knitters who use an even number of stitches in the steek and those that use an odd number of stitches. At first sight, this appears to be a matter of whether you prefer to cut the steek between two stitches (and even number), or to cut the steek down the centre of a stitch (odd number). The decision is indeed a matter of personal preference if the steek is in the middle of a round (for example a v-neck opening). A change of colour in the steek (that is, if the steek is at the beginning of a round) introduces a subtlety that makes an even number of stitches desirable.
Why should an even number of steek stitches be preferable if you are changing colour? It comes down to how you plan to reinforce your steek, and is most obvious if you are planning to use a crochet reinforcement. A crochet reinforcement ties together the nearest legs of the two columns of stitches on either side of the cut. If you have a change of colour and are using an odd number of stitches for your steek, then the central stitch has to be either the old colour or the new colour – it cannot be both. This means that you have one of the colours that is not reinforced. With an even number of stitches, the pair of stitches to the left of the cut are in the new colours (and are bound together by the reinforcement), and the pair to the right of the cut are in the old colours (and also bound together).
Even for other methods of reinforcement, a change of colour with an odd number of stitches means that the steek is not symmetrical about the central stitch, and the strategy for reinforcing the steek has to take this into account.
A steek using an odd number of stitches in an item using only one yarn is not immune from the problem if you change the ball in the steek.
Perhaps the easiest way of avoiding problems is always to use an even number of stitches in the steek.
Useful links
- T-ref: Casting on for steeks
- How to cast on for steeks that have changes of colour in the middle.
- T-reference article on steeks