
Context
Picking up stitches allows you to create a continuous fabric by knitting new stitches onto existing ones. Exactly how you pick up the stitches depends on where on the fabric you are picking up the stitches, where the new row of stitches will lie relative to the original fabric, and the stitches used in the original fabric and the new fabric to be created from the stitches you have picked up. This article describes how to pick up stitches on the edge of a fabric that is in stocking stitch.
You can find instructions for picking up stitches in other contexts in these related atricles.
- Pick up stitches at a garter stitch edge.
- Pick up stitches at a cast-off edge.
- Pick up stitches on the body of fabric.
- Pick up stitches at a steek.
How to do it
Your pattern will usually tell you how many stitches you need to pick up, but may say “pick up stitches evenly”. If you would like help working out how to distribute your new stitches (or work out how many stitches you need to pick up), you can find more information in the article “Strategy for picking up stitches“.
If you are picking up stitches from a stockinette edge and are using the same yarn and needle to form new stockinette fabric, the rule of thumb is that you should pick up from two out of every three stitches on the edge. That is, use the pattern: (pick-up, pick-up, skip).
These instructions form the new stitches on the needle held in your right hand. In the photograph, the original fabric is the light colour and the new fabric (and working yarn) are the dark colour.
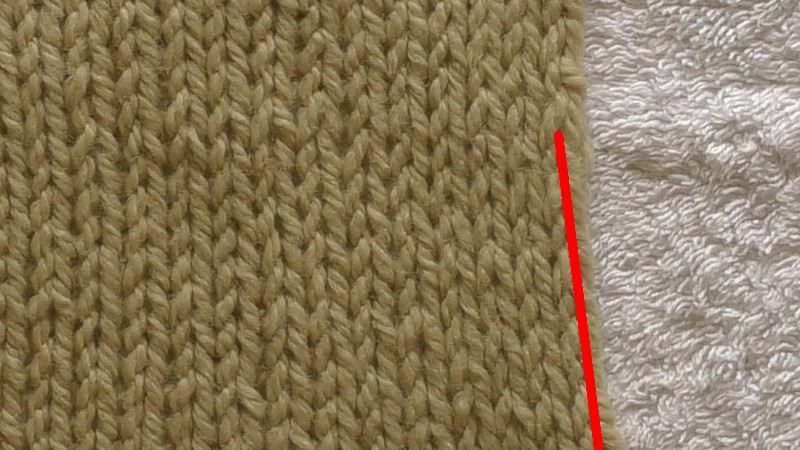
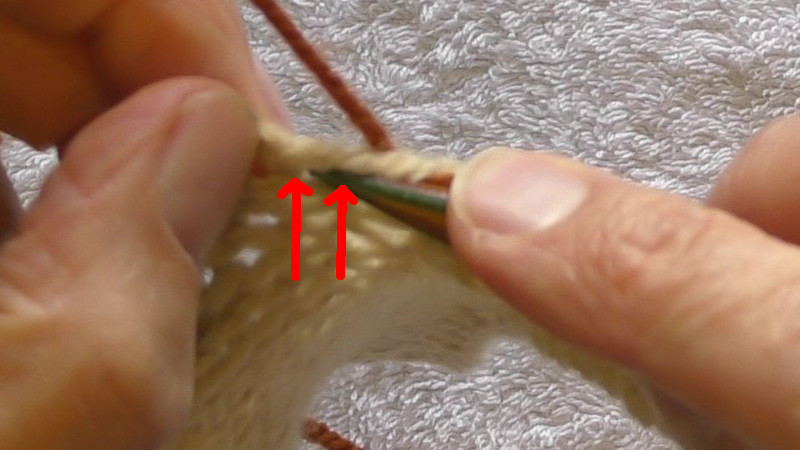
Whichever method you use to pick up stitches at the edge of stockinette, you always pick up from the gap between the edge stitch and the stitch next to it. Stockinette naturally rolls to the back, so (as in the photograph) the edge stitch is likely to have rolled towards the back so that only the inside legs of the edge stitches can be seen from the front.
You will be creating new stitches in which the working yarn comes from behind the fabric and up through the gaps between running threads of the original fabric. Between new stitches, the working yarn must cross at least one running thread of the original fabric.
If you need to pick up more stitches than there are rows in the original fabric, for example if the new fabric is at a tighter gauge, then pick up one less stitch than there are rows in the original fabric and increase to the right number on the next row you knit.
Work with the stockinette (right or public) side of the fabric facing you. Hold the working yarn behind the fabric.
Pick up stitches using two needles
You will use the needle in your left hand to open the gap between stitches in the fabric so that you can use the needle to knit a stitch into the loop held on the left hand needle.
The needle in your right hand (the one that makes the new stitches) should be the one used in your pattern (in the photograph it is the darker needle). You may find it easier to use a smaller needle in your left hand (light coloured needle in the photograph).
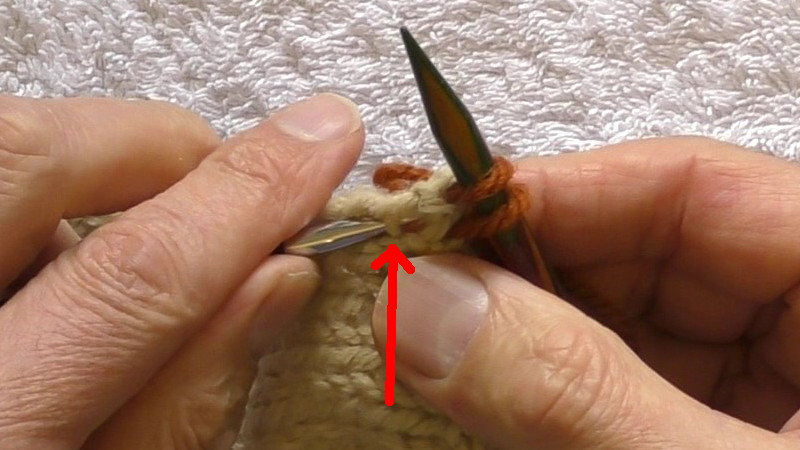
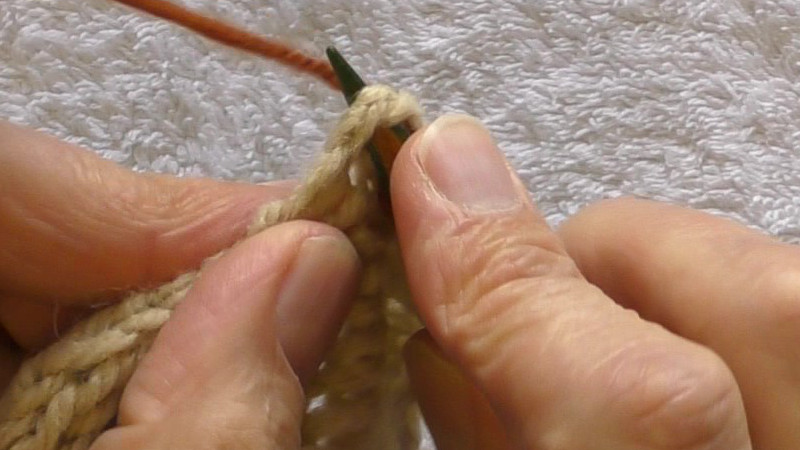
Hold the working yarn behind the fabric. Insert the left hand needle between the edge and next stitch in, to the left of the next running thread in the original fabric.
You will have the two legs of the edge stitch on top of the needle, and the running thread lying across its front.
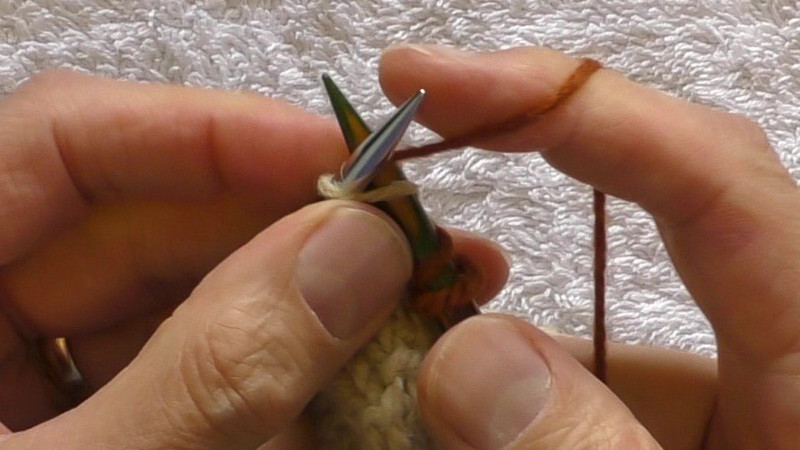
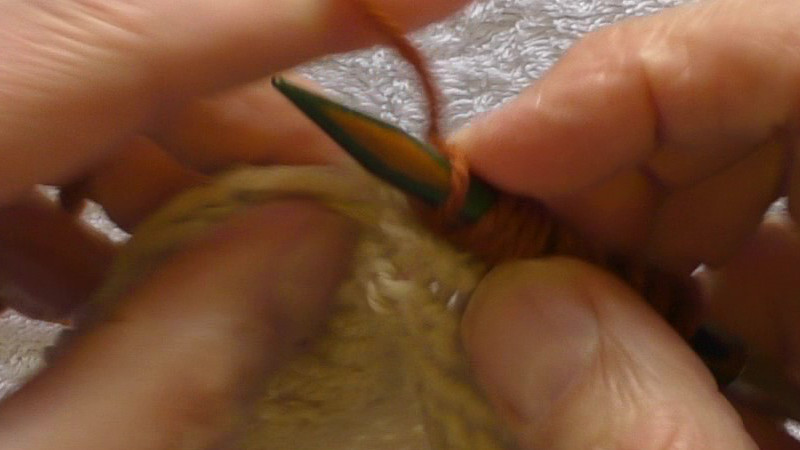
Insert the right hand needle knit-wise into the “stitch” on the let hand needle. This will put the running thread of the original fabric around the right hand needle .
Wrap the right hand needle with the working yarn as if to knit. Pull the yarn through to complete the new stitch.
Continue until you have been picked up all the stitches you need. Near the end of this article you can see what the fabric looks like when a row has been knit onto the new stitches.
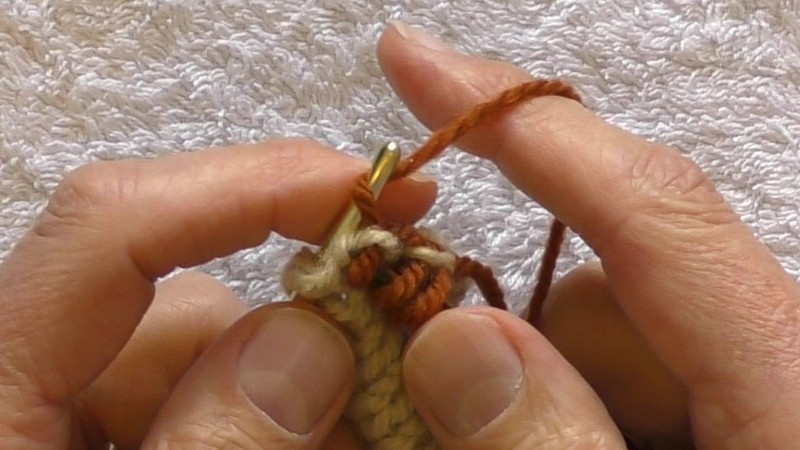
Pick up stitches with a crochet hook
You use the crochet hook to pull loops of the working yarn from the back to the front of the original fabric. You may find it easier to use a smaller crochet hook than the needle used to knit the original fabric. The right hand needle should be the one specified in the pattern.
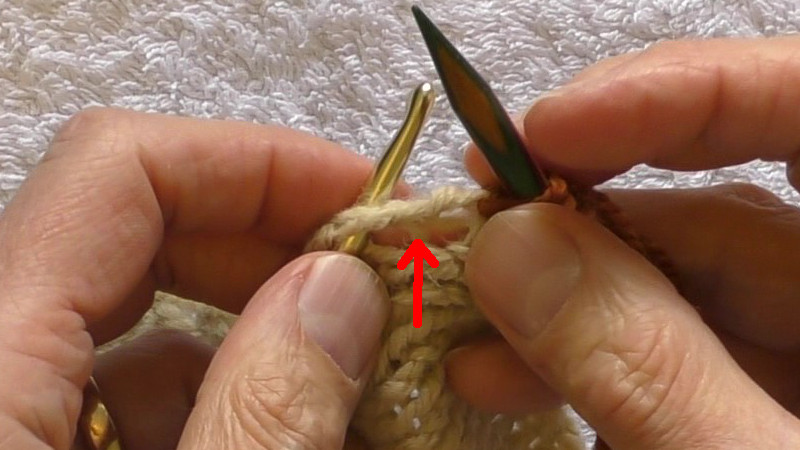
Hold the working yarn behind the fabric. Insert the crochet between the edge and next stitch in, to the left of the next running thread in the original fabric.
You will have the two legs of the edge stitch on the left of the crochet, and the running thread to its right.
Wrap the working yarn around the hook.
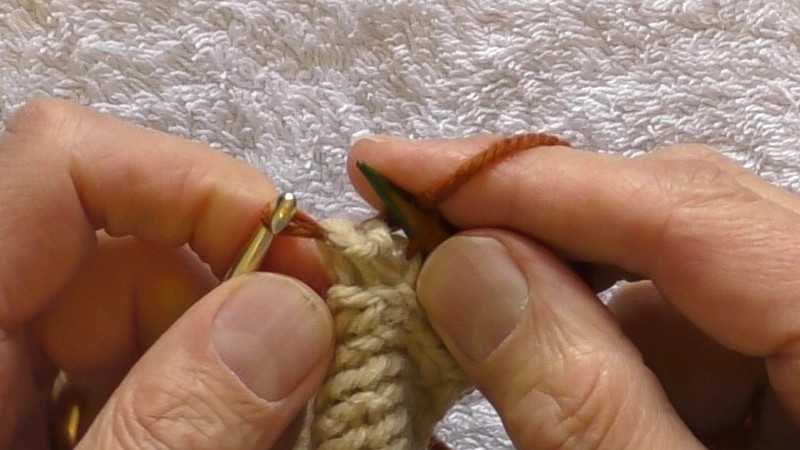
Pull the loop of working yarn through to the front of the fabric.
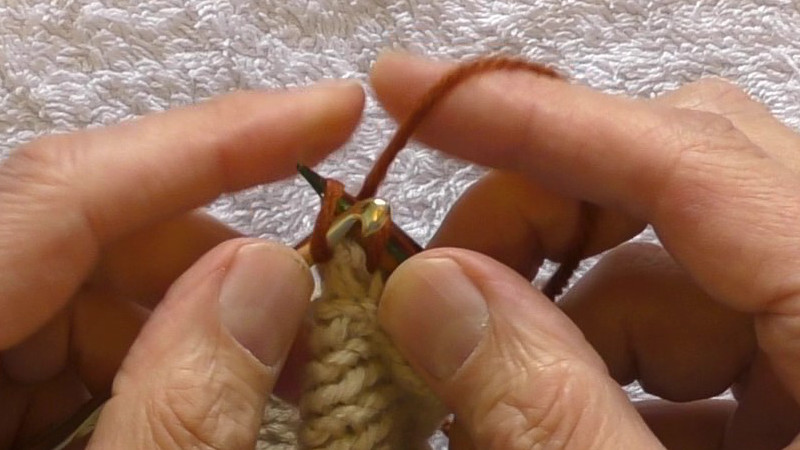
Transfer the loop from the crochet hook onto the right hand needle to form the new stitch.
Mount the new stitch so that the running thread to the previous stitch lies to the front of the needle and the remainder of the working yarn lies behind it – “western mounted”.
Continue until you have picked up as many stitches as you need. Near the end of this article you can see what the fabric looks like when a row has been knit onto the new stitches.
Pick up stitches with one needle
Use the needle specified in your pattern. You will use this needle to draw the working yarn from the back to the front of the fabric to leave new stitches on the needle.
Hold the working yarn behind the fabric. Work between the edge stitch and the next stitch in.
Insert the needle from front right to back left between running threads of the the original fabric.
The edge stitch will be lying across the top of the needle.
Wrap the working yarn round the needle in the same way as for a knit stitch.
Pull the loop of working yarn through to the front of the fabric to form a stitch on the needle.
Continue until you have picked up as many stitches as you need. In the next section you can see what the fabric looks like when a row has been knit onto the new stitches.
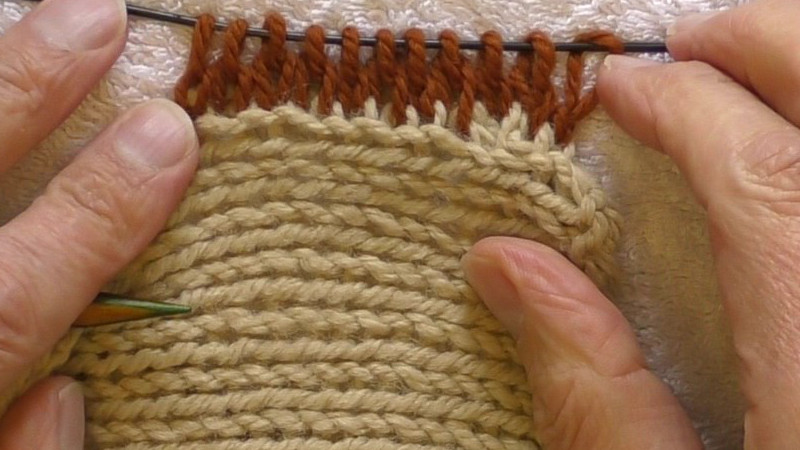
Final result after a row has been added
Knit onto the picked up stitches as needed by your pattern.
The photograph shows the added fabric after one stockinette row has been added.
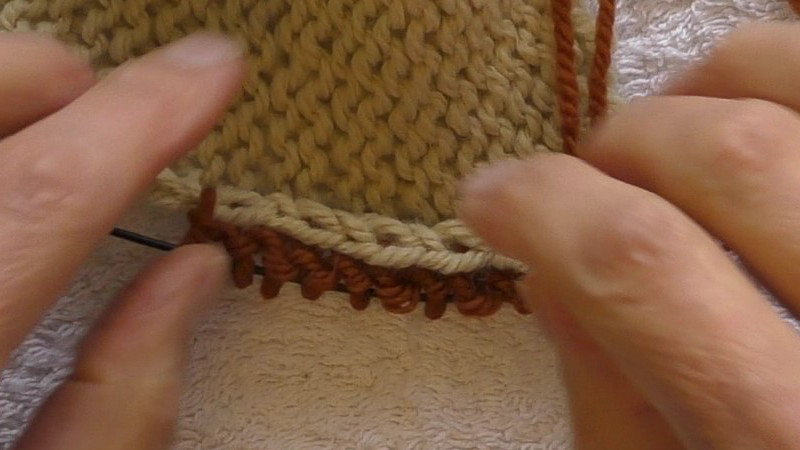
Seen from the private (wrong) side of the fabric, the edge stitches of the original fabric show up as a chain that looks like a crochet chain or a bound off edge.
The new working yarn (dark in the photograph) can only be seen in the new stitches and where it has to cross over the edge to form the first knit row of the new fabric.
Helpful links
- T-ref: pick up stitches on a stocking stitch edge.
- Roxanne Richardson Techniques Tuesday video on the meaning of "pick up stitch" terms.
- Roxanne Richardson Techniques Tuesday video on how to pick up stitches along a finished (cast-off/bound-off) edge.