
Context
Picking up stitches allows you to create a continuous fabric by knitting new stitches onto existing ones. Exactly how you pick up the stitches depends on where on the fabric you are picking up the stitches, where the new row of stitches will lie relative to the original fabric, and the stitches used in the original fabric and the new fabric to be created from the stitches you have picked up. This article describes how to pick up stitches on the edge of a fabric that is in garter stitch.
You can find instructions for picking up stitches in other contexts in these related atricles.
- Pick up stitches at a stocking stitch edge .
- Pick up stitches at a cast-off edge.
- Pick up stitches on the body of fabric.
- Pick up stitches at a steek.
How to do it
Your pattern will usually tell you how many stitches you need to pick up, but may say “pick up stitches evenly”. If you would like help working out how to distribute your new stitches (or work out how many stitches you need to pick up), you can find more information in the article “Strategy for picking up stitches“.
If you are picking up stitches on the edge of a garter stitch fabric to form new stitches on a stocking stitch fabric, and the new fabric uses the same yarn and needle as the original garter stitch, you would normally pick up one stitch for every garter stitch “bump” – because normally the width of a garter stitch is the same as the height of two rows, and there is a “bump” every second row.
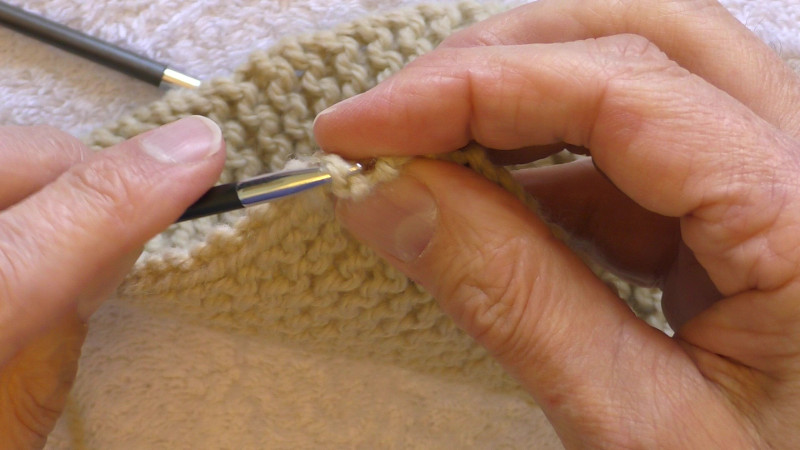
You need to put the purl bumps onto a needle. Start with the public side nearest you. You may find it easier to use a needle smaller than the one you will be knitting with when you pick up the stitches.
Pick up the bumps with the left needle, starting at the left and working down the edge of the fabric. Mount the bumps so that the leg nearest you is the one closest to the right side of the fabric. (The photo shows the bind off bump being picked up).
Continue until all the bumps you need have been placed on the needle.
Check that all the bumps have been loaded onto the left hand needle. They should all be mounted as if you were about to start knitting a row.
If any are mounted wrongly, you can correct this by knitting into the back of the loop at the next step.
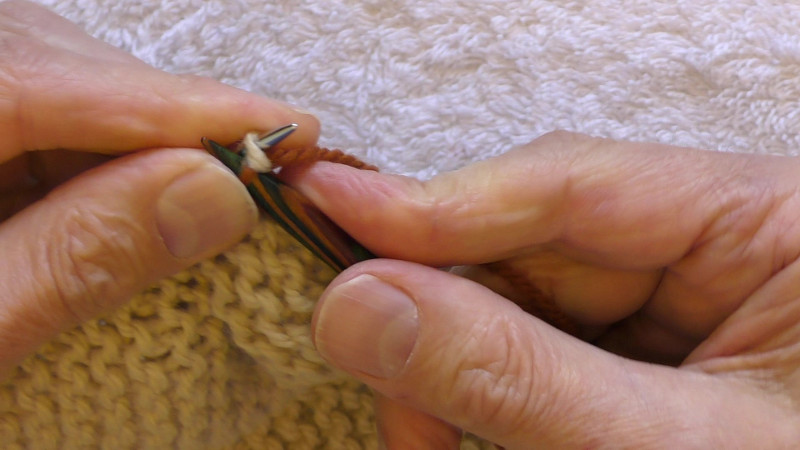
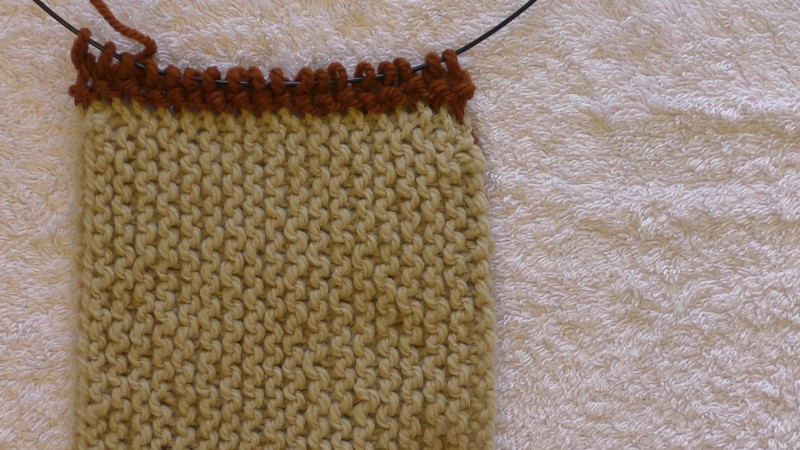
Hold the working yarn behind your work. Using the needle called for by your pattern, knit into the stitches from the left needle.
The photograph shows a smaller metal tipped needle holding the bumps and a wooden needle knitting the new stitches. The darker yarn is the working yarn.
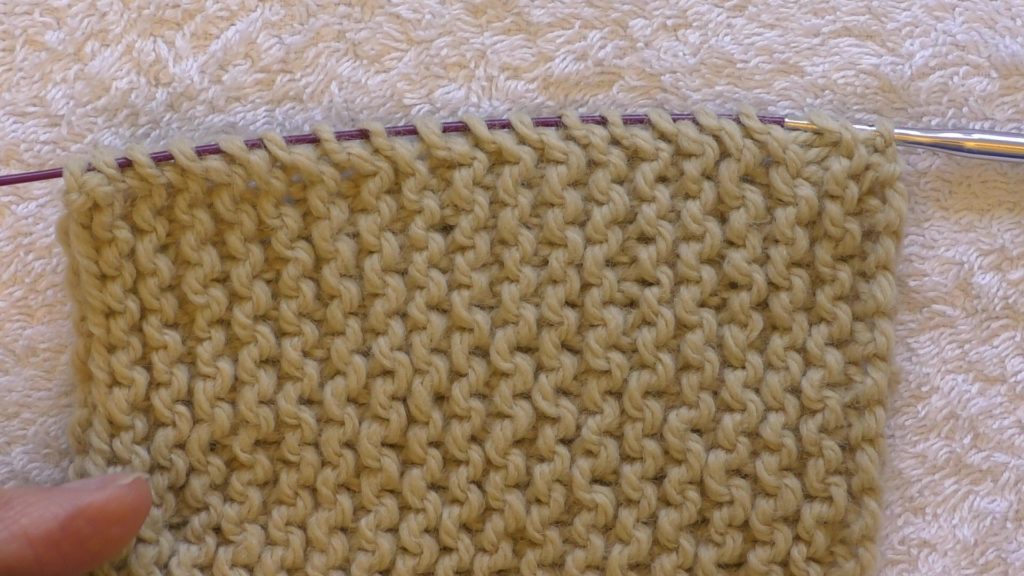
Continue to knit stitches until the end of the row.
The completed row is the first row of picked-up stitches.
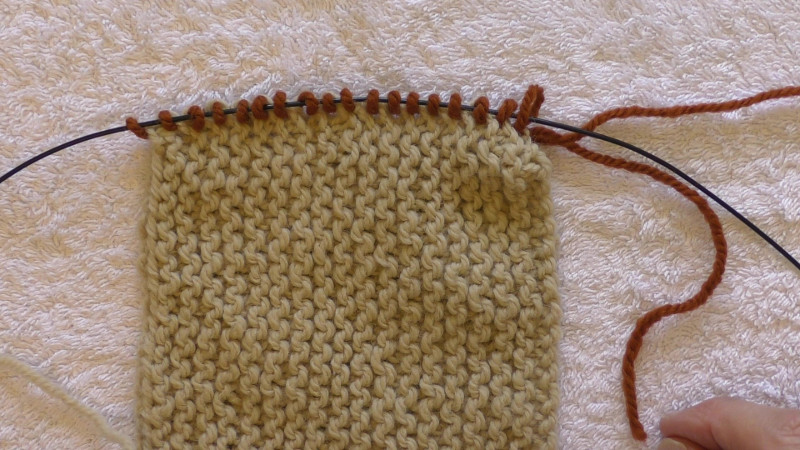
Check that you have the right number of stitches. If you do not, you can use increases or decreases on the next row to correct the count.
The new fabric (shown as dark coloured garter stitch in the photograph) will lie flat as a continuation of the original fabric.