
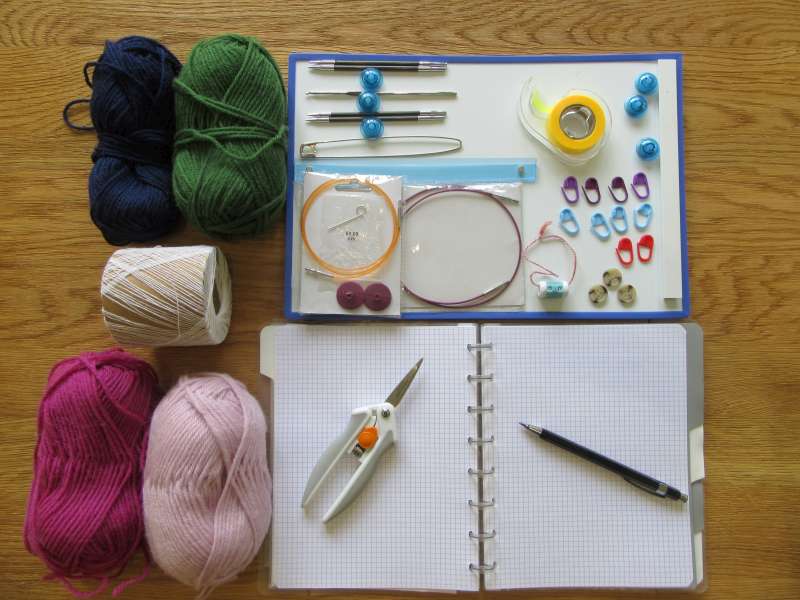
Activity 0 – Yarn and tools
This activity may need a bit of retail therapy! Work through this web page to find out what you need to take part in the tutorial.
Handout
Start by downloading the handout for the tutorial. In it you will find the pattern for the waistcoat that you will knit, together with hints and tips on how to knit it. To make it easy to follow, it is divided into the same activities as this tutorial.
Yarn
Double knitting (DK) wool. 20g in each of four contrasting colours. This should not be superwash. Choose wool that has good stitch definition. Two colours are background colours and two are contrast colours. The project will look better if the background colours share a “theme” and the contrast colours share a “theme” (for example the background colours might be mid and light grey, and the contrast colours primary colours), but the most important thing is that you can distinguish easily between the four colours.
Tip. You can check whether colours can be distinguished easily.by using your phone. Open the camera, choose the monochrome (black and white) filter, put the yarns next to each other, and point the camera at them. If they look different on the screen, they probably have enough contrast.
Thinner yarn. 4m of 4 ply (or thinner) yarn. The fibre content of this yarn is not
important so long as the yarn is smooth and without a halo. It should contrast with all four of the double knitting (DK) yarns.
Needles
Knitting needles. 4mm and 3.5mm needles. For each size you could use either a set of 5 double pointed needles or a circular needle of at least 80cm length (if you use two circular needles to knit in the round, you will need two of each size, but these could be shorter). You will use both needle sizes at the same time, so if you use interchangeable needles bring both sizes already connected to their cables.
Crochet hook. 2.75 mm crochet hook. The size is not critical – you could go up or down a size.
Notions
Stitch markers. You will need at least ten stitch markers. As you will place these between stitches that are already on the needles, it is preferable to use markers that fasten and unfasten (locking type). An alternative is to use the “thinner yarn” as place markers.
Buttons. Three shirt buttons.
Small, sharp scissors. Scissors will be used to cut your steeks.
Embroidery needle. An embroidery needle with eye large enough for double knitting (DK) yarn.
Optional notions.
- Row counter;
- A4 magnetic board, magnets to hold paper in place, and magnetic rule;
- Highlighter tape;
- Stitch holder.
Important note
This tutorial assumes that you knit from the right hand side of the public side towards the left hand side. This is assumption made by most written patterns. Some people knit in the other direction. If you are one, you will need to adapt this tutorial in the say way that you adapt patterns.
Next activity
You are now ready to move to Activity 1: Vertical stripe rib.