
Activity 1: Vertical stripe rib
Before you start, please make sure that you have done everything in Activity 0. For instance, have you downloaded the handout and have the yarn and tools listed in Activity 0.
Instructions for this activity are on page 6 of the handout. You do not need to swatch for this project because its size does not matter. Instead, you can treat the entire project as a swatch to practice. Then make another one if you want to have a “showcase” to show others.
Cast-on
You will knit the waistcoat in the round (circular knitting). Start by casting-on.
Cast-on 64 stitches using your preferred method. This video uses the twisted knit half-hitch cast-on. In addition, it shows you how to use a marker thread to help you join in the round.
You can pass the marker thread behind the first or the last stitch in each group of ten stitches. However, you must do the same for each group of stitches. If you don’t, the marker thread doesn’t make it any easier to count stitches.
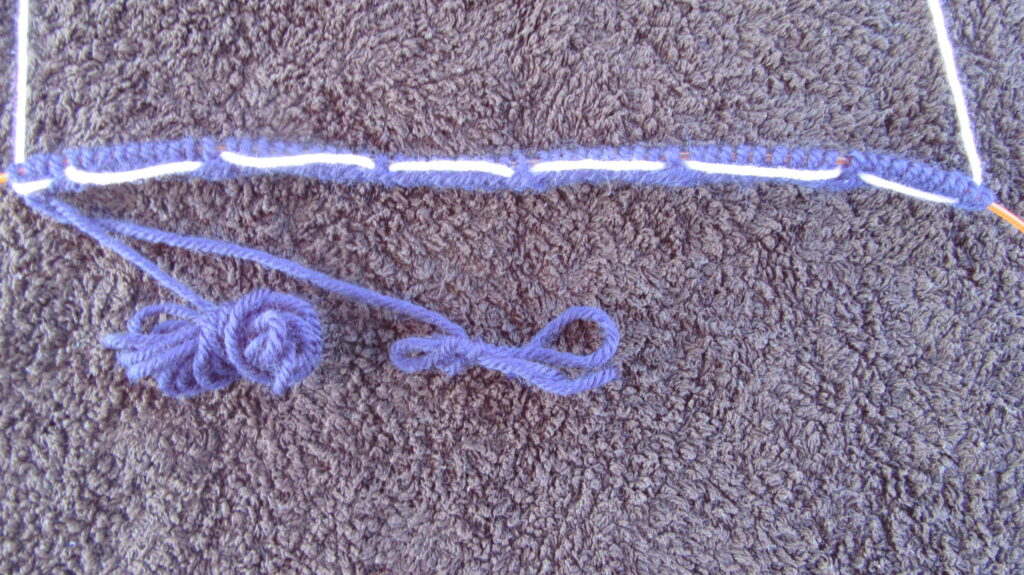
Your cast-on should look something like this. When you join in the round, the marker thread (white in the photograph) should not pass over the top of the cable (or needles) anywhere in the round.
Joining for knitting in the round
This waistcoat project has a steek that spans the beginning and end of rounds. In other words, it does not matter how you join in the round. But you still need to avoid twisting the cast-on edge around the cable or needles. Using a marker thread makes it easier to spot if you have twisted the cast-on.
Tip. Most projects have a continuous cast-on edge. In that case, you may want to use a method the avoids the join being visible. See the “useful links” section at the bottom of this page.
Always make sure that the marker thread does not pass over the top of the cable or needles.
Using double pointed needles
If you use double pointed needles, spread the stitches evenly across one less needle that you are using. There are four repeats of the motif. So, if you use five double pointed needles, you can place one repeat on each of four needles. Leave the fifth for receiving new stitches.
Place a stitch marker on the receiving needle to mark the end/beginning of the round.
Check again that the marker yarn does not cross over the top of the needles. Then knit the first stitch (the stitch at the other end of the cast-on to the working yarn).
At the end of each needle, stop. Check that the marker thread does not cross over the top of the needles or joins. Then start knitting the stitches on the next needle.
Using circular needles
If you are using a circular needle, slip the stitches onto the cable. Then pull a loop of the cable out between the stitches that are at the half-way point. This make a “magic loop”. Next, move the half of the stitches farthest from the working end of yarn to the tip of the needle. Keep the other half of stitches on the cable.
Place a stitch marker on the receiving needle to mark the end/beginning of the round.
Check again that the marker yarn does not cross over the top of the needles or cable. Then knit the first stitch (the stitch at the other end of the cast-on to the working yarn).
When you reach the “magic loop”, slide the stitches you have just knit onto the cable. Then slip the next set of stitches onto the needle. Check that the stitches have not twisted and then keep knitting.
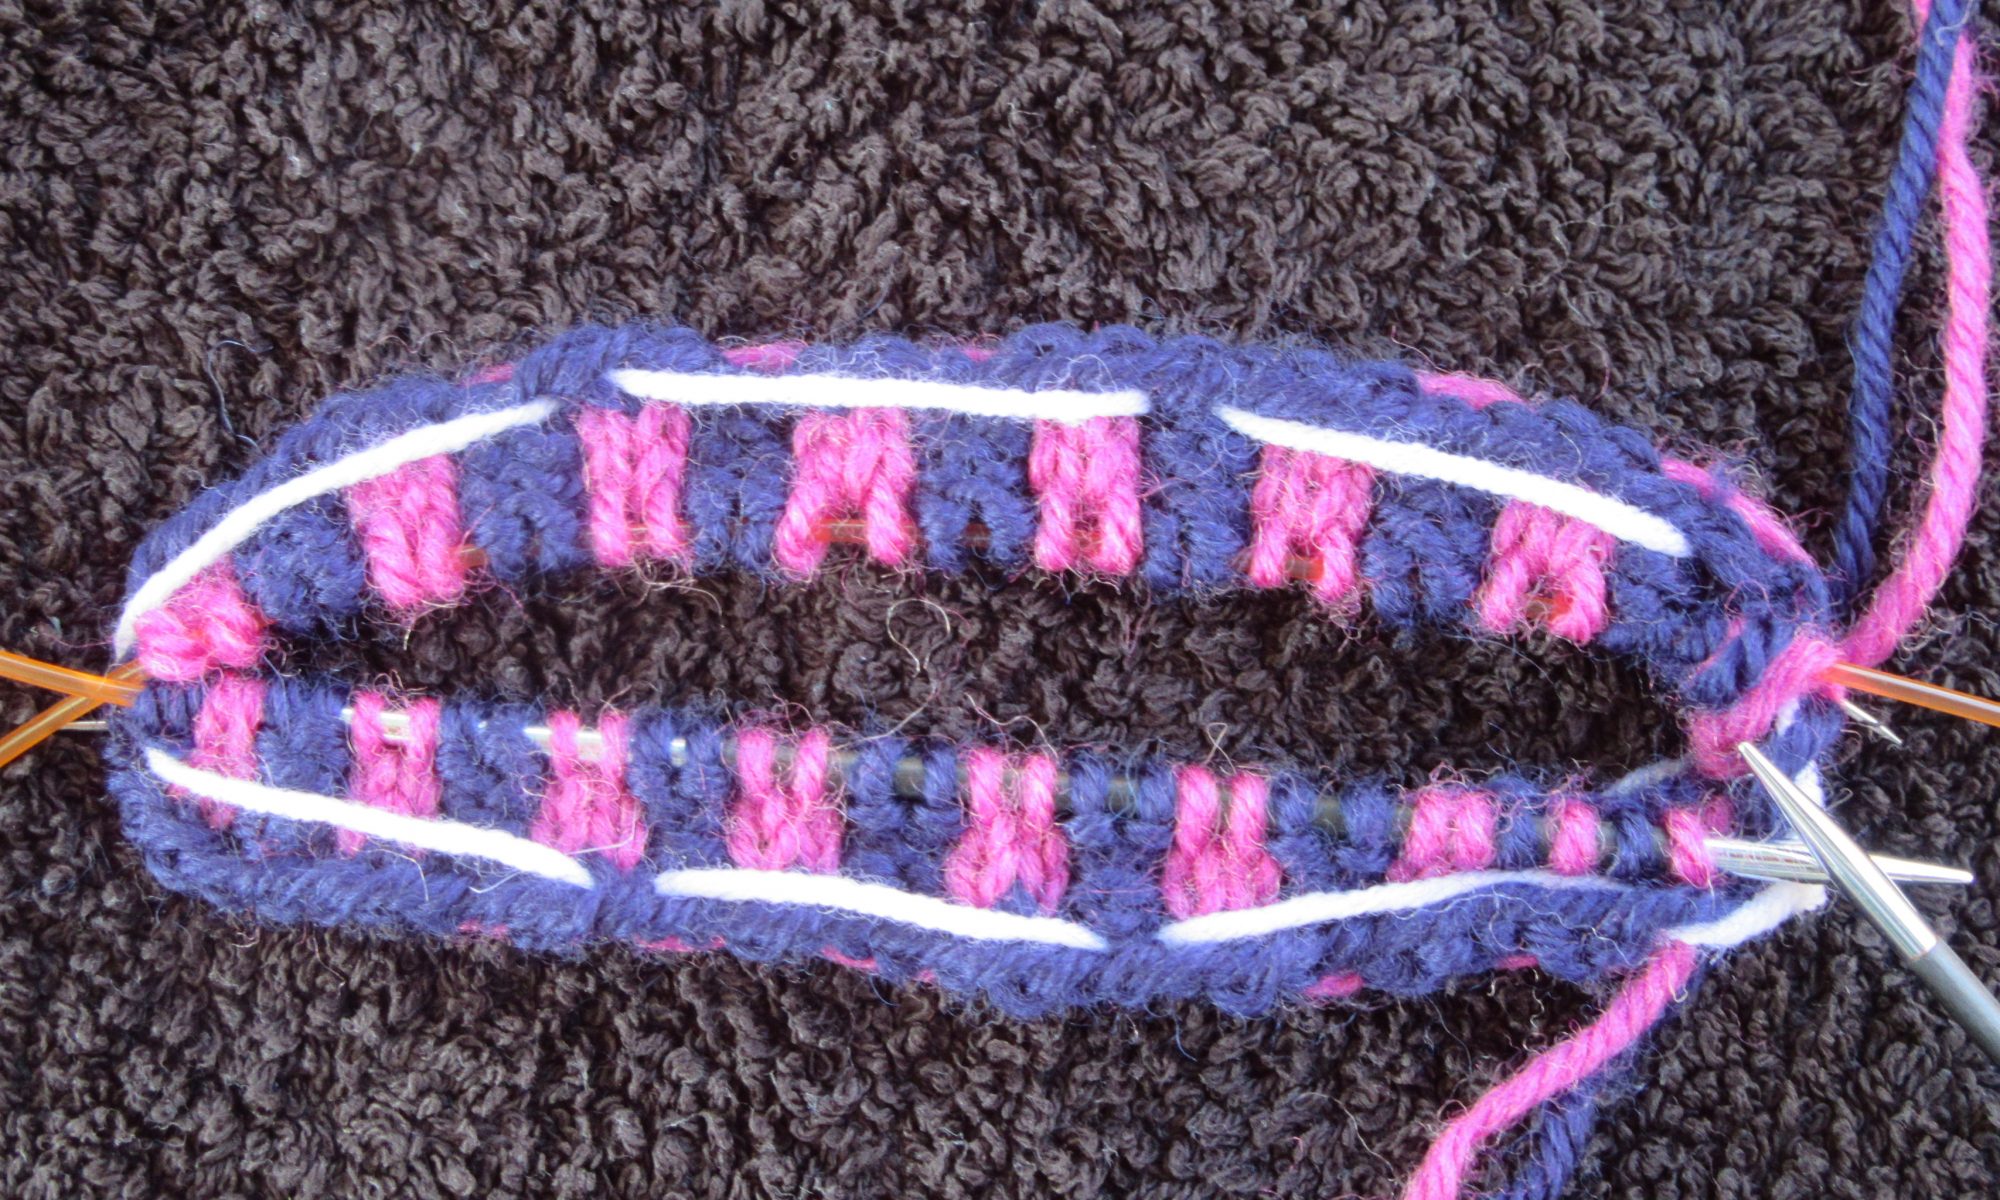
Vertical stripe rib
You use two colours to knit vertical stripe rib.
See the T-torial “Holding yarn for stranded knitting (T201906)” for suggestions on how to hold your yarn for two-colour knitting.
You have three basic options:
- Hold one yarn at a time.
- Hold one yarn in each hand. You knit the one on the left using continental style and that on the right using the English style.
- Hold both yarns in one hand. This means you knit using either the continental or English style depending on which hand you use . Use continental if they are in your left hand, use English if they are in your right hand.
Vertical stripe rib is also known as “cartridge rib”.
Like standard ribbing, it does not curl. Unlike standard ribbing, it does not stretch.
In this pattern you start and end each round with knit stitches of alternating colours. This makes it easy for you to spot the steek. In between you knit the vertical strip rib: “k2 in one colour, p2 in the other colour”. You need three rounds of vertical stripe rib.
Tip. I place the magic loop between a purl stitch and the following knit stitch. This prevents ladders there. However, you may need to put it between a knit and the following purl. You will need to see which works for you. When I knit a stocking stitch area, I change the position of the magic loop each round. That means loose or tight stitches from crossing the join are not always in the same position.
Controlling your tension
When you are knitting, you will need to control your the length of your floats. You should aim for the floats (the unused yarn that lies behind the one being used for the stitch) to lie loosely behind the stitches. If the float is too tight, the fabric will be ridged.
Vertical stripe rib should be almost flat. Compare that with standard rib where the purl stitches are almost hidden behind the knit stitches, and with moss stitch where the purl stitches stand out in front of the knit stitches, increasing the texture of the fabric.
You will learn more about controlling your floats in the next activity, but for now, concentrate on alternating between knit stitches in one colour and purl stitches in the other.
You are ready for the next activity
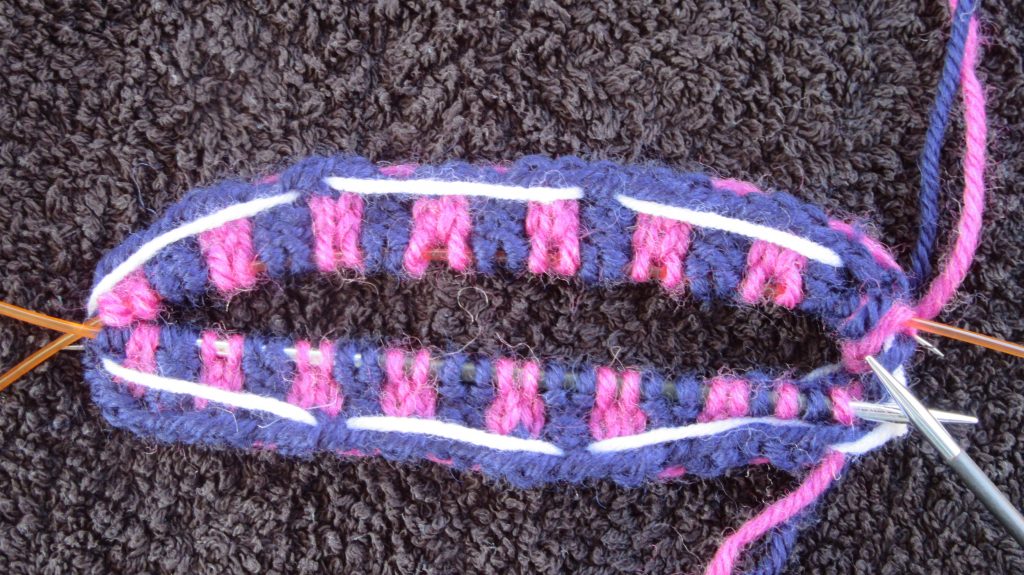
Your work should now look something like the photograph.
You are now ready to move on to Activity 2 – Knit stranded colour work in the round.
Additional links
- T-shop - Introduction to stranded colour work tutorial
- Excerpt from a seaming video by Roxanne Richardson.
- Playlist of the series on videos on how Teabreak Knitter made the Nahanni river vest.
- Very Pink Knits video "Knitting Help - 3 Ways to Join In-the-Round"
- How to bind-off when you have finished knitting. By Very Pink Knits.