
Activity 7: Start steeks for armholes
You should have completed Activity 6: Knit in the round to the armholes and completed round 14 of the chart.
A steek lets you keep knitting in the round, even when there will be an opening in the finished item. You already have one steek at the beginning of each round that will form the opening at the front of the waistcoat. In this activity you will create two more for the armholes.
This activity is on page 15 of the handout.
Understanding the pattern
This activity is the first time you really need to pay attention to the written pattern as well as to the chart.
In previous activities, you always started with the steek stitches before proceeding to the motif, ending up with the steek stitches. Because the pattern uses vertical stripes to indicate the steek, it was easy to work without referring to the pattern.
From now on, you will need to use both the written pattern, that will tell you about the shaping, and the chart, which will tell you the colours to use.
The abbreviation kfpmb{a,b}
This activity is concerned solely with round 15. It uses non-standard abbreviations: kfpmb{a,b} and CO{a,b}.
kfpmb{a,b} ties the steek stitches to the main body of knitting.
Rather than casting-on the edge stitch using a standard cast-on, it uses a kfb (knit front and back) increase, separating the two new stitches with a stitch marker. This lets you see where the main body ends and the edge stitch starts the steek. The edge stitch may not be the same colour as the main body stitch next to it, so you may have to knit into the front with one colour yarn (a) and into the back with another colour (b). So “knit into the front and back, placing a marker between the two new stitches.”
CO{a,b} is a cast-on that uses both the motif and background colour yarns.
This makes sure that when you reinforce the steek you trap both colours.
With colour a, form a loop around the left hand needle passing the yarn from back to front over the top of the needle, then taking it under the top to the back and off to your left. You have got this right if you pull on the yarn and it holds the loop tightly on the left hand needle. Now knit into that loop using yarn b.
This gives you a new stitch where the new stitch is in colour b and it is held at the bottom by a noose of colour a.
Working the round
Use round 15 of the chart.
The first four stitches are the first half of the steek and edge stitches for the front opening.
You then knit the first 11 stitches of the chart. This takes you to 3 stitches before the marker. You are then ready to add the new edge and steek stitches for the armhole.
Now that you have your new steek stitches, slip the next four stitches onto spare yarn – you will use these for the bottom of the arm band. You can take off the stitch marker. The final step of creating the steek is to make the second edge stitch.
You then knit 22 stitches for the back of the waistcoat, again stopping three stitches before the marker.
Make the edge stitches, cast-on the steek stitches and slip the stitches for the arm band in the same way as before.
Now return to the chart and knit 11 stitches. Finish with the edge and three steek stitches at the end of round.
Following the pattern either side of the steek
When you formed a new steek, you slipped four stitches that will be used for the arm band. When you read the chart, you need to skip over those four stitches.
Tip. You may want to mark on the chart where you stop and start either side of a steek. This position will vary as you introduce shaping in later rounds
You are ready for the next activity
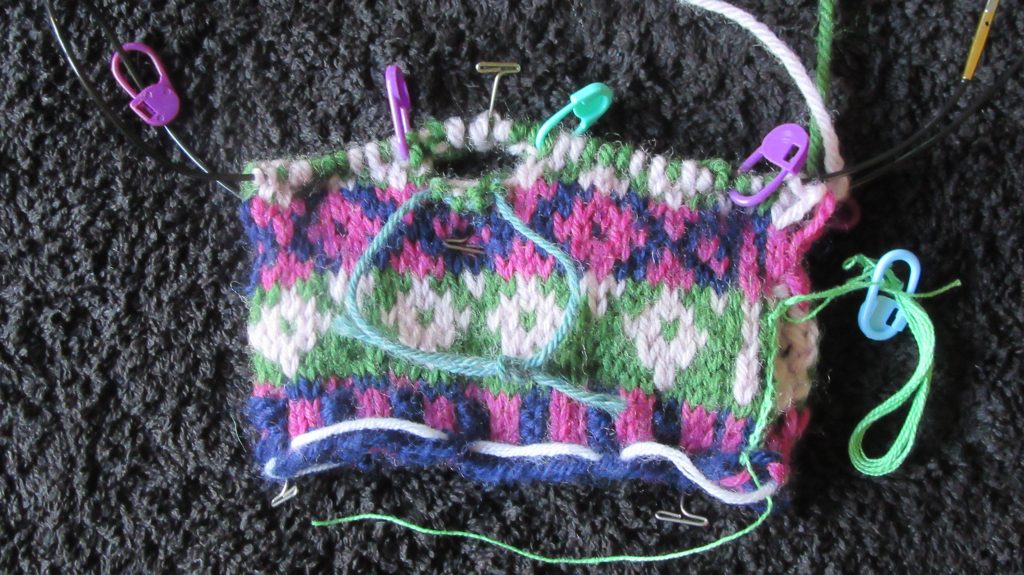
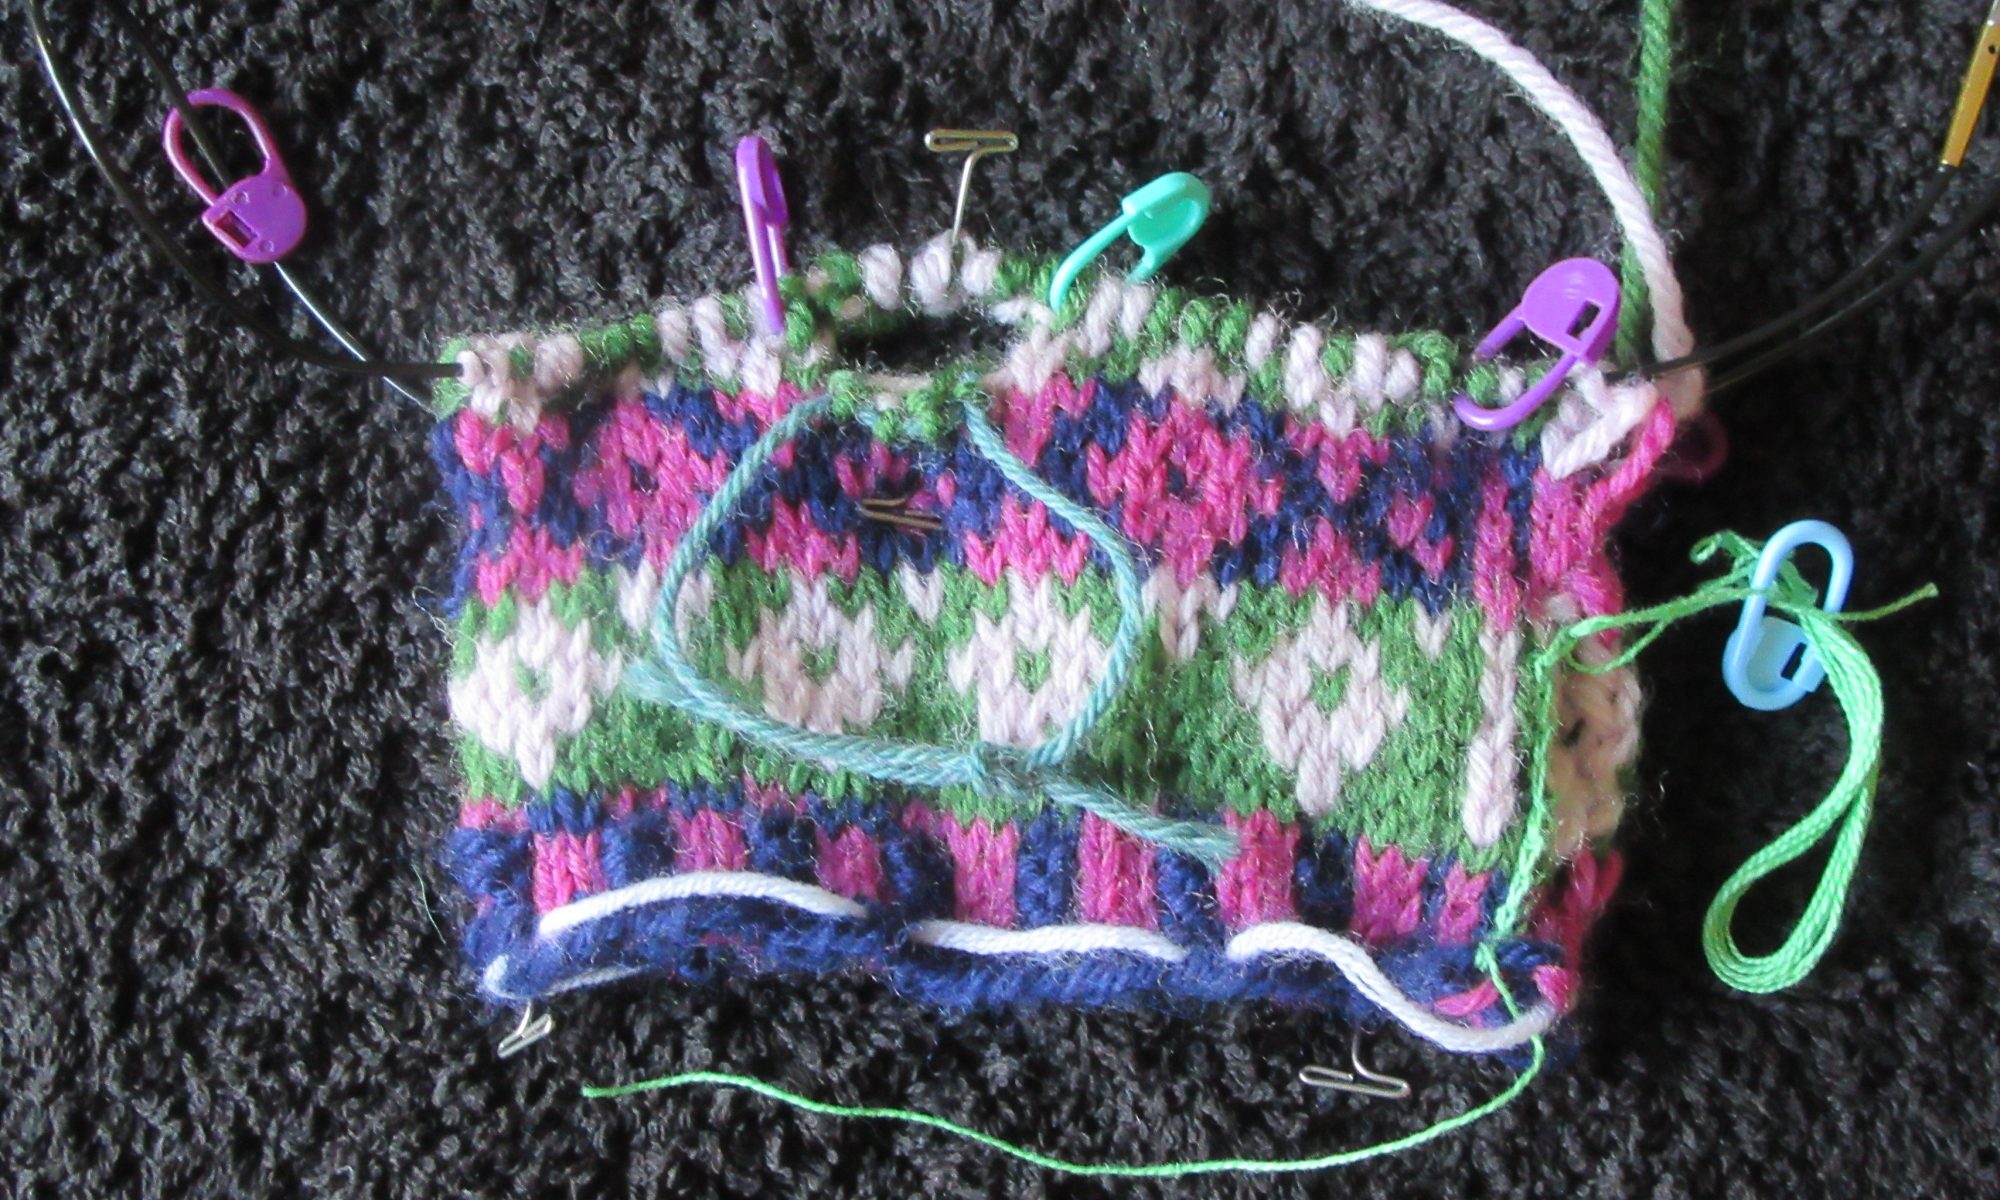
Your work should look something like the photograph.
You are ready to move to the next activity: Activity 8: Complete the main body of the waistcoat.
Additional links
- T-shop - Introduction to stranded colour work tutorial
- Excerpt from a seaming video by Roxanne Richardson.
- Playlist of the series on videos on how Teabreak Knitter made the Nahanni river vest.
- Very Pink Knits video "Knitting Help - 3 Ways to Join In-the-Round"
- How to bind-off when you have finished knitting. By Very Pink Knits.